

These ideas run from a single sheet of paper to a wooden crate that holds actual weight, and the one that fits depends on whether you need something flat enough to mail or dimensional enough to stand on a shelf.
A rocking Santa made from a paper plate needs only a nudge to wobble, while a folded bauble collapses flat for mailing and springs open when the recipient pulls the ends.
1. DIY Christmas Cards
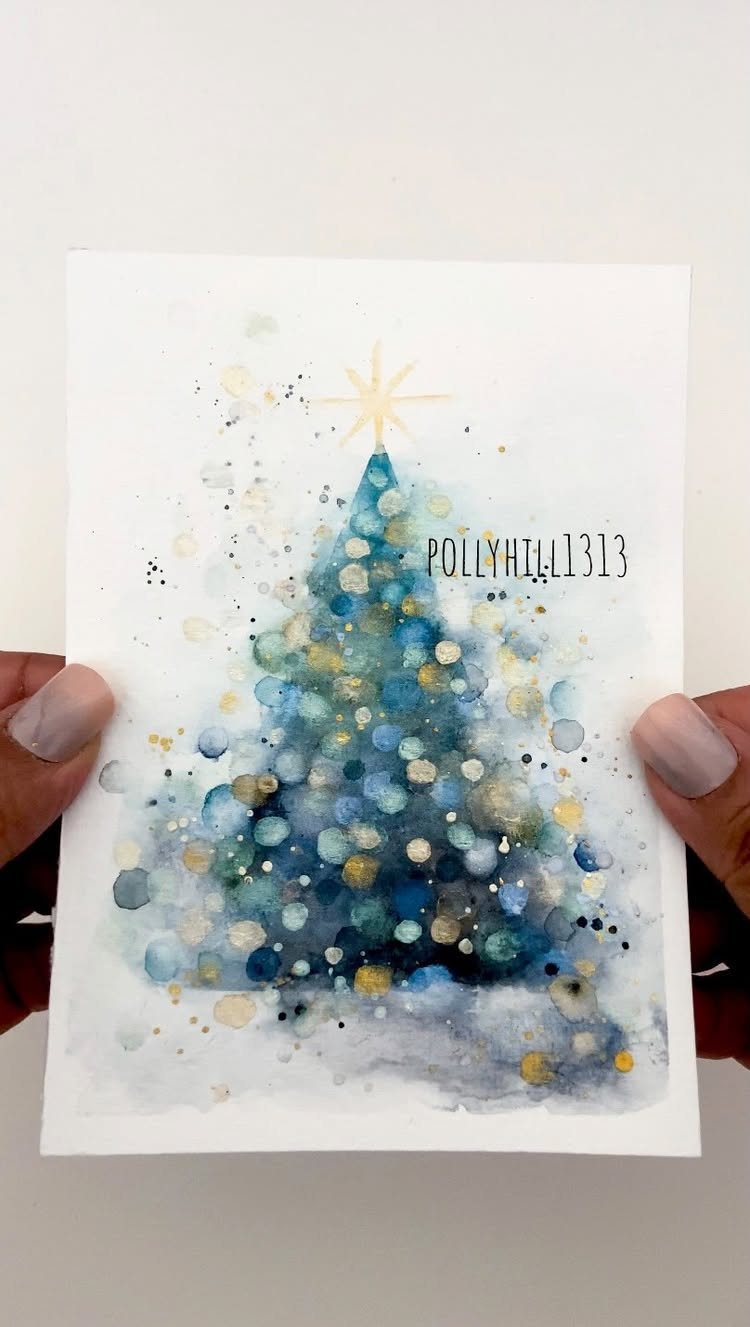
A handmade card lands harder than anything store-bought, especially when the paint is still slightly warped from your own water. Watercolor trees in blue and gold come together fast once the paper is cut to size.
Loading the brush wet enough that the colors bleed into each other but not so wet the paper buckles is where this lives or dies.
Kids can handle this if you tape the edges down first. For adults, the same technique works with a finer brush and a little metallic gouache on top.
2. Christmas Paper Crafts

Three-dimensional paper trees stand up on a shelf without any frame or hanging hardware, which matters when you rent and every nail is a deposit risk.
The honeycomb construction folds flat for storage and opens into a cone that stays put from its own geometry.
The tan, green, and brown set above sits on a rug, but these work on a mantel, a windowsill, or clustered on a dinner table.
You can buy honeycomb paper by the sheet or find kits with the slits already cut; either way, count on an hour to assemble three sizes.
Battery tea lights fit inside the larger ones if you cut a small exit for the switch.
3. Popsicle Stick Snowflakes
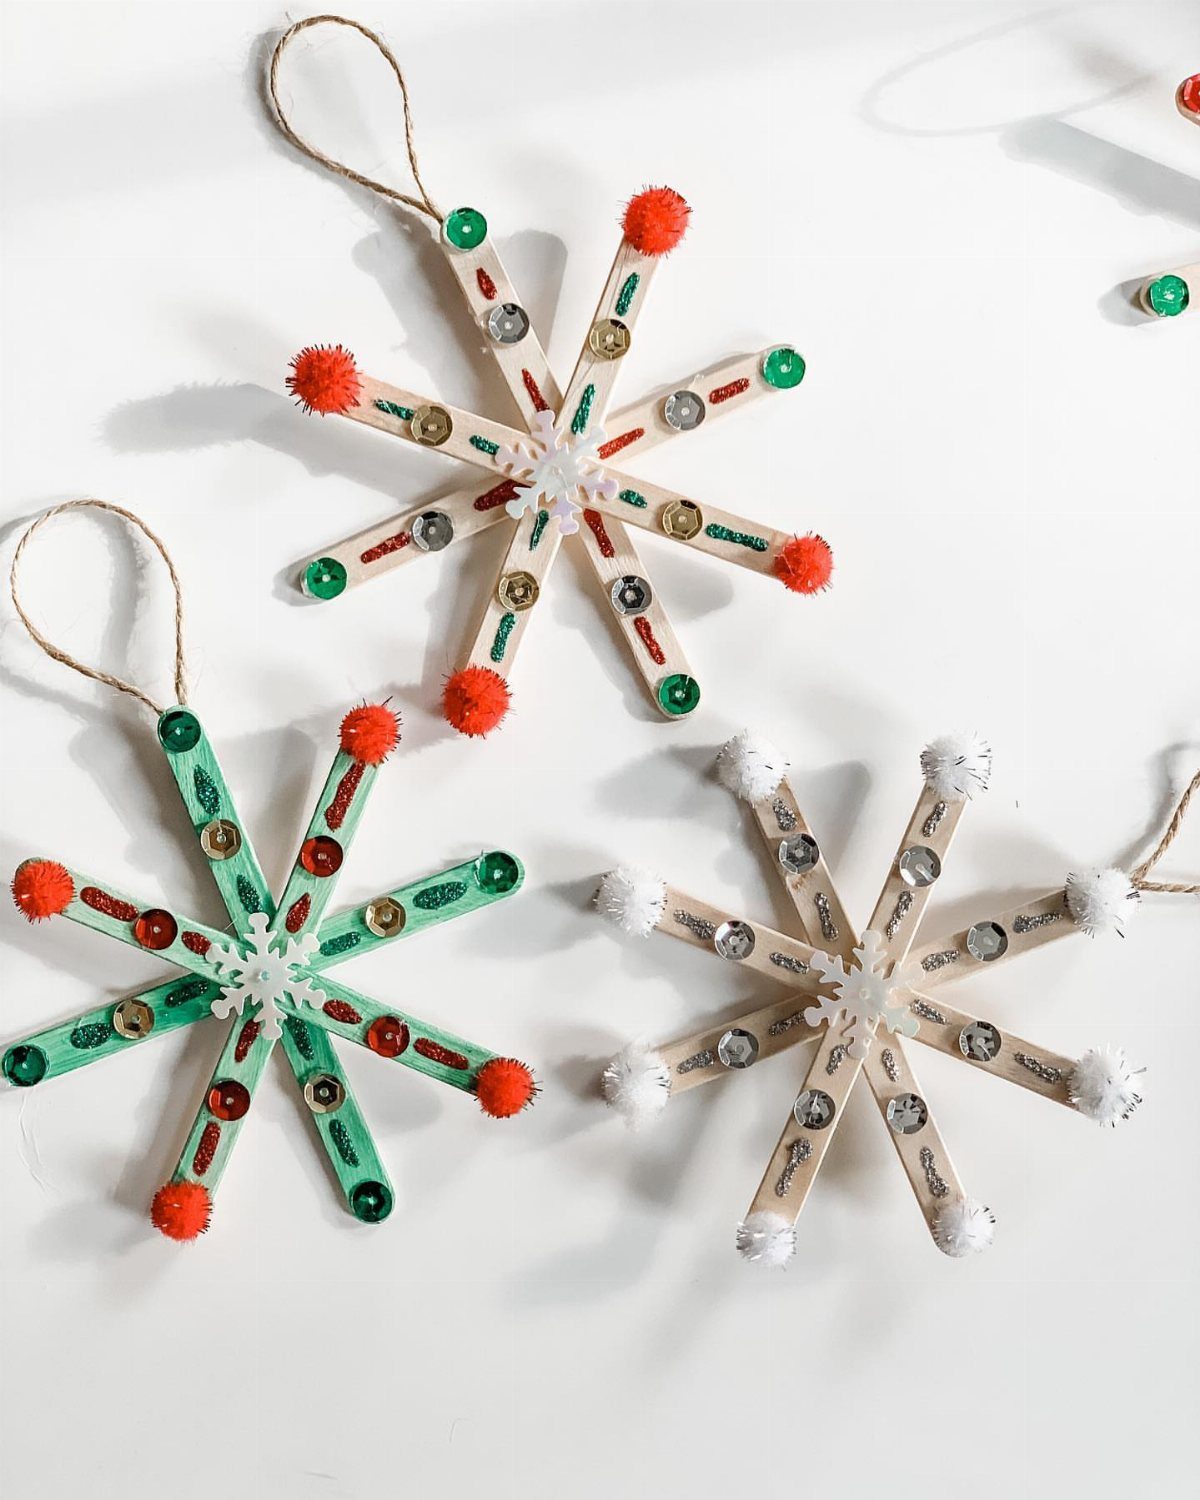
Popsicle stick snowflakes bridge the gap between kid craft and something you’d actually hang.
Quilling paper coiled into tight spirals fills the gaps in a more grown-up version; silver paper against natural wood reads Scandinavian, like something from a shop in Reykjavik.
I tried hot glue first and regretted it; tack glue sets slower but holds better on the porous wood. These need overnight drying before you add weight.
A single snowflake takes hardly any active work, not counting dry time.
4. Watercolor Christmas Cards
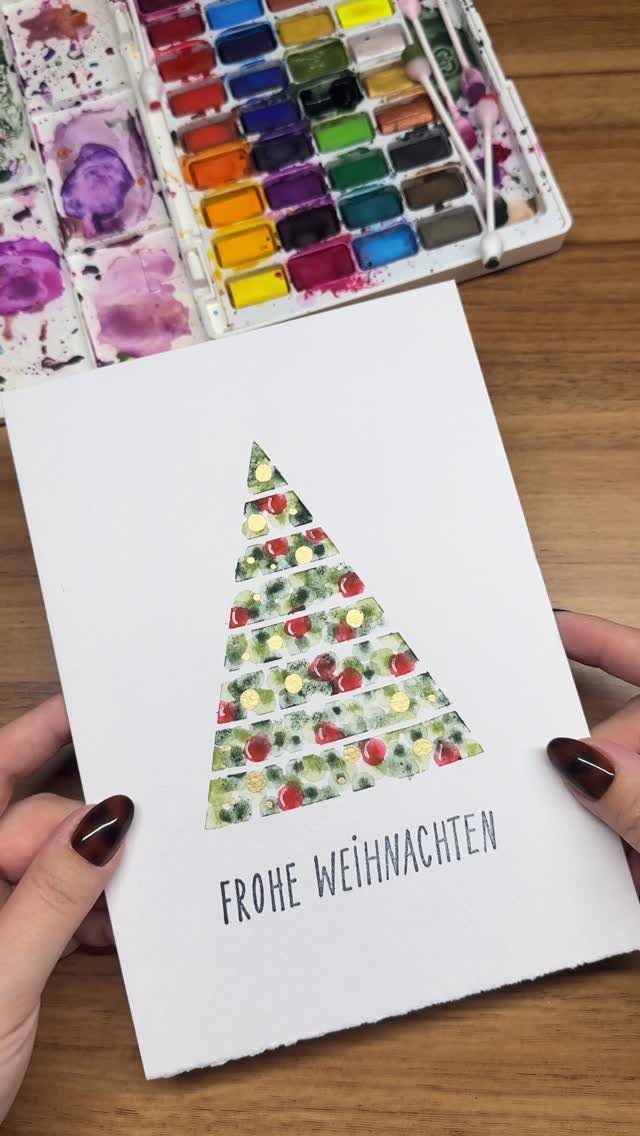
Watercolor cards look expensive and cost almost nothing beyond the brush you probably already own. A waterproof pen after drying adds the message, or you skip text entirely and let the image speak.
This suits kids old enough to wait for a layer to dry before adding the next, maybe eight and up. Younger ones get frustrated by the timing.
For a batch of cards, I set up an assembly line: all backgrounds first, then all trees, then all dots, so nothing sits wet too long.
5. Christmas Tree Pop-up Card
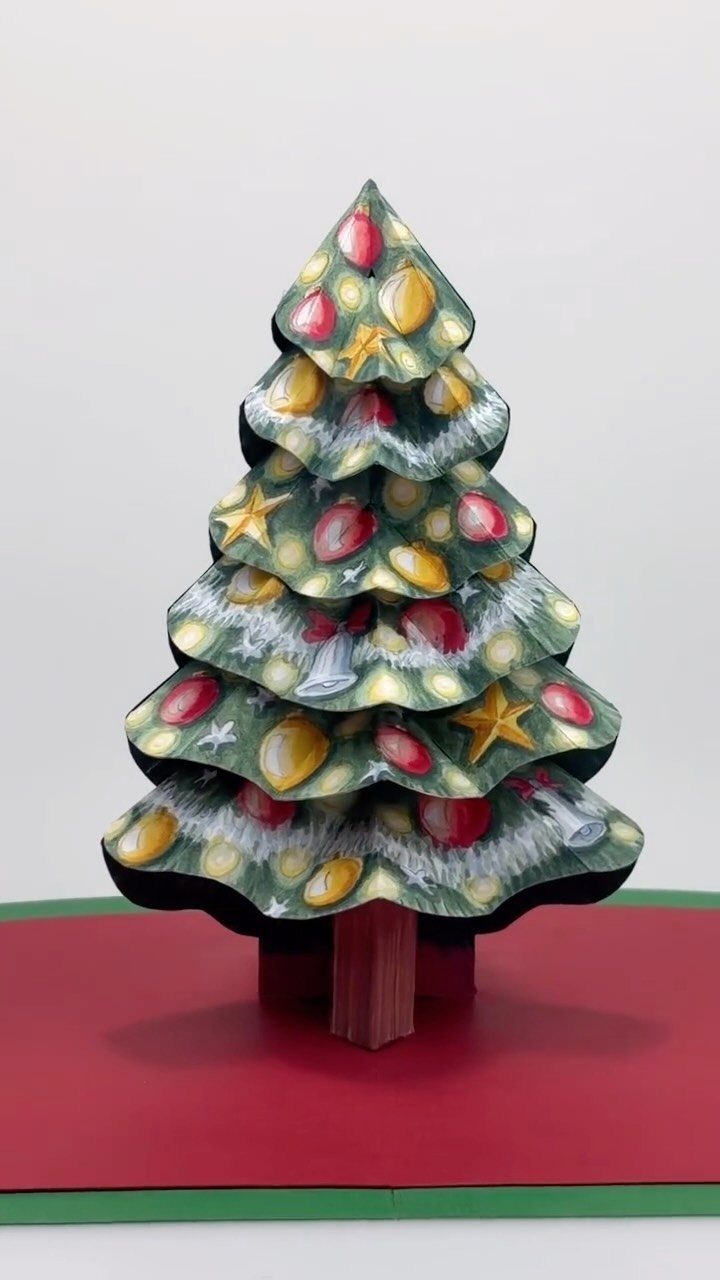
Pop-up cards deliver that small gasp when opened, which is worth the extra measuring and folding.
The mechanism is simpler than it looks: two parallel cuts in the folded card create a step that pops forward.
I messed up my first try by cutting too close to the edge; leave at least half an inch or the tree tears loose.
This works best for a single recipient you hand the card to, since dimensional mail needs extra postage and still gets crushed.
6. Paper Plate Christmas Tree
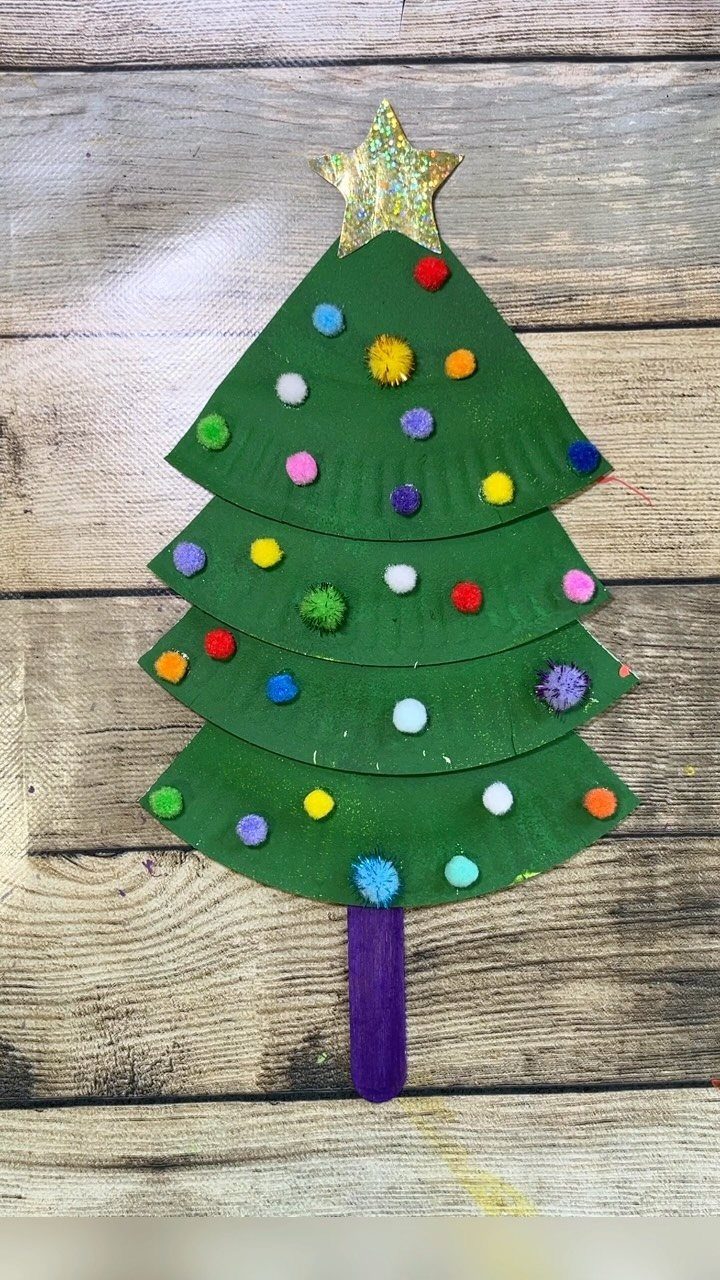
Paper plate trees solve the problem of what to do with a pack of plates left over from summer cookouts.
This is pure toddler territory. A toddler can dab glue and place decorations; you handle the stapler.
The whole thing comes together quickly and survives being knocked off a table better than anything ceramic or glass.
I’d use this as a low-stakes craft at a holiday party where the parents want something to take home but don’t want glitter in the car for months.
7. Christmas Stocking Card
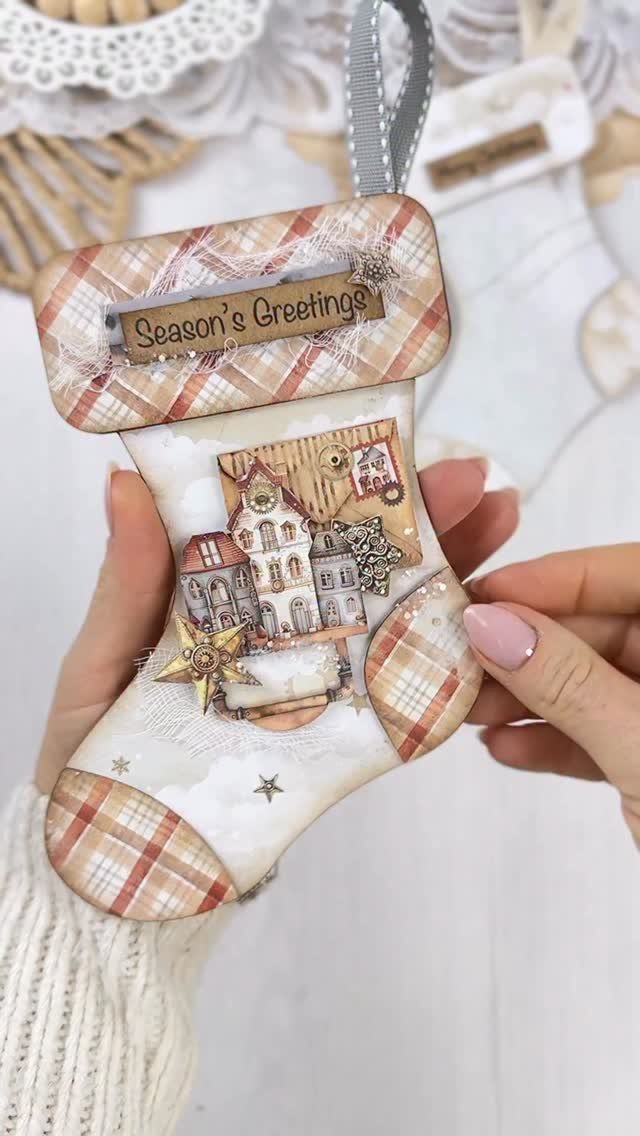
A stocking-shaped card works best when you want the shape itself to carry the greeting, not just the words inside.
The reader folds patterned paper into the familiar heel and toe, then layers on a small village print and a tag that reads "Season’s Greetings."
I would keep the embellishments flat enough to mail without extra postage, since a card that needs a padded envelope defeats the point of a simple holiday greeting.
For a teacher or a relative who saves these things, the stocking silhouette stands out in a pile of rectangles. Kids can handle the cutting if an adult scores the fold lines first.
8. Egg Carton Snowman
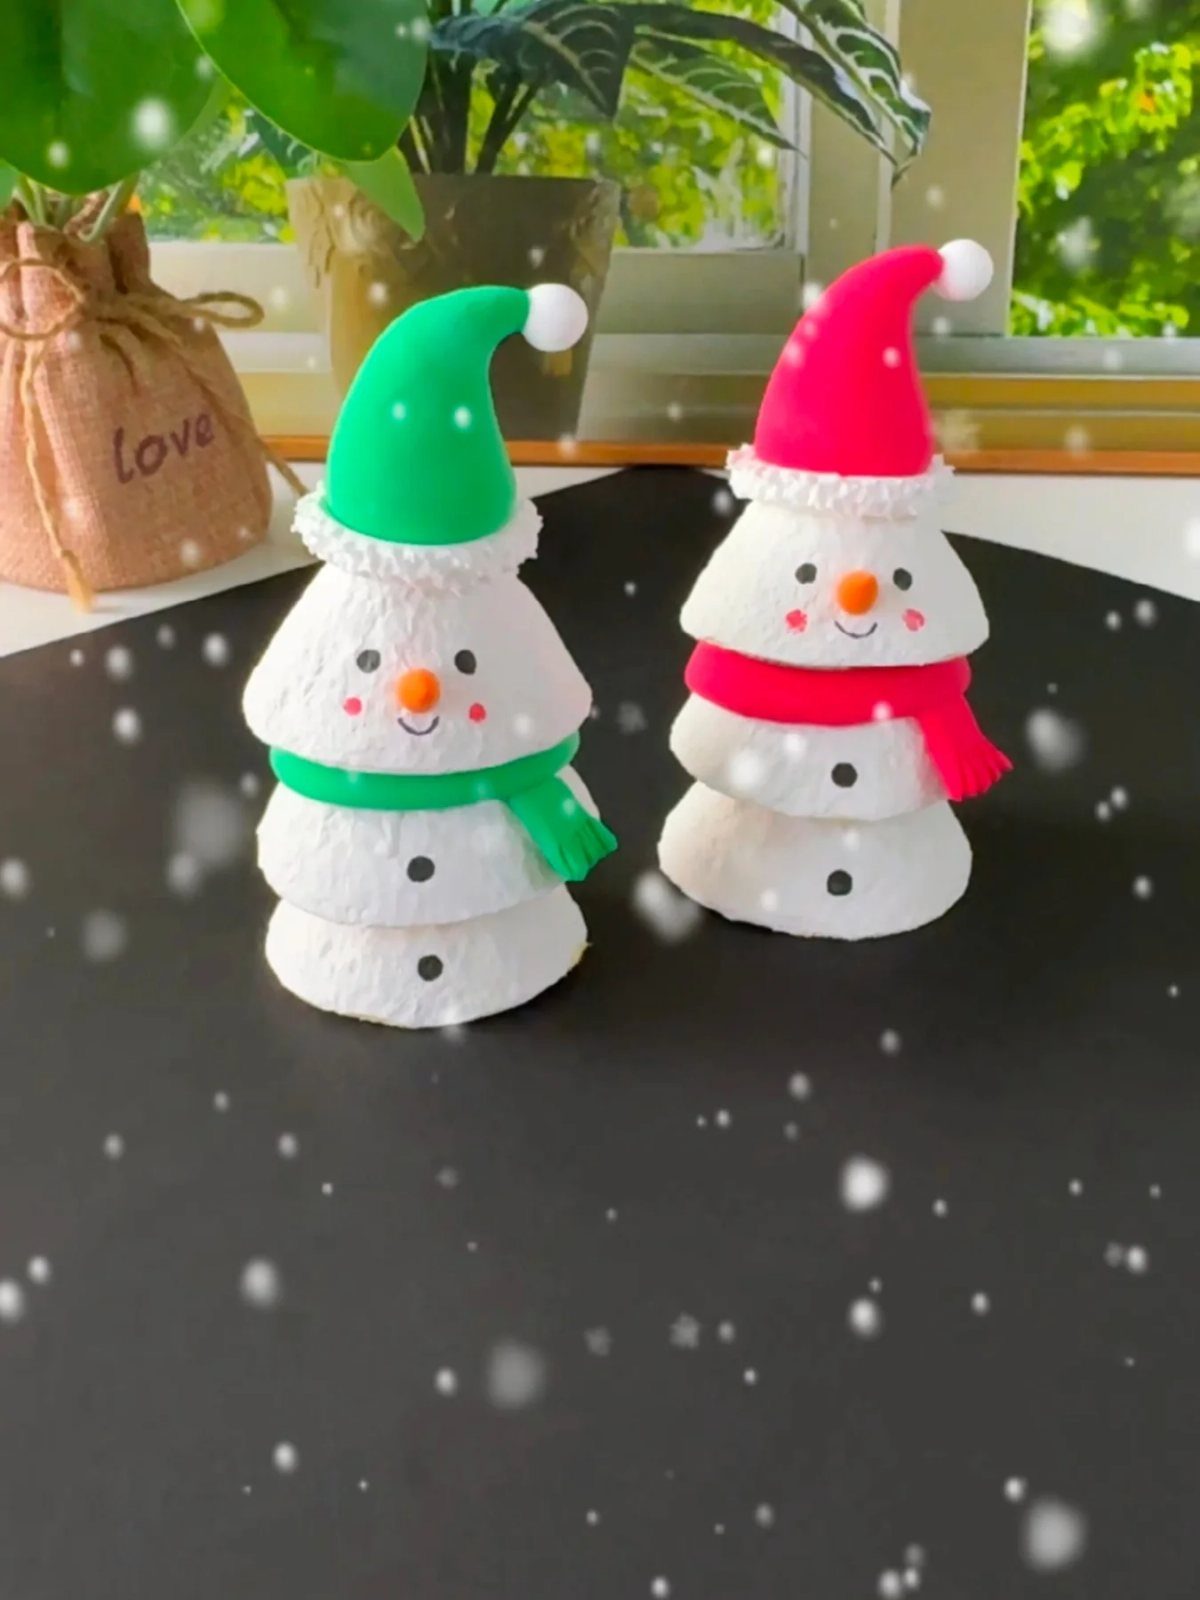
Egg carton cups already curve like a snowman’s middle, so half the shaping is done before you start.
Two or three cups stacked and painted white become the body; a scrap of felt or an old sock becomes the hat and scarf. The color is arbitrary and a good place to let a child choose.
I like that this sits on a shelf past Christmas, since plain snowmen read as winter rather than holiday-specific. No sewing means no waiting for an adult to thread a needle.
9. Ornament Crafts
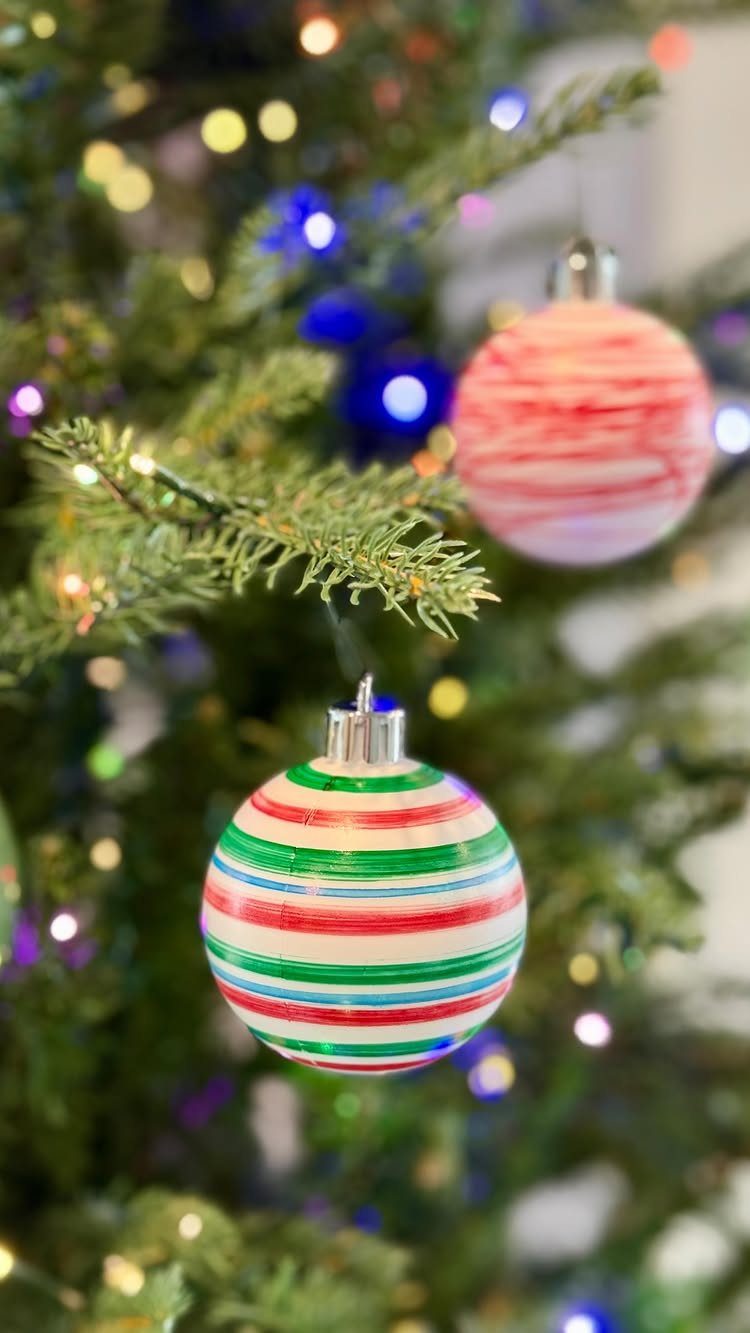
Wood slices, clay, or paper each give a different weight and surface. Wood slices take stain or paint well and feel substantial in hand.
Clay, especially a five-minute air-dry mix, lets kids press in textures from leaves or lace before baking. Paper keeps the cost near zero and folds into anything from stars to accordion spheres.
I have made the mistake of choosing clay for a classroom without checking drying time; regular salt dough needs hours in a low oven, and an impatient child will poke fingerprints into half-hardened work.
For an ornament exchange where everyone takes one home, wood slices with a drilled hole and a stamped initial finish fast and travel well.
10. Christmas Wood Shim Tree DIY
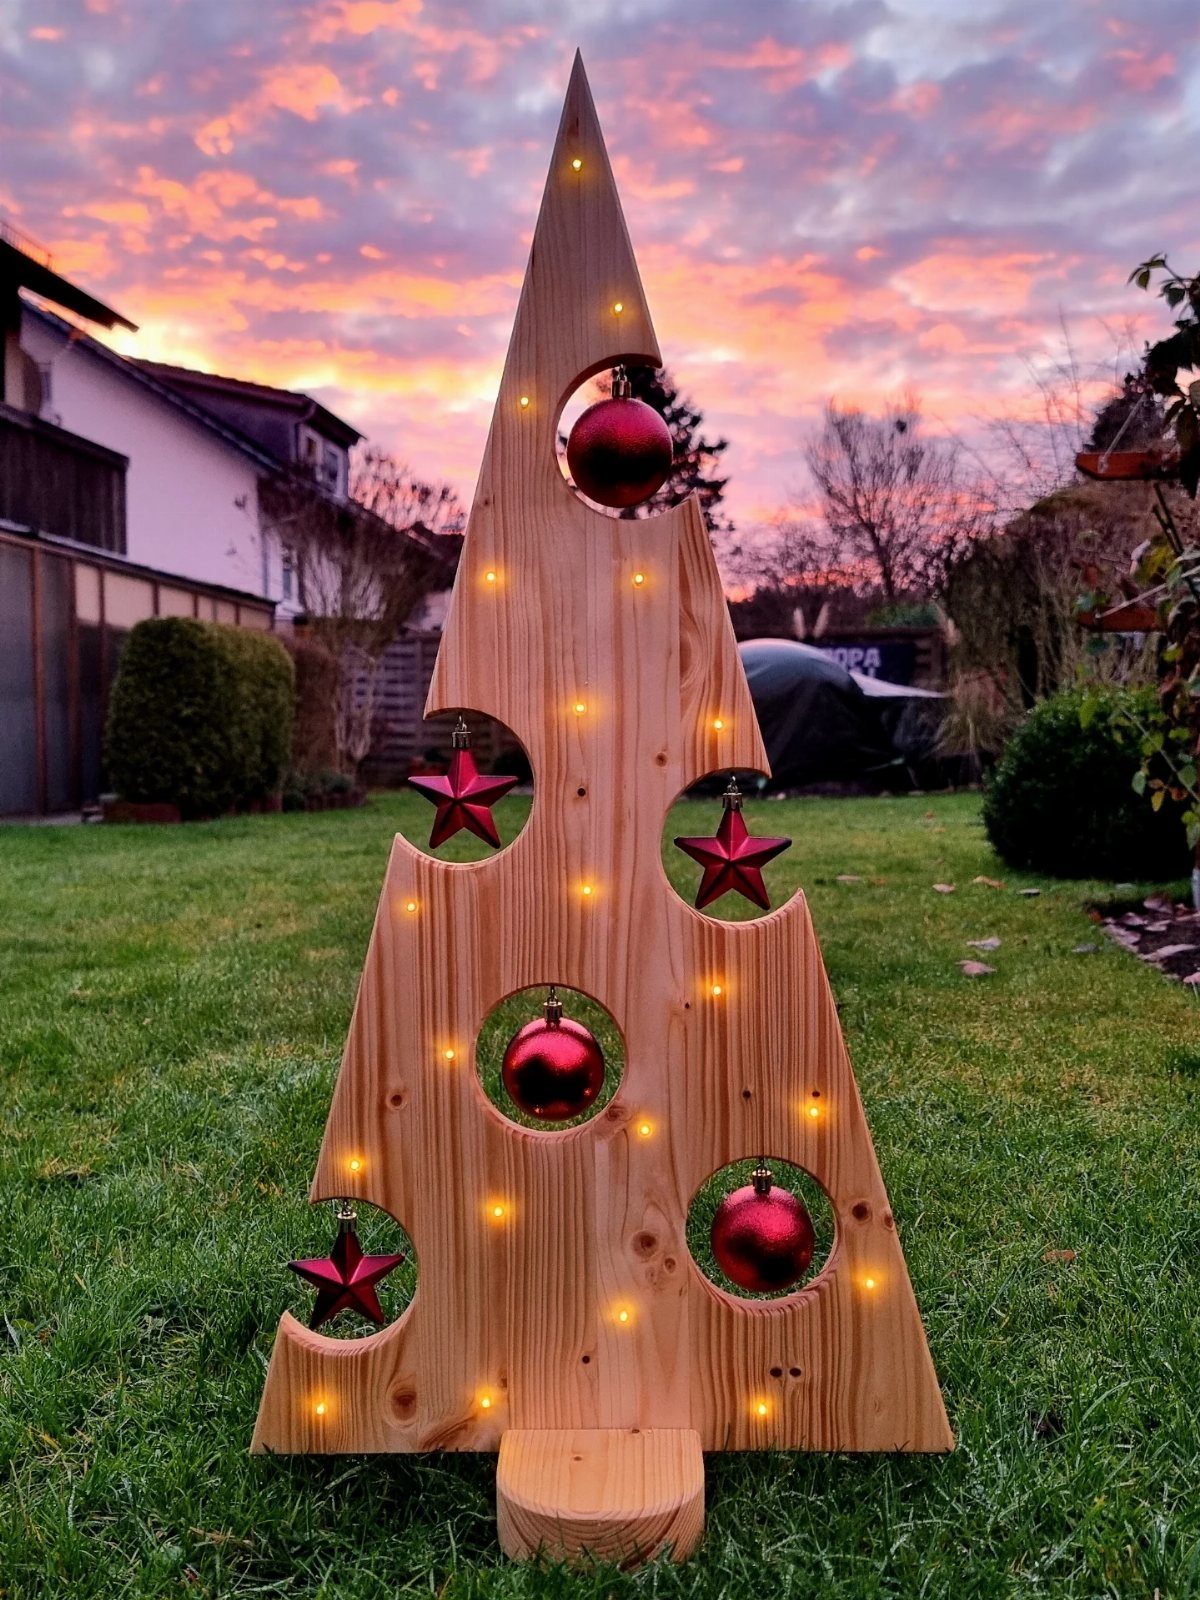
Wood shims, those thin tapered wedges sold in bundles for leveling doors, stack into a tree shape with gaps wide enough to nestle small ornaments inside.
Kids handle the gluing and decorating; an adult should run the saw for the round holes if you want the inset look.
I would paint or stain the shims before assembly, since wet finish on a glued stack warps the joints.
A cluster of three at staggered heights, as the notes suggest, gives the eclectic look of a small forest without matching perfectly.
11. Christmas Ornaments for Kids
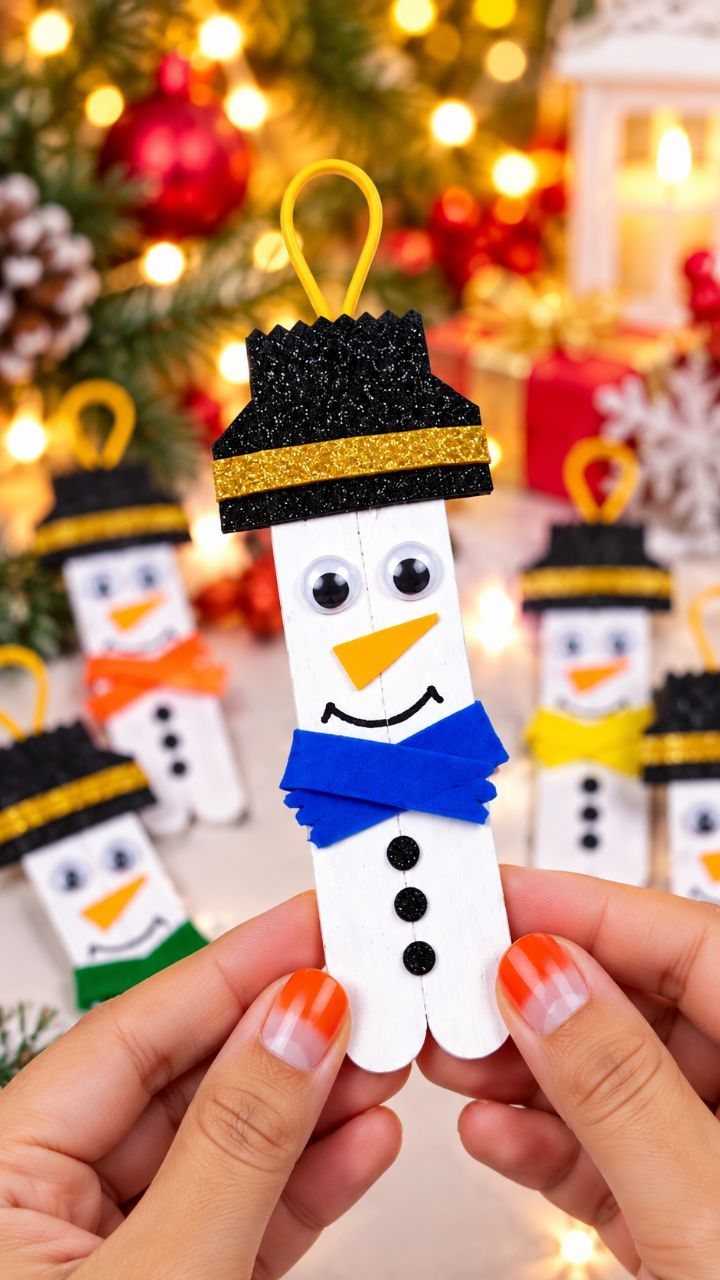
Anything a child can assemble with glue and patience works here. Pipe cleaners twist into trees.
Felt cuts into penguins. Salt dough, stamped and baked, becomes Santa faces or stars.
The photo’s version uses googly eyes and a carrot nose, which means markers or paint pens work too if the eye pack runs out.
I would set up stations for a group: one table for dough rolling, one for felt cutting, one for assembly.
Older kids handle the cork foxes and champagne-cork Olafs; younger ones stick to flat shapes that dry face-up on a tray. Watercolor on pre-cut paper ornaments is another lane entirely, looser and faster, good for a classroom with no oven.
12. DIY Vintage Bells Christmas Swag
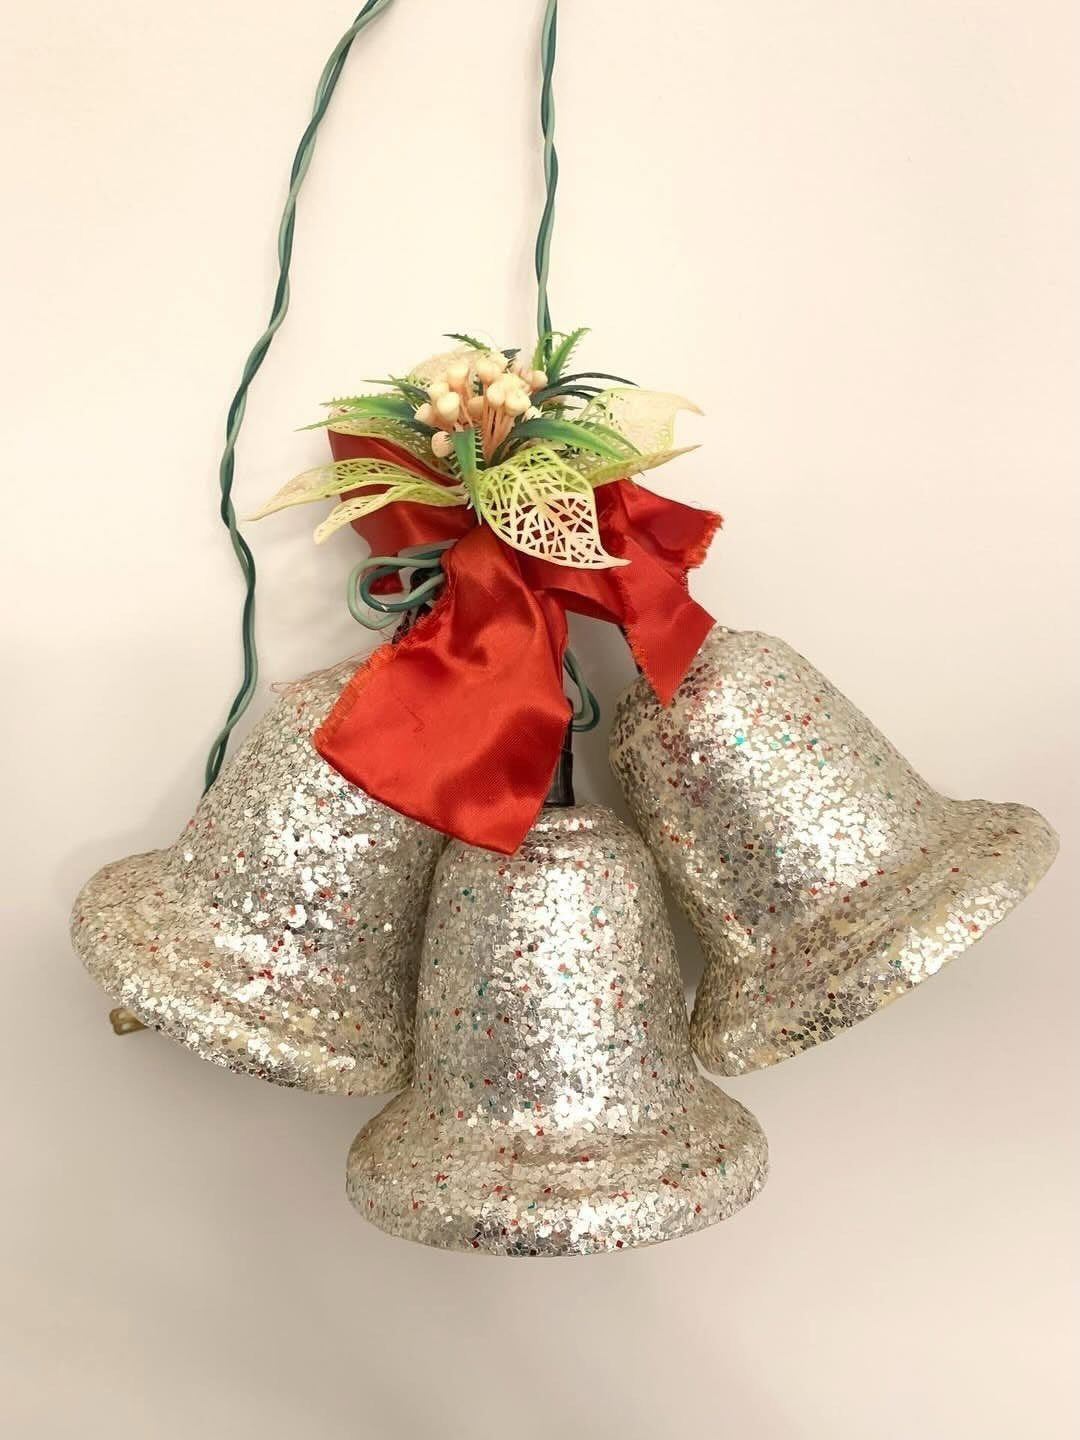
Silver glitter bells on a wire, hung with a red satin bow and small cream flowers, read as vintage because the materials are slightly loud and slightly mismatched, not because they are old.
The rope or wire you hang them from should be stiff enough to hold the curve of a swag; green floral wire from the craft store works and disappears against a door.
Faux wintergreen stems fill the gaps between bells, though versions with nothing but ribbon tails hold up fine. The whole thing takes minutes, not hours, which makes this a Sunday afternoon project that still looks deliberate.
I would keep it up through January; snowmen and Santos come down after New Year’s, but bells and greenery stay winter-appropriate until the light starts changing in February.
13. DIY Pine Cone Garland

A pine cone garland bridges the gap between found-object craft and finished holiday decor. White string and gold satin bows sized large enough to read from a few feet back work best, with glitter catching light on the cones themselves.
I like this for a covered porch because the materials handle cold fine and cost next to nothing if you collect cones yourself.
A sturdier branch across a mantel works too; smaller branches suit wall spaces above a sofa or bed. Ceiling hangs need lighter line and more attachment points than you’d guess.
The bows do the visual lifting, so buy wide satin rather than trying to make narrow ribbon look generous.
14. Paper Doily Christmas Trees
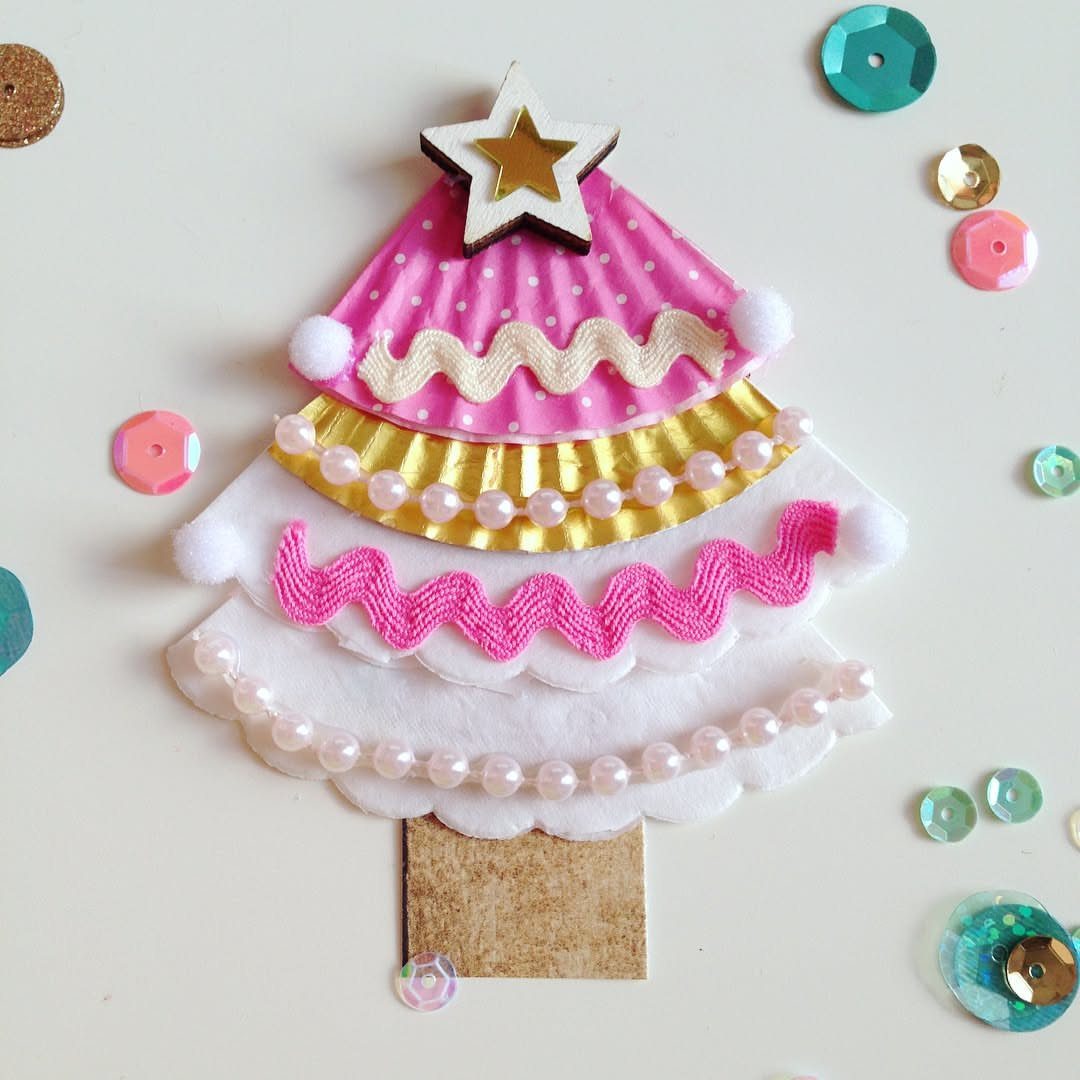
Paper doilies carry a specific nostalgia, the kind of handmade touch that reads grandmother’s tree rather than store display.
Doilies come in packs of thirty or forty for a few dollars, enough for a small forest. Layer three sizes with glue at the centers only, so the edges stay dimensional.
Sequins and a top star finish them; adhesive-backed pearls save threading.
These suit someone who wants ornament-scale pieces rather than room-dominating decor. They store flat, a real advantage in apartments with limited holiday bin space.
Kids can manage the gluing, though an adult should handle any hot glue for the trim.
15. DIY Christmas Wreaths
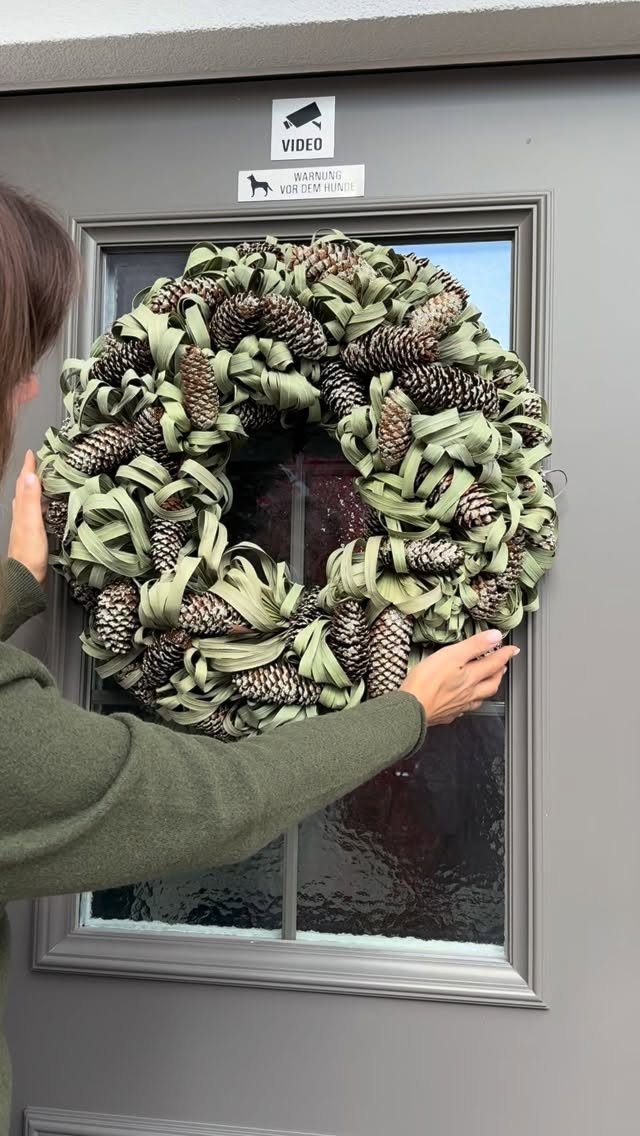
Sage green ribbon leaves and pinecones against a grey door give a muted palette that reads modern rather than traditional.
An embroidery hoop forms the base, which matters more than it sounds: hoops are cheap at any craft store, hold greenery without wrestling, and give you a finished edge to work against.
Flameless candles in the center remove the fire concern for apartment doors and rentals with strict rules.
I would pick the hoop for fresh greenery that lasts through the holiday or for dried and faux versions that store flat; the hoop makes either possible.
This is the entry point wreath, the one you make when you want something on the door by Sunday evening without a craft store outlay.
16. Toilet Paper Roll Santa
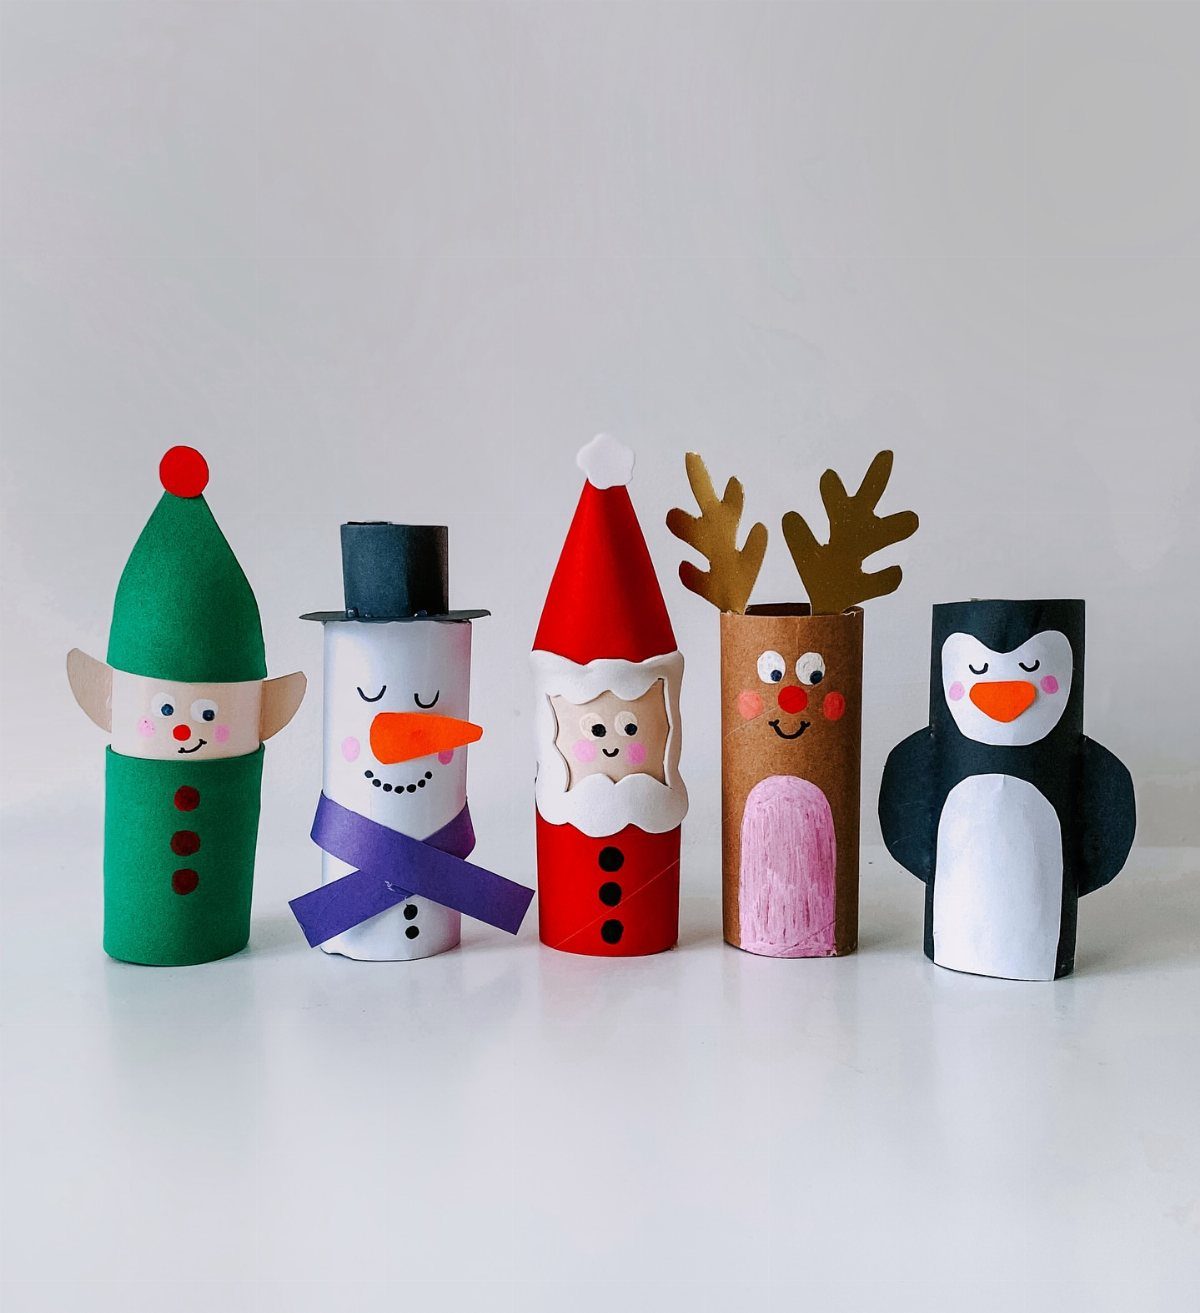
Toilet paper roll figures start with a tube, paint, and whatever scraps the drawer holds. A set of characters keeps kids occupied across an afternoon, and they mix and match parts once they get the idea.
Paint the roll red and white, add a paper face and cotton ball trim, fill with wrapped candy if you want a gift element. One base spins into variety with different ears, hats, and color schemes.
Younger kids need help with the cutting and gluing; older ones run the whole project themselves. The rolls need to be clean and dry, which means starting the collection a week before you plan to craft.
The only supply is the paper itself, assuming you buy toilet paper anyway.
17. DIY Christmas Gift Tags
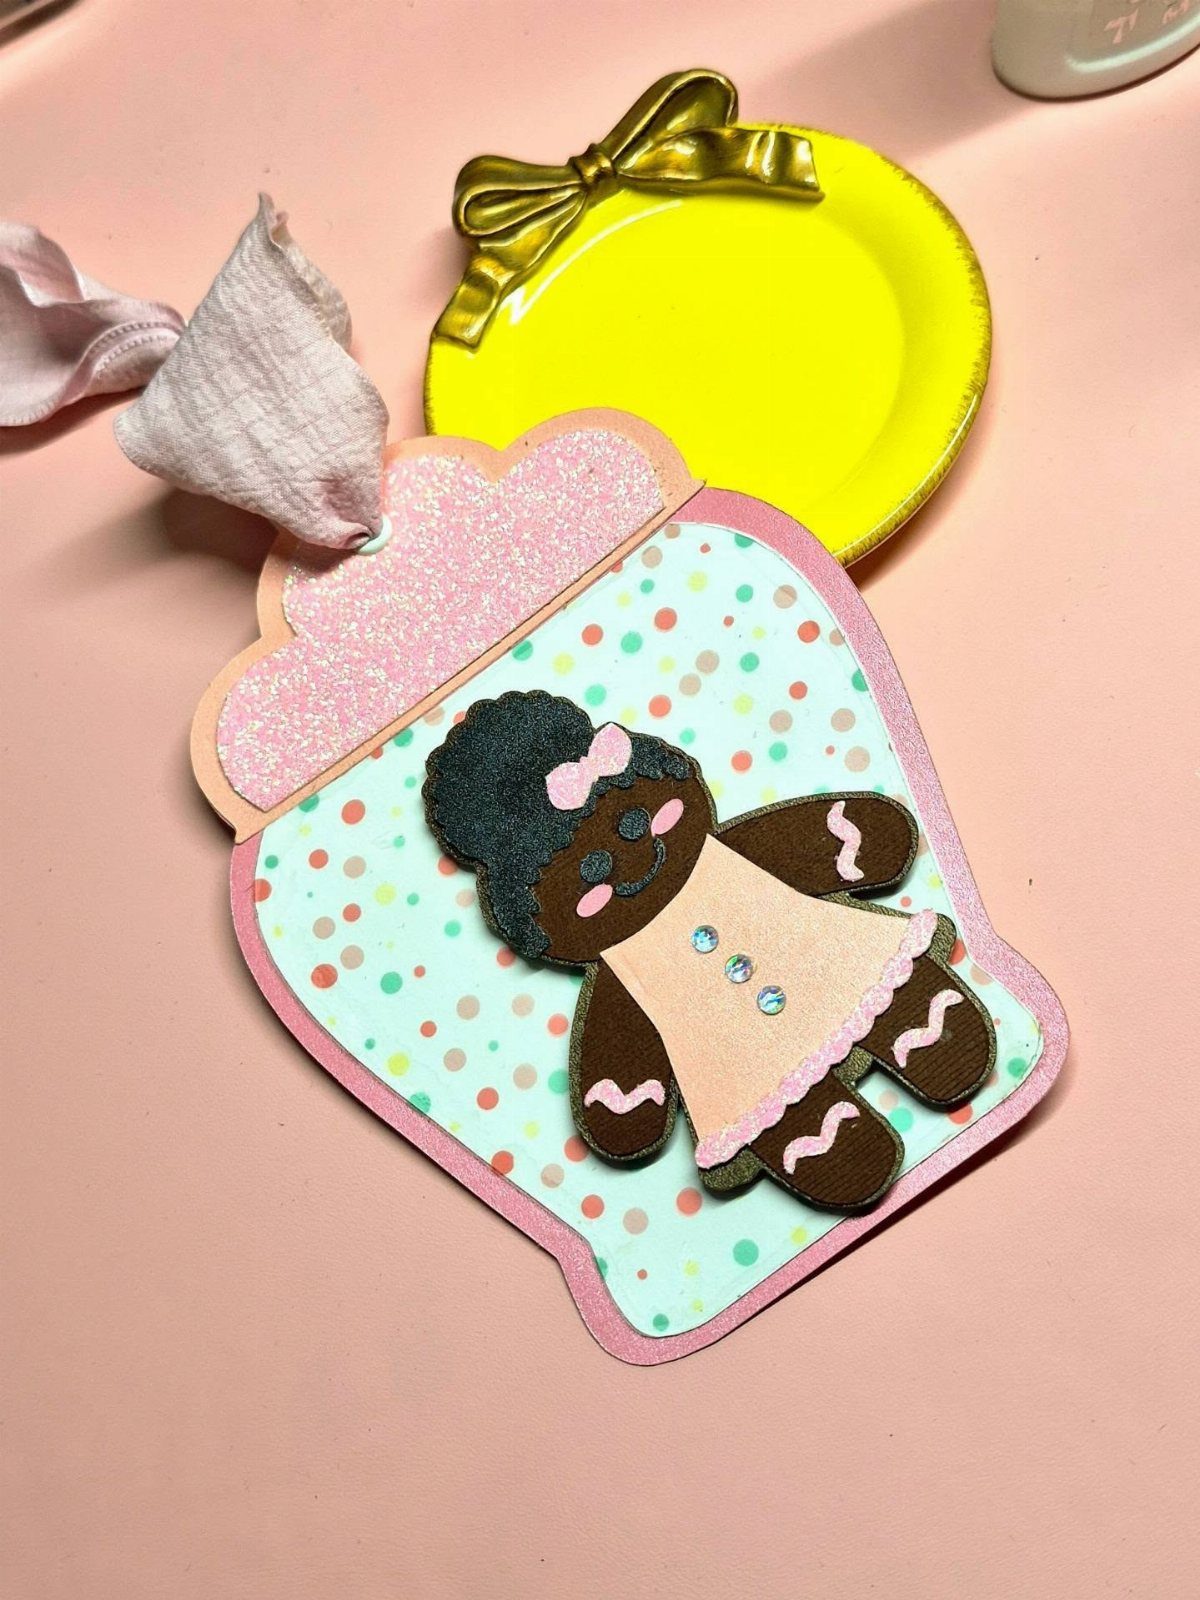
Gift tags are the last thing made and the first thing noticed, which makes them worth more attention than they get.
The character style works across skin tones and outfit colors, so you match the recipient rather than defaulting to one look.
A full set takes an evening and costs next to nothing if you have markers and glue. I would make these ahead and store with the wrapping paper, because tag-making at midnight with unwrapped gifts is its own special stress.
18. Cutesy Christmas Coloring Pages
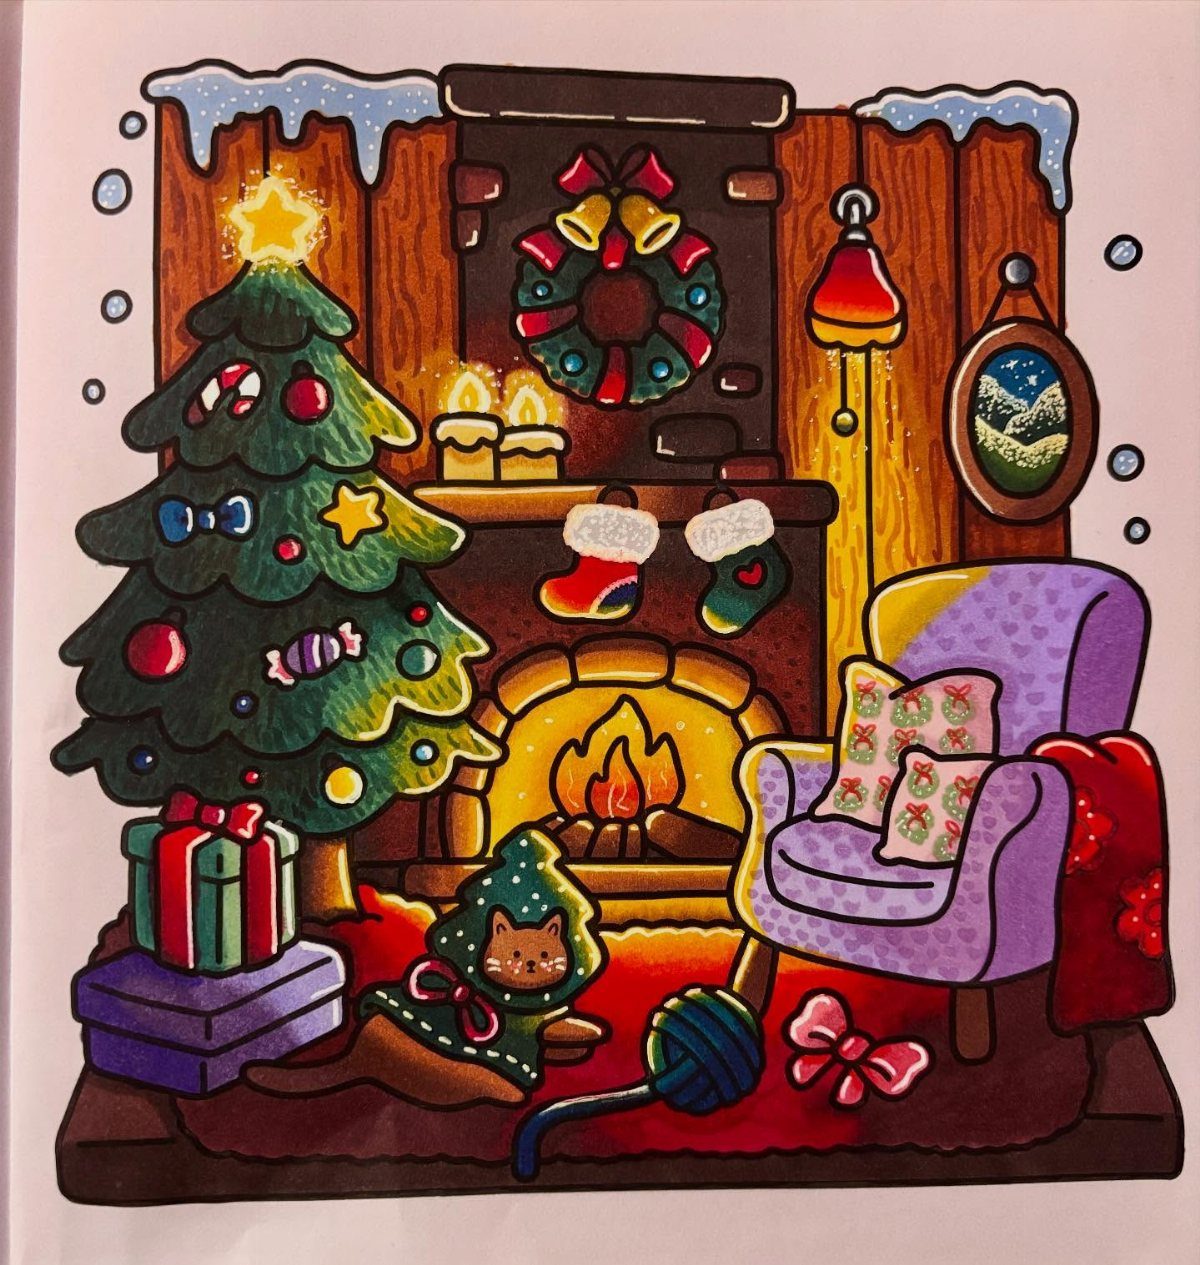
Coloring pages buy quiet time, full stop. A living room scene with tree, fireplace, cat and armchair gives enough detail to engage an older child without overwhelming a younger one who wants to fill spaces fast.
Printable means no waiting, no shipping, no storage beyond a file folder on your computer. I print on standard paper for casual use, card stock if the finished page might become a grandparent gift or holiday card.
These work for the relative who arrives with nothing for the kids to do, the sick day that falls during break, the dinner prep that needs occupied children. Free to low cost, immediate, and recyclable when the season ends.
19. Christmas Silhouette Cards
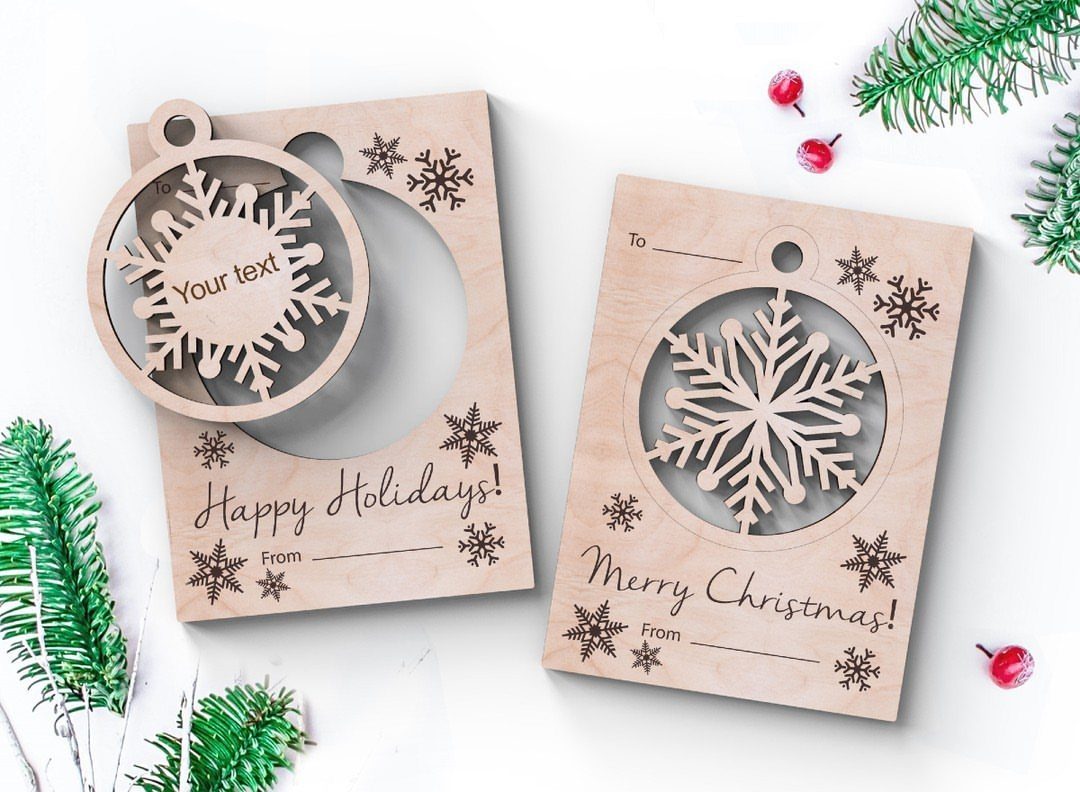
A laser-cut snowflake card gives the clean look of a silhouette without needing steady hands or an X-Acto knife. The cutout lets light through and casts a small shadow on the mantel, which ordinary drawn cards do not manage.
I would trace a simple shape onto cardstock folded in half, a tree or a star, and cut through both layers at once so the silhouette stays symmetrical.
For younger kids, a cotton ball snowman or button snowflake keeps the handmade feel without the frustration of fine cutting.
These cards suit anyone mailing more than a handful; the work is front-loaded in the design, then each copy goes quickly.
20. Rocking Paper Plate Santa
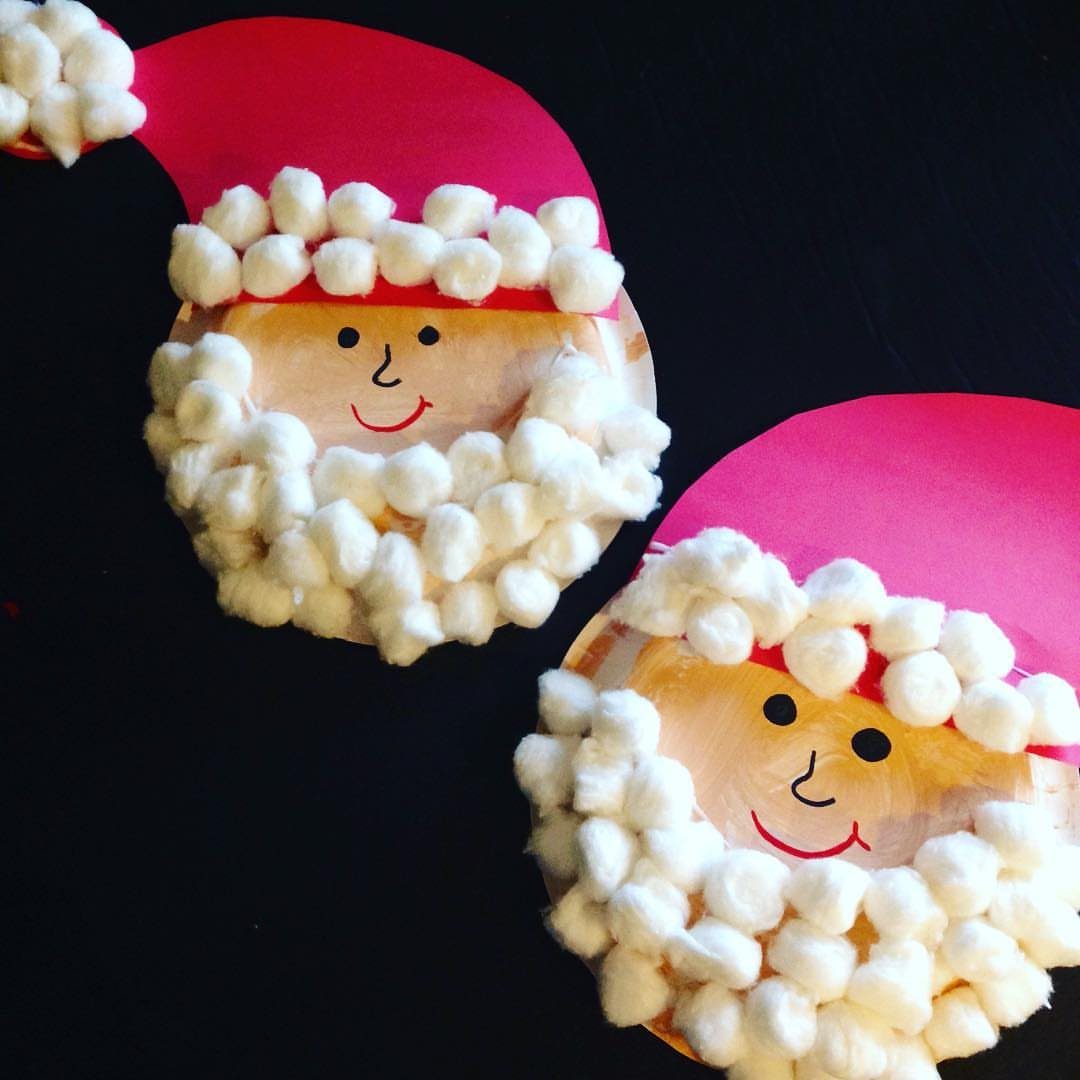
Paper plates bend into a curve that rocks back and forth when you stand the Santa upright, which turns a static craft into something a toddler will actually play with.
Red construction paper hats and cotton ball beards cover the plate so the cheap material never shows.
I would glue the beard in overlapping rows like roof shingles so it reads as fluffy from across the room rather than sparse. A real pom-pom on the hat tip upgrades the whole thing for pocket change.
This one needs supervision for the cutting, but the assembly is simple enough that a kindergartner can manage most of it. The rocking motion means it lives on a shelf or table, not the wall.
21. Christmas Tree Bauble
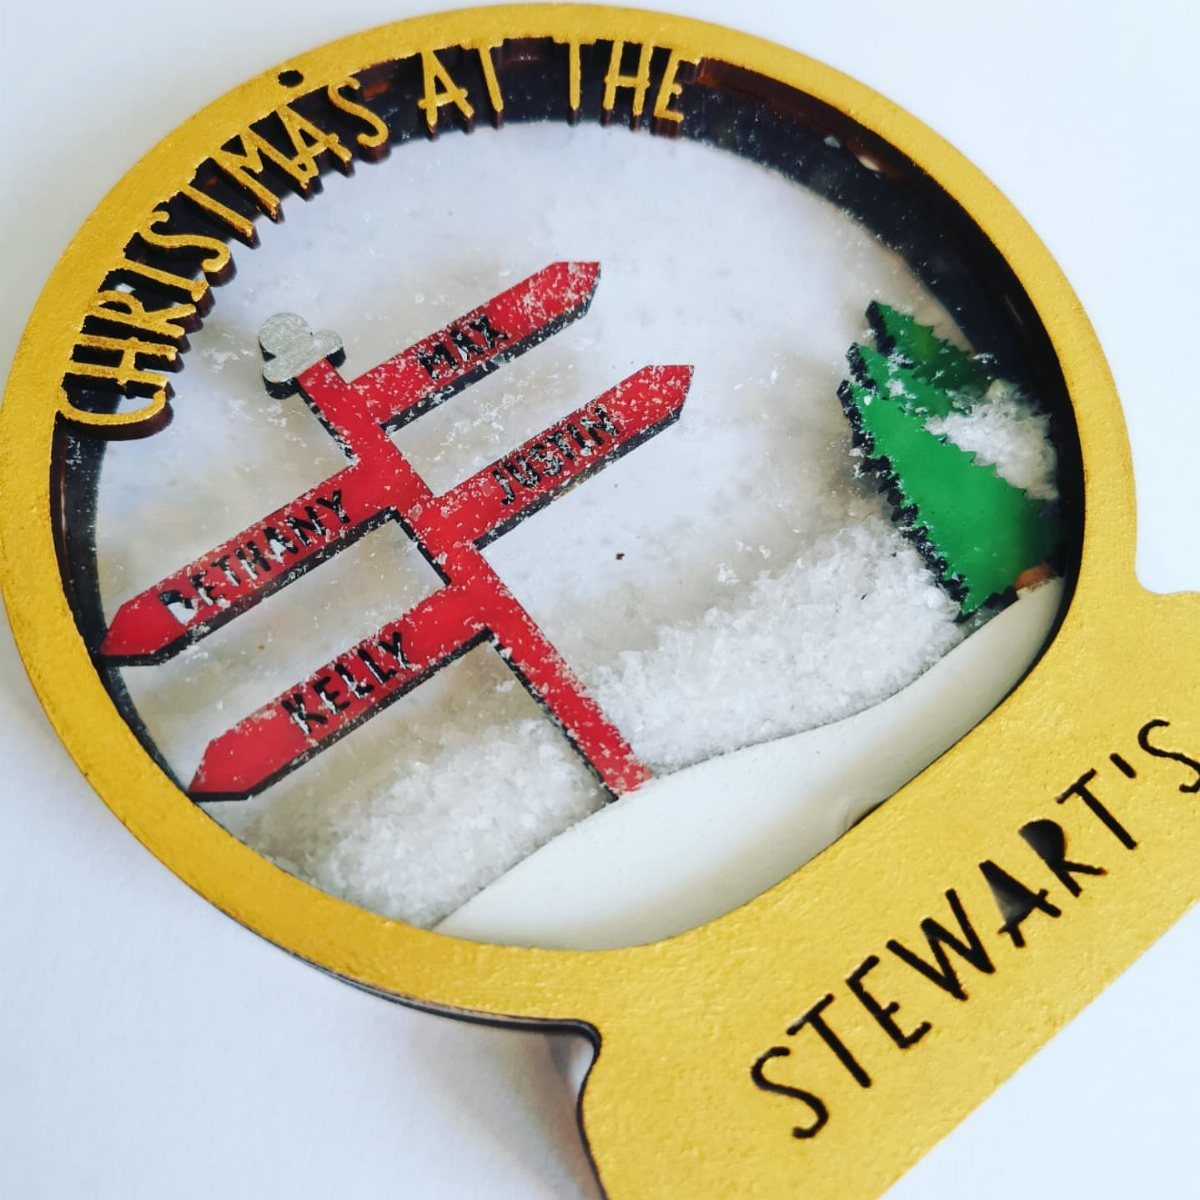
A 3D paper bauble folds flat to mail and pops open at the ends, which solves the problem of sending something dimensional to family you will not see. The layered construction, identical shapes slotted together, looks intricate from any angle.
Cardstock in two weights changes how the bauble hangs: heavier paper holds its shape in humidity but needs a stronger thread.
I would start with ordinary printer-weight paper for the first attempt; mistakes cost pennies and the folds teach you where the slots must sit.
The names on the signpost version suggest a gift for new parents or a newly married couple. A plain geometric version, no scene inside, works anywhere on the tree and takes less time.
22. Christmas Crate
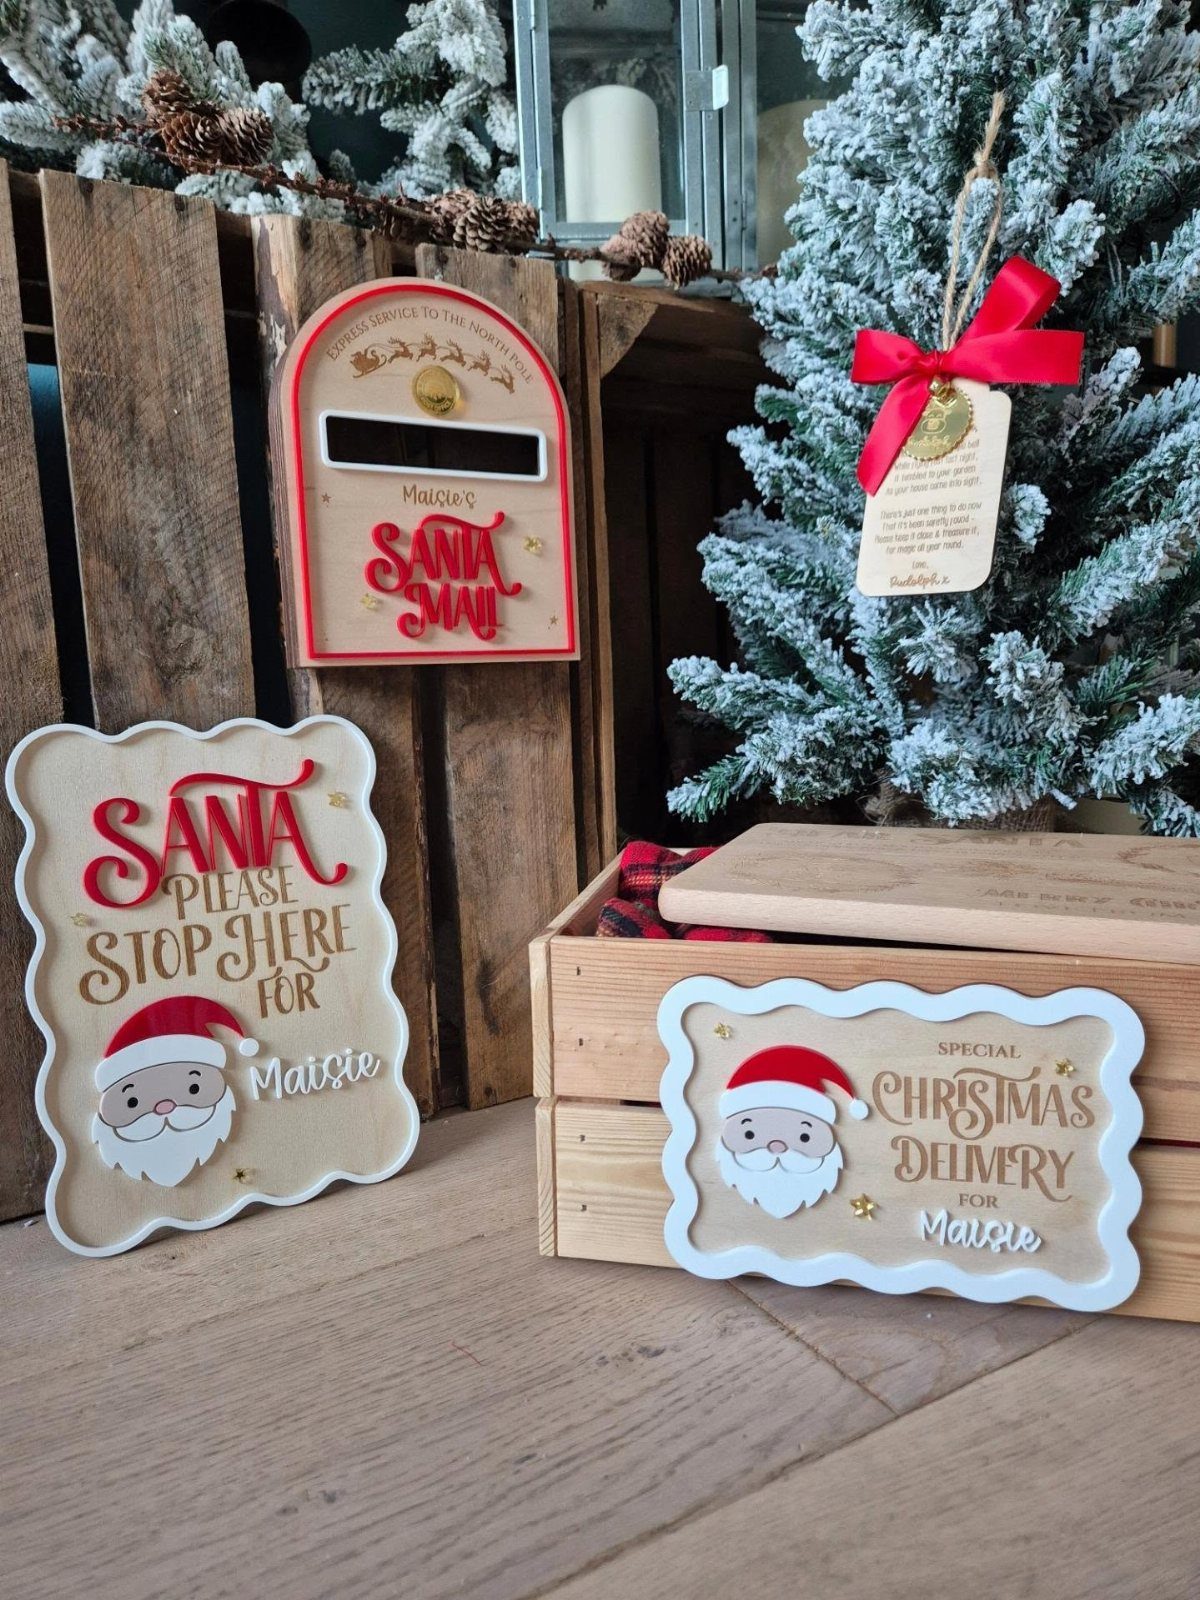
A wooden crate with a painted sign turns into a holder for the gifts that arrive before Christmas Eve, which keeps wrapping paper from colonizing every flat surface in the house.
The slatted sides let ribbon and paper show through just enough to look festive without reading as clutter.
I would check the crate for splinters, especially if small kids are in the house, and sand the lip where hands reach most often.
A quart of milk paint or leftover latex from another project covers it; the sign can be a separate board screwed on so you swap the name or message next year.
This trades the polished look of store-bought decor for something that can hold actual weight. A crate full of oranges or walnuts reads as a gift itself.
23. DIY Christmas Tree Boho Wall Hanging
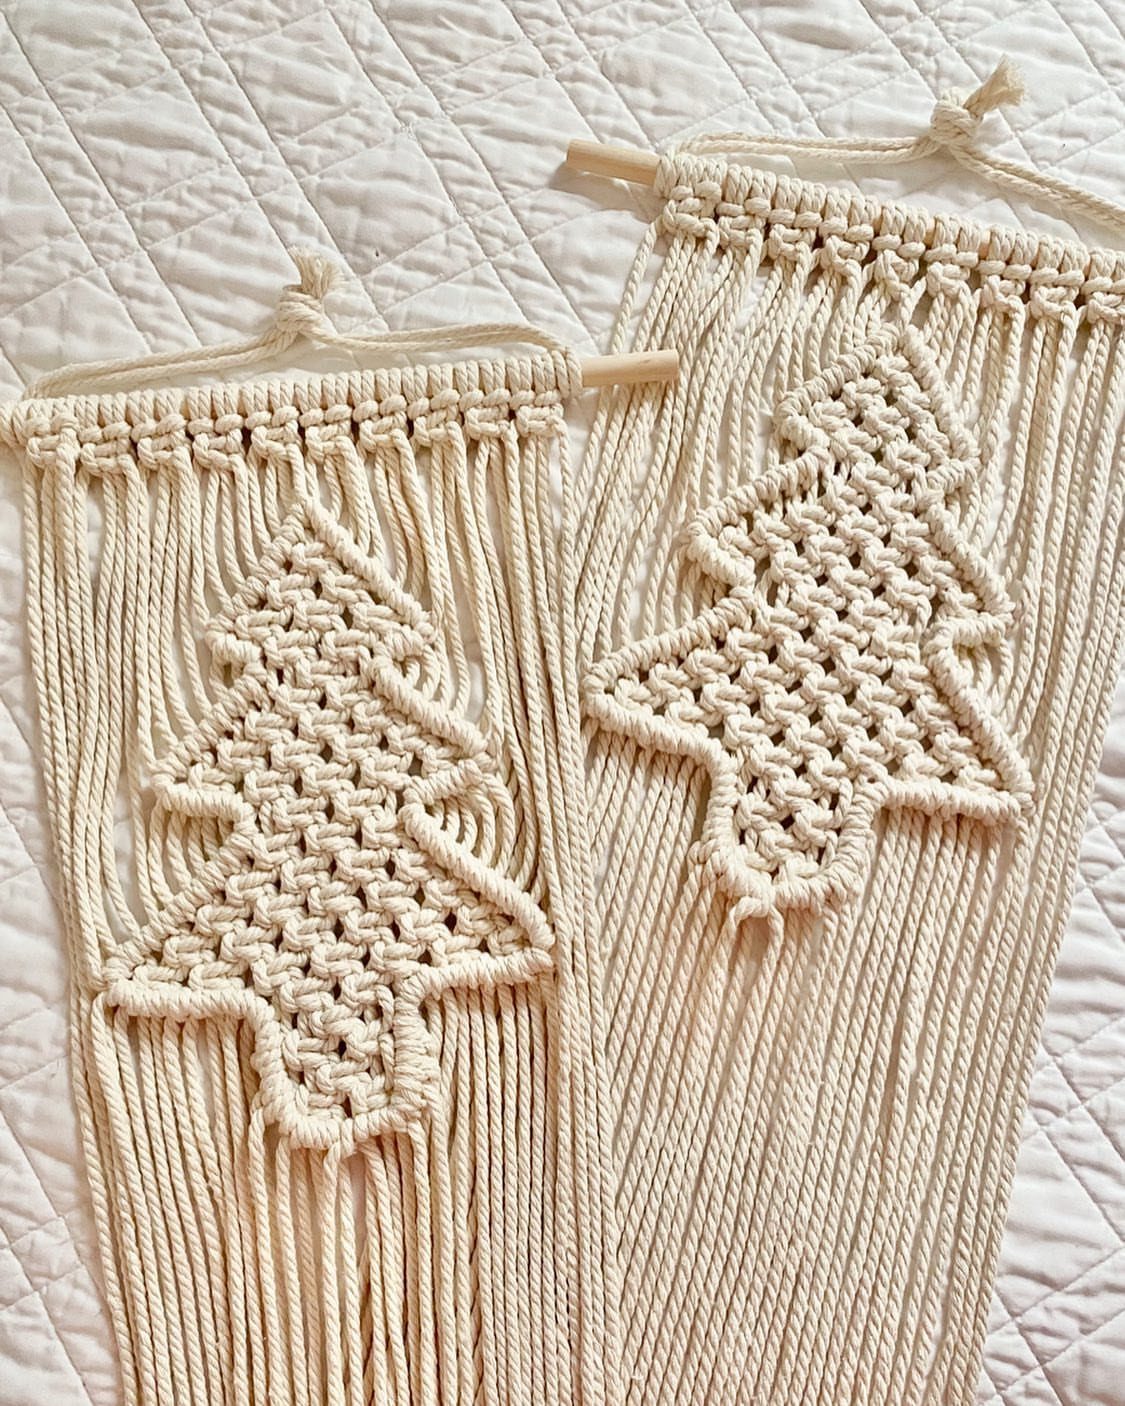
Macrame wall hangings take up no floor space and no outlet, which matters in a small apartment where a tree competes with the sofa for square footage.
A simple square knot and alternating half-hitch, two moves repeated, build the whole shape; I would practice on a short sample before cutting the long cords.
A wooden dowel from the hardware store, sanded smooth, costs next to nothing and holds the weight without sagging.
This one rewards patience more than skill. The same technique, a wider dowel and longer cords, scales to a full-size wall piece for year-round use.
24. DIY Upcycled Christmas Gift Tags
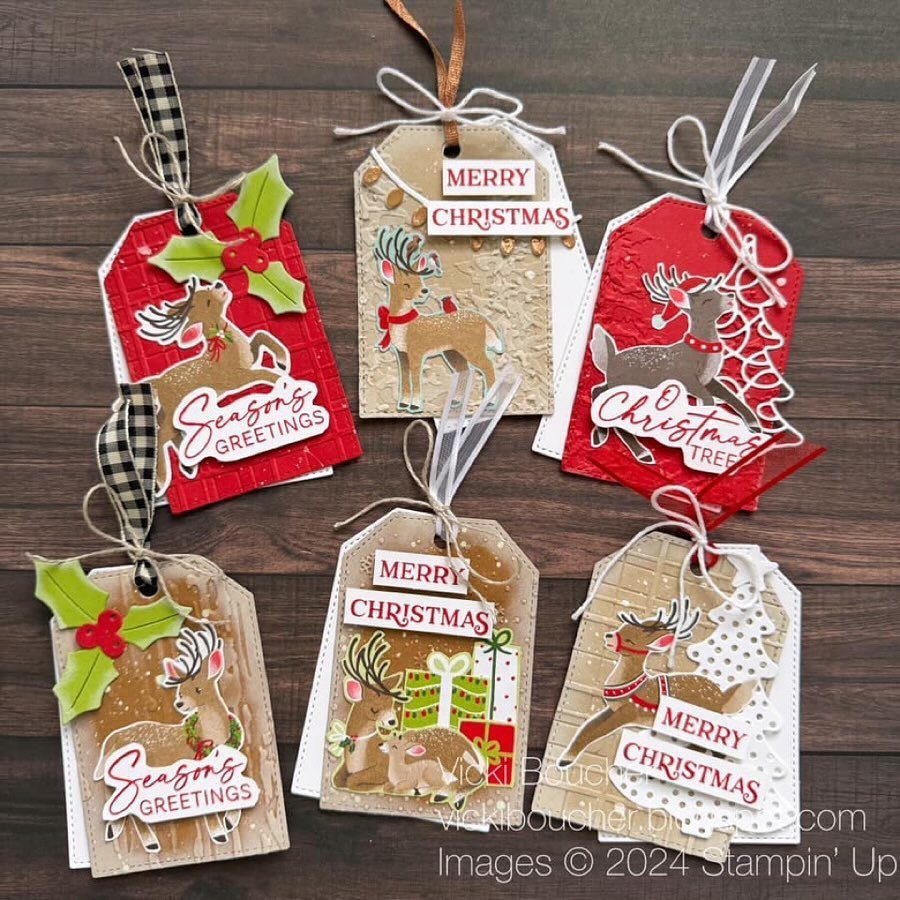
Gift tags from last year’s cards or wrapping paper scraps cost nothing and take less time than a trip to buy new ones.
A hole punch at the corner, reinforced with a small eyelet if you have the tool, keeps the ribbon from tearing through on the way to the tree.
I would write names in pen before threading the ribbon; pencil smudges against the paper edges and looks tired by Christmas morning.
This suits anyone who saves paper ephemera and feels guilty throwing it out. Each tag takes a few minutes, so batch them with a podcast running and stop when you have enough for the year.
25. DIY Christmas Fortune Tellers
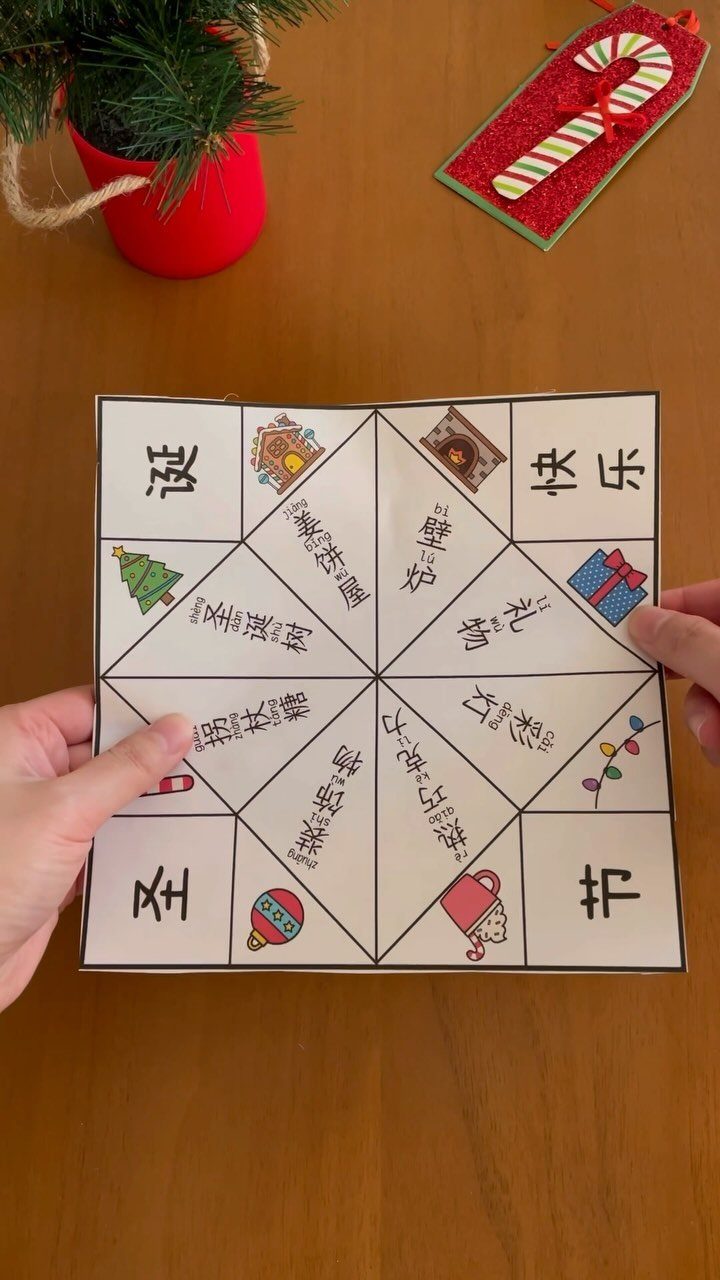
A Christmas fortune teller folds flat into a pocket or lunchbox and opens into a game. The outside flaps can hold Rudolph, Santa, an elf or a wrapped gift, with holiday truth-or-dare prompts hidden inside.
You need one square sheet of paper and a pen.
Print or draw the characters on the outer triangles, write the surprises underneath, fold the corners to the center twice, flip it and fold again, then work the fingers in underneath.
This one suits kids old enough to read and write their own prompts, or adults making them as table favors. The format travels across languages; you can swap in any figures you like.
Materials for Crafting
Paper and cardboard carry most of these projects, with mason jars and toilet paper rolls close behind. Wood shims come in bundles at any hardware store, enough for a cluster of three trees at staggered heights.
Recycled materials keep the cost near zero if you plan ahead. Egg cartons, pine cones, and corks from champagne bottles all need collection time, not money.
I would start saving tubes and cartons a week before you craft, so everything is clean and dry.
Involvement of Kids
Several of these crafts are built for small hands. Paper plate Santas and rocking plate figures let toddlers dab glue and place cotton balls while you handle the stapler.
Egg carton snowmen need no sewing, which means no waiting for an adult to thread a needle.
Kids old enough to wait for paint to dry, maybe eight and up, handle watercolor cards and finer brushwork.
Younger ones get frustrated by the timing and do better with immediate results: pipe cleaner trees, felt penguins, or salt dough stamped and baked.
For a group, I would set up stations: one table for dough rolling, one for felt cutting, one for assembly. Older kids manage cork foxes and champagne-cork Olafs; younger ones stick to flat shapes that dry face-up on a tray.
Easy Crafts for Busy Schedules
Many of these projects finish in half an hour of active work, not counting dry time. The honeycomb paper trees take about an hour to assemble three sizes.
The vintage bell swag and pine cone garland each come together in a single Sunday afternoon.
Popsicle stick snowflakes need overnight drying before you add weight, but the gluing itself is brief.
I would batch the watercolor cards in an assembly line, all backgrounds first, then all trees, then all dots, so nothing sits wet too long.
Gift tags take an evening for a full set, which is why I make them ahead and store with the wrapping paper. Tag-making at midnight with unwrapped gifts is its own special stress.
Decorative Uses for Crafts
These crafts work as mantel pieces, porch hangs, or tree ornaments depending on scale. The three-dimensional paper trees stand on a shelf without any frame or hanging hardware, which matters when you rent and every nail is a deposit risk.
Battery tea lights fit inside the larger ones if you cut a small exit for the switch.
The embroidery hoop wreath with flameless candles in the center removes the fire concern for apartment doors and rentals with strict rules. Pop-up cards deliver best when handed directly; dimensional mail needs extra postage and still gets crushed.
I would keep the bell swag up through January, since bells and greenery stay winter-appropriate until the light starts changing in February.
Frequently Asked Questions
What are some creative ideas for Christmas art and craft?
Blue and gold watercolor trees work up quick for cards you actually mail, and honeycomb paper trees sit on a shelf on their own, no hook or stand needed.
Egg carton snowmen and paper plate trees keep costs near zero and let kids handle most of the work.
What crafts sell best at Christmas?
Handmade ornaments and decorations move fastest during the holiday season. Small 3D paper baubles ship flat and pop open at both ends, which keeps postage cheap for online orders.
Gift tags cost next to nothing in materials and take an evening to make a full set.
What is the hottest craft right now for adults?
DIY home decor projects like wreaths and wall hangings are trending for adults who want finished pieces rather than kid crafts.
An embroidery hoop wreath with sage green ribbon leaves and a few pinecones filled my Sunday evening and cost maybe twelve dollars in craft store basics.
Macrame wall hangings with simple square knots and alternating half-hitches take up no floor space or outlets in small apartments. The vintage bells swag, with silver glitter bells and mismatched materials, reads deliberate rather than mass-produced.