
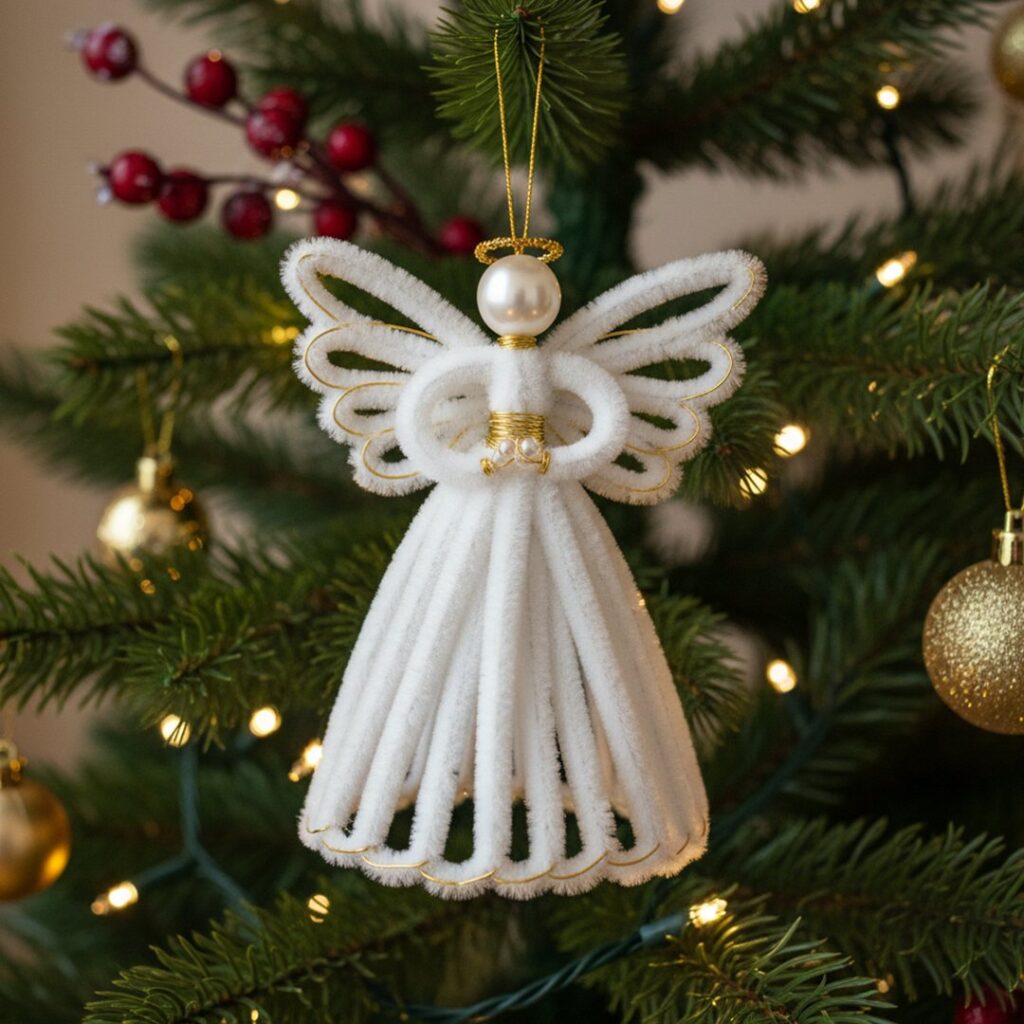
These ornaments run from a coffee’s worth of paper doilies to a resin setup that demands its own afternoon and a dust-free hour.
What picks one over another is whether you already own the tool or the material; a Cricut justifies itself only across a season of gifts, while salt dough asks for nothing but flour, salt, and water in equal parts.
The half-inch thickness is the detail that saves that dough from cracking in a low, slow oven.
1. Mason Jar Snow Globe
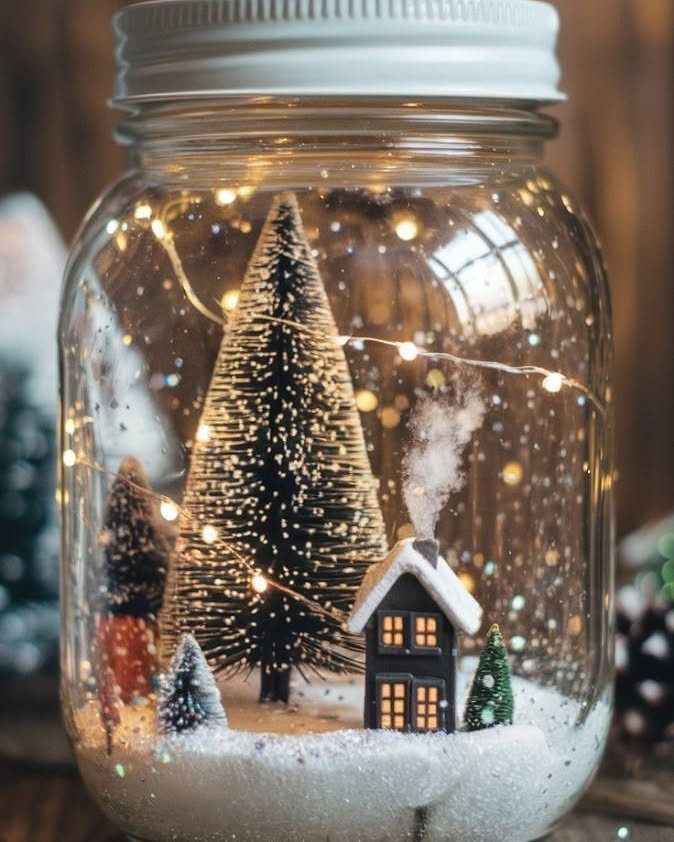
A Mason jar snow globe starts with the jar itself as the frame. Miniature trees, a small house with lit windows, and faux snow go inside, with fairy lights threaded through for glow.
Resin sets the scene permanently: pour a thin layer in the bottom, press your pieces in place, and cure before adding more resin or a glitter-snow mix. LED lights or metallic flakes bump up the warmth.
Water-based versions work too, but resin keeps fake snow from clumping and protects paper or wood pieces from moisture.
This one suits anyone who wants a keepsake that survives packing away. The jar lid takes paint, twine, or tiny wreath trim if you want it dressed up on the shelf.
2. Candy Cane Ornaments
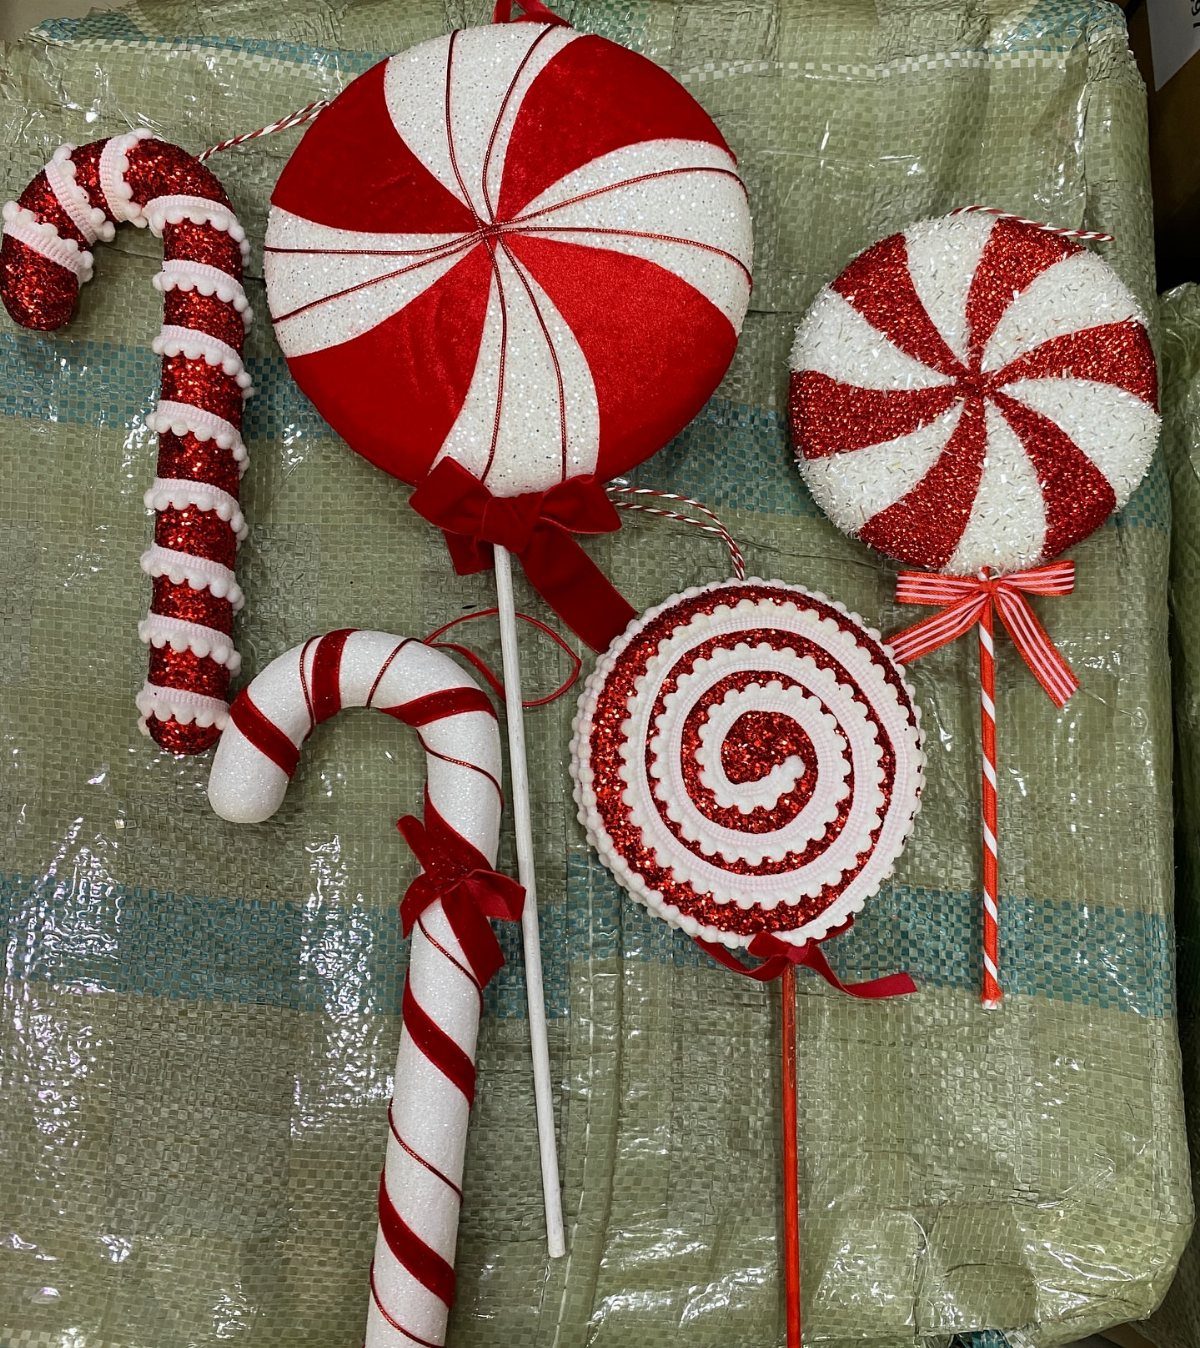
Red and white fabric scraps plus wire armature make candy cane shapes that read as peppermint from across the room.
Glitter and small bows finish them; the round lollipop versions use the same materials in a disk instead of a curve.
The wire matters more than the fabric choice. Anything thin enough to bend but stiff enough to hold its shape works: floral wire, pipe cleaners, even stripped coat hangers for larger ones.
Fabric weight changes the stuffing; quilting cotton needs more filler than felt to look round.
These suit a tree that runs whimsical rather than polished. I’d pick them for a kitchen tree or a gift topper, where the scale stays small and the hand-stitched look is the point.
3. DIY Mushroom Ornaments
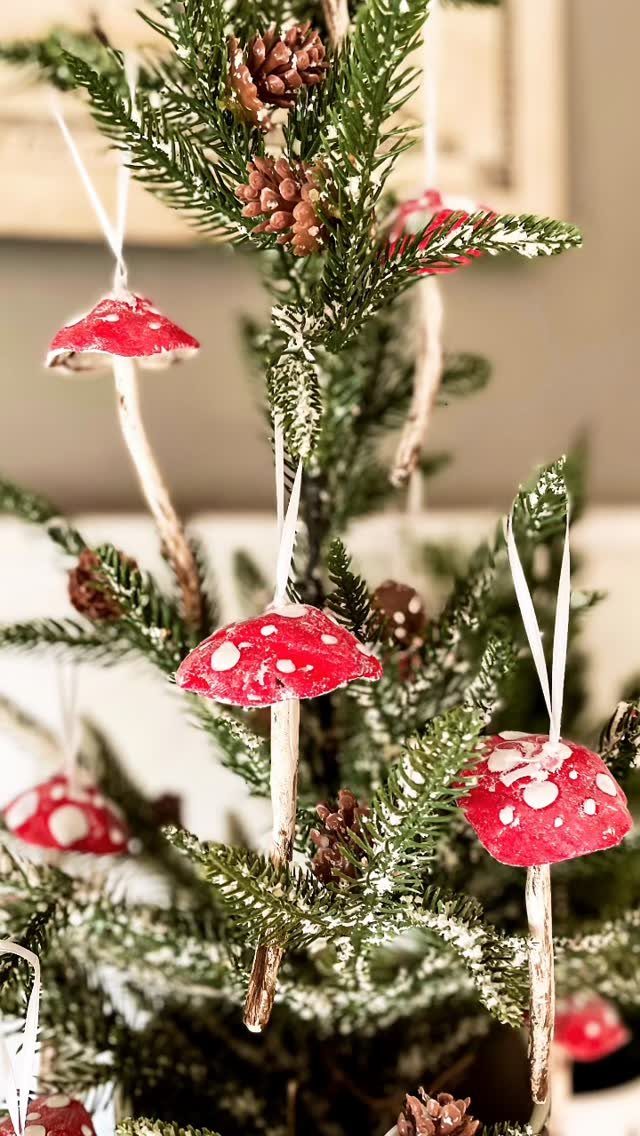
Scraps of red fabric with white spots and pale stems turn into mushrooms that fit a woodland tree without fighting the green. The cap and stem are separate pieces, sewn and stuffed, then joined.
Clay gives a harder, more realistic version if you want something that won’t snag on branches. The fabric ones travel better; the clay ones catch light differently and suit a mantel or a static display where they won’t get knocked.
A maker of the fabric version notes that starting early lets you enjoy the holidays instead of rushing to finish. I’d add that these work in multiples: one or two look accidental, a small cluster looks intentional.
4. DIY Beaded Snowflake Ornaments
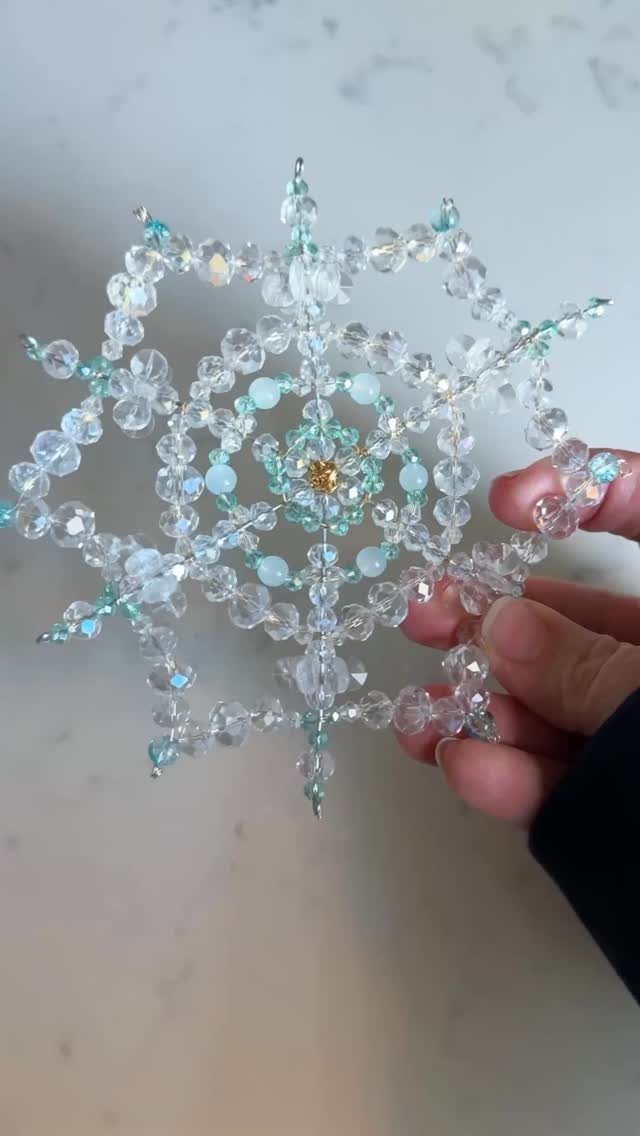
Clear and light blue faceted beads strung on wire form six-pointed snowflakes that catch window light even without a tree. The same technique strings into garlands for a mantel or a doorway.
Melted beads are a separate route: arrange in a metal cookie cutter on parchment, bake until they fuse, and you get a solid star or snowflake with a stained-glass quality.
That version needs ventilation and an oven you don’t mind dedicating to craft for an afternoon.
The strung version travels flat and stores in a shoebox. I’d pick it for anyone mailing ornaments or working in an apartment with limited storage.
5. DIY Felt Heart Ornaments
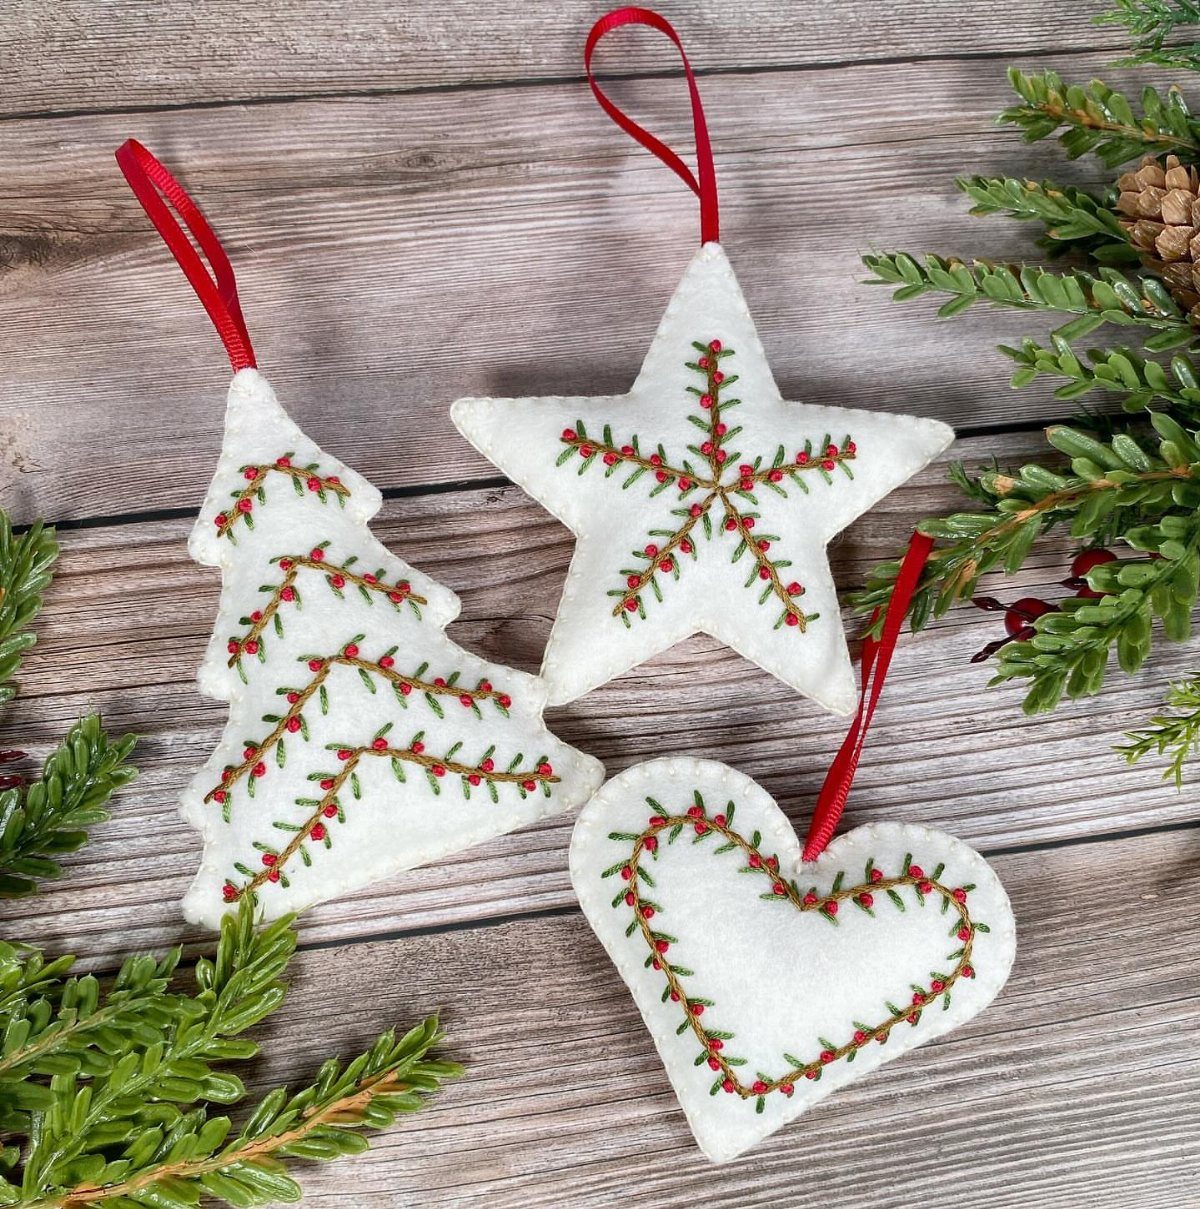
Felt hearts need no pattern: fold a square, cut half a heart, unfold, and the symmetry handles itself.
Red and green embroidery on white felt reads as Christmas; the same shape in pink or red with a February date works for Valentine’s Day.
The stitching is where you spend your time. Running stitch outlines, French knots for dots, or blanket stitch around the edge all show up against the felt’s matte surface.
Two layers with a little stuffing between them give the shape more presence than a single cutout.
These suit someone who wants handwork without precision. I’d make a dozen in an evening, string them as a garland, and pack them away to flip to the other holiday.
6. DIY Painted Birch Slice Ornaments
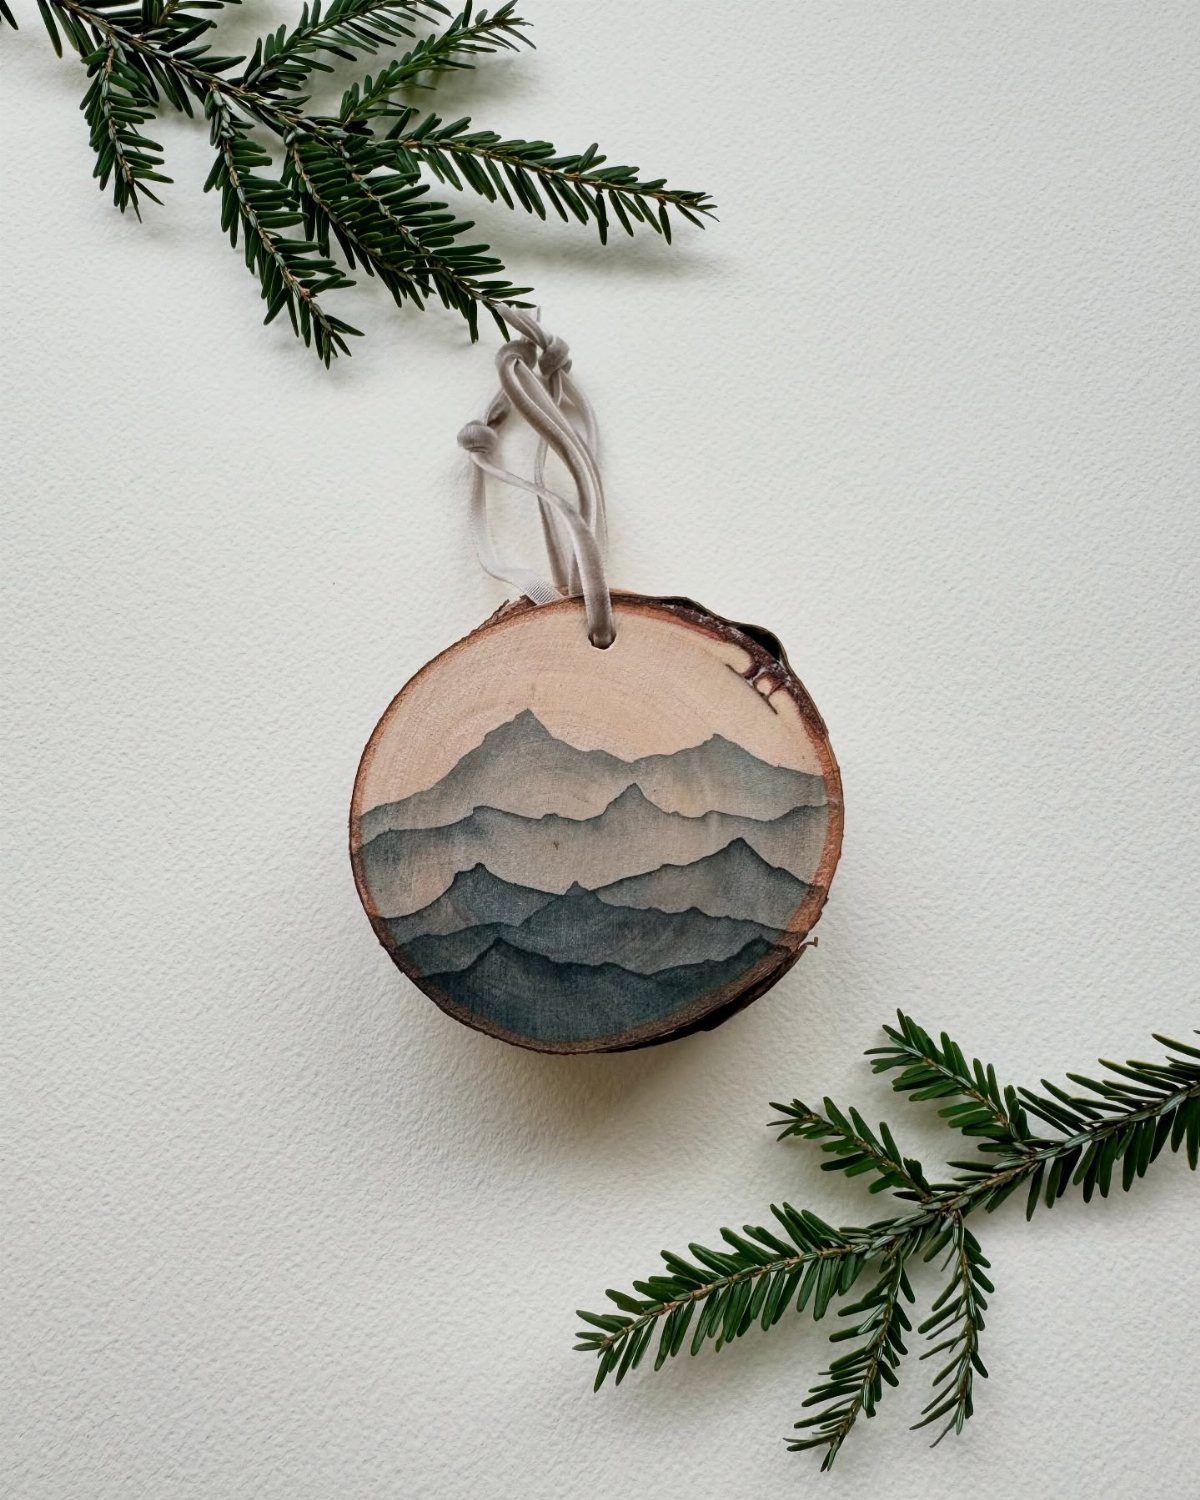
Birch slices come with the bark edge already decorative; acrylic paint fills the flat face with whatever scene or pattern you want. Mountains in blue and grey read as winter without being literal about Christmas, so the ornament works longer.
The wood grain shows through thin paint and adds texture you can’t get on paper or canvas.
Sealing with clear coat keeps the paint from chipping where the string rubes; matte or gloss depends on whether you want the bark or the painting to dominate.
I’d pick larger slices, ones where the brushwork has room to breathe and the bark border frames it like a natural mat.
7. DIY Stained Glass Effect Alcohol Ink Ornaments
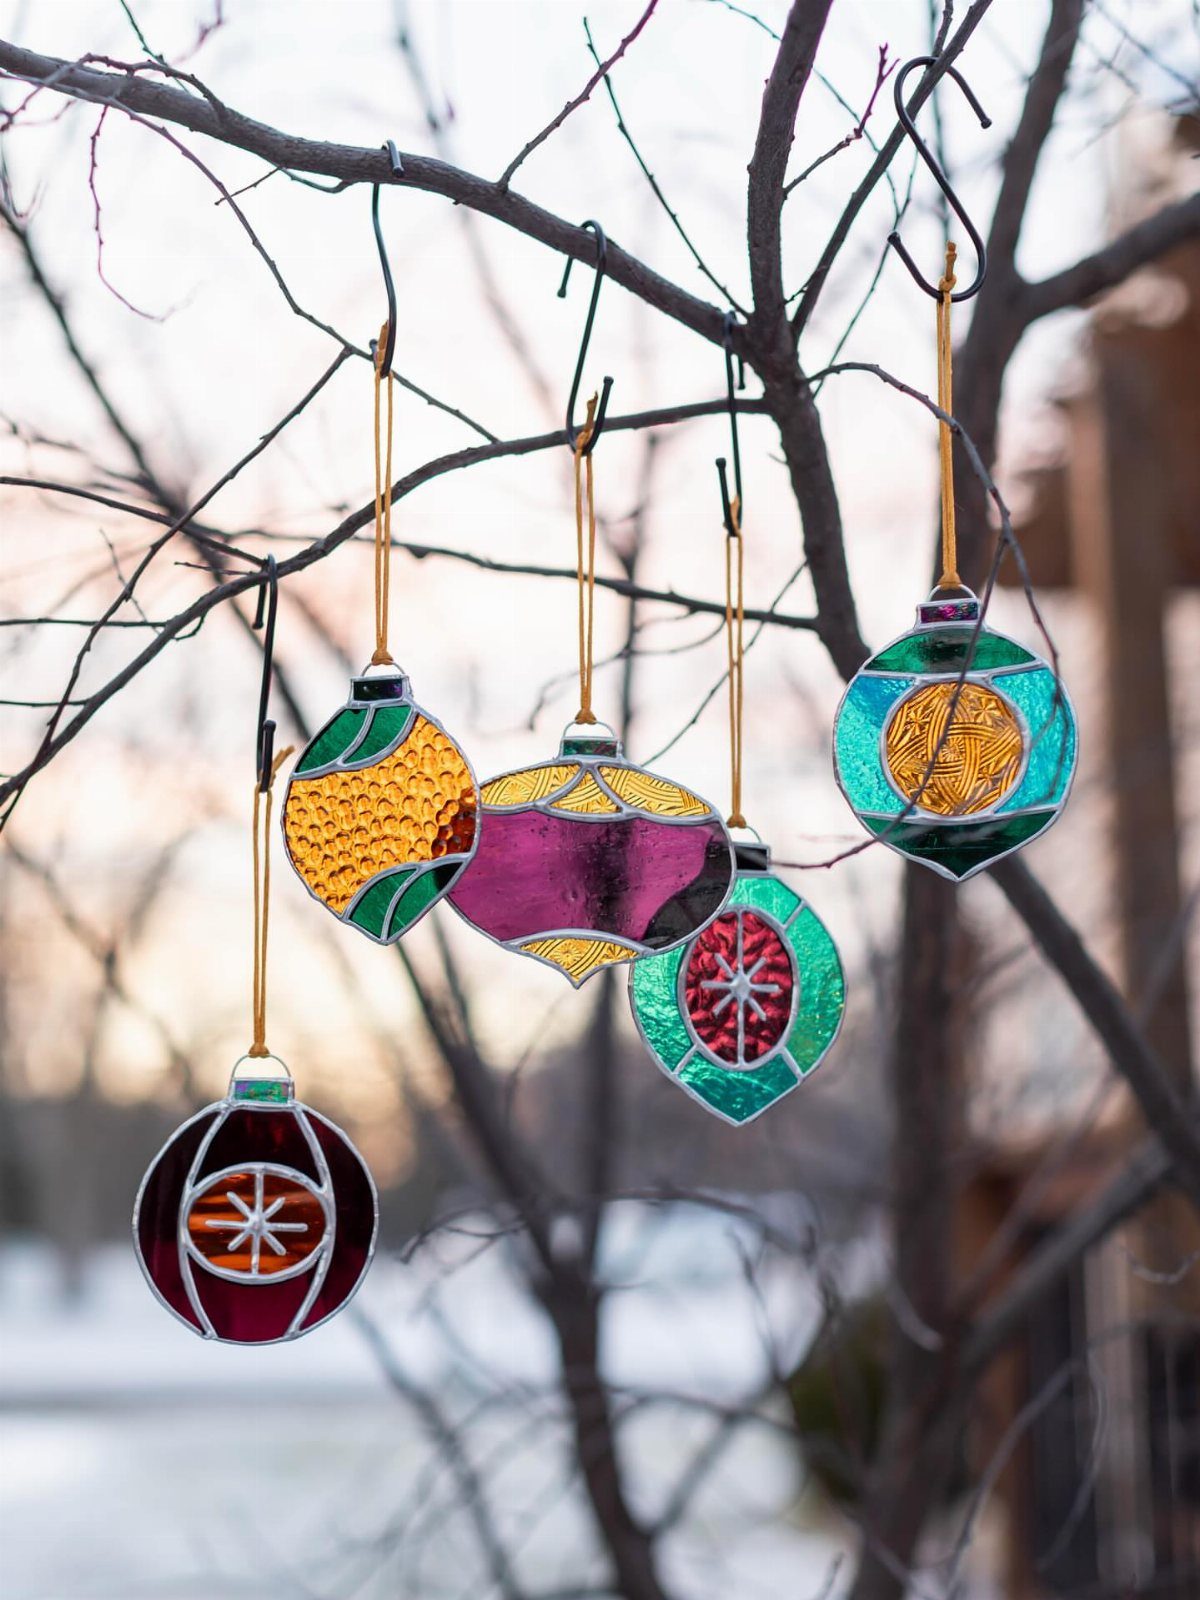
Alcohol ink on clear acrylic blanks gives you cathedral-window color without the glasswork. The ink spreads fast, so work on one face at a time and let it dry before deciding if you want a second layer.
I like the single-pass look; going back in usually muddies it. Transparent adhesive vinyl backing, the kind used for faux stained glass, keeps the edges clean if your hand slips.
A stained glass effect suits anyone who wants bold color with almost no drying time. Skip it if you prefer matte finishes or precise shapes; this medium has its own mind.
8. DIY Cricut Ornaments
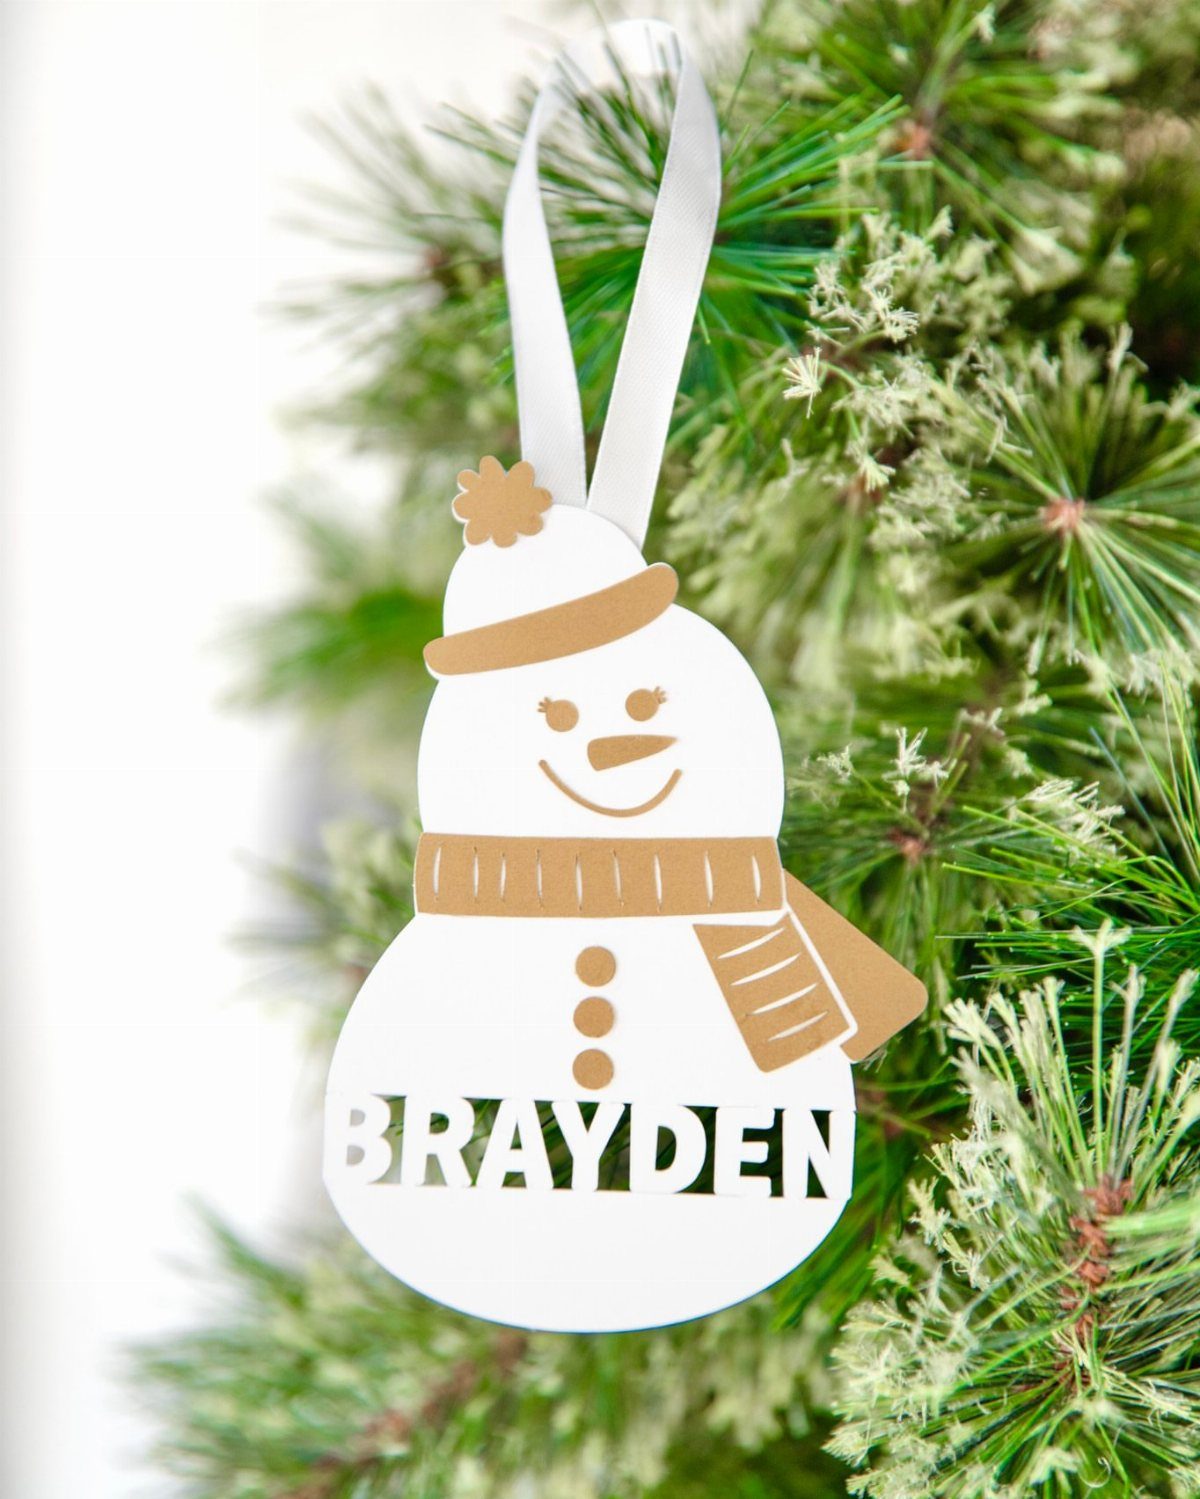
A Cricut turns out names and tiny stars that I would never cut freehand. The machine scores adhesive vinyl for transfer to glass, resin, or acrylic blanks; metallic and holographic vinyl catch tree lights better than plain colors.
I have used transfer tape and a credit card to smooth bubbles, though a proper scraper is worth buying if you make more than a few. Fine-tipped acrylic pens add outlines if the vinyl alone looks too clean.
This one pays off only if you already own the machine or plan enough gifts to justify the cost. For a single ornament, dollar-store stick-on gems do nearly the same work.
9. Gnome Ornament
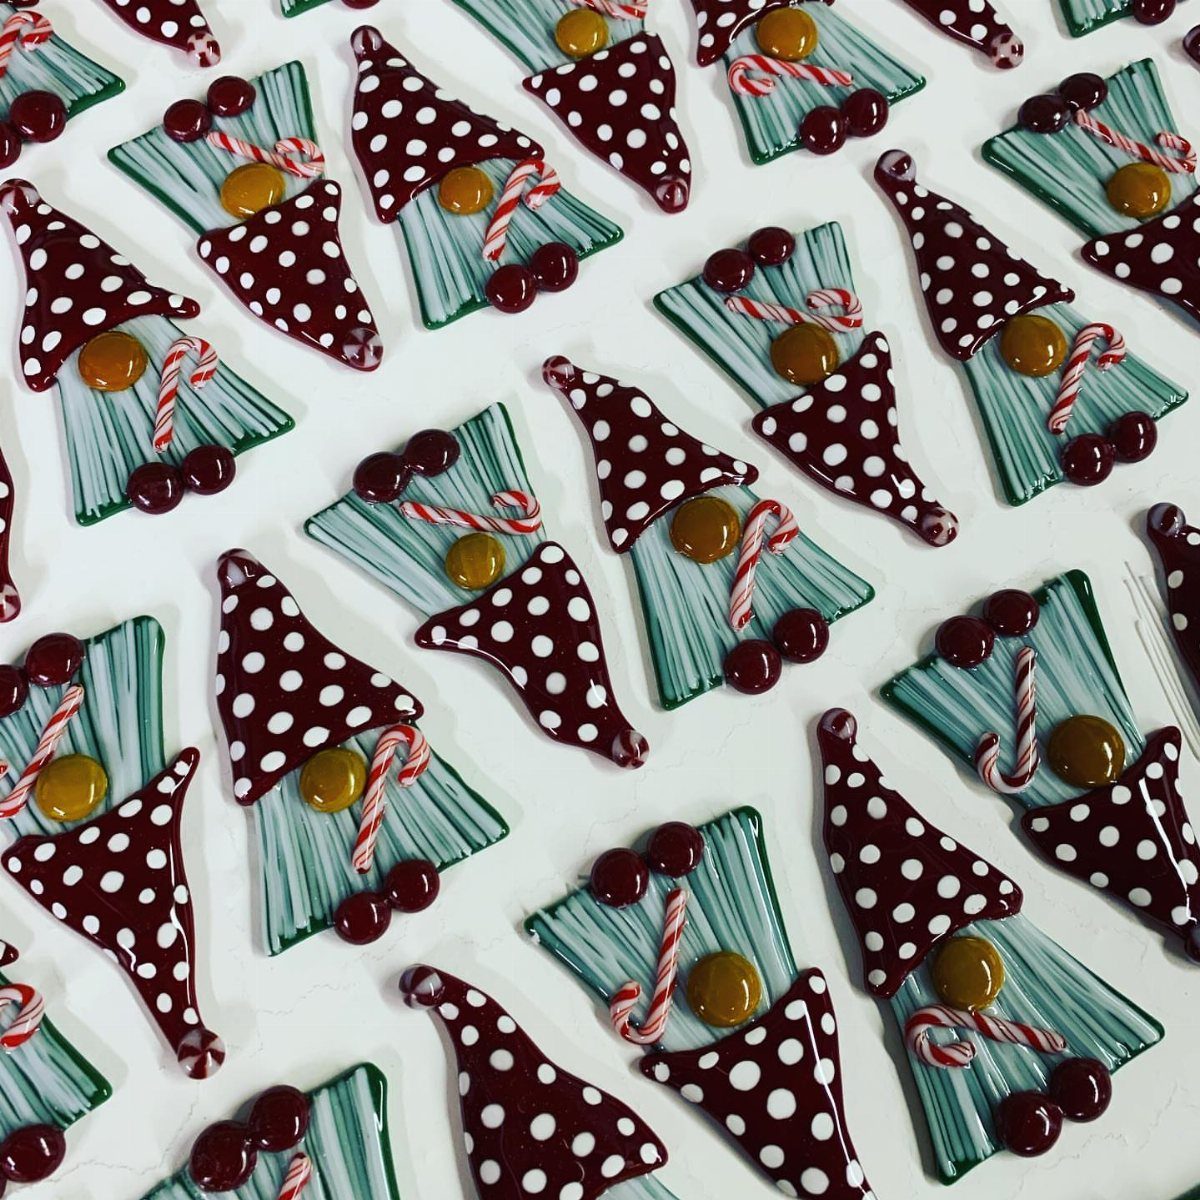
Cardboard and twine make a gnome that looks more finished than it has any right to.
I cut a 2-inch-wide triangle from a shipping box, wrap it with twine held by hot glue dabs, and loop matching twine from the point for hanging.
A wooden bead or a pom-pom serves as nose; the body is just more twine or a scrap of striped fabric. Terra cotta pot hats, fluffy yarn beards, and ribbon hangers are a second route if you want something taller.
Either version takes under an hour and uses what is already in the junk drawer. A polka-dot hat reads playful; solid colors look more Nordic.
10. DIY Yarn Ball Ornaments
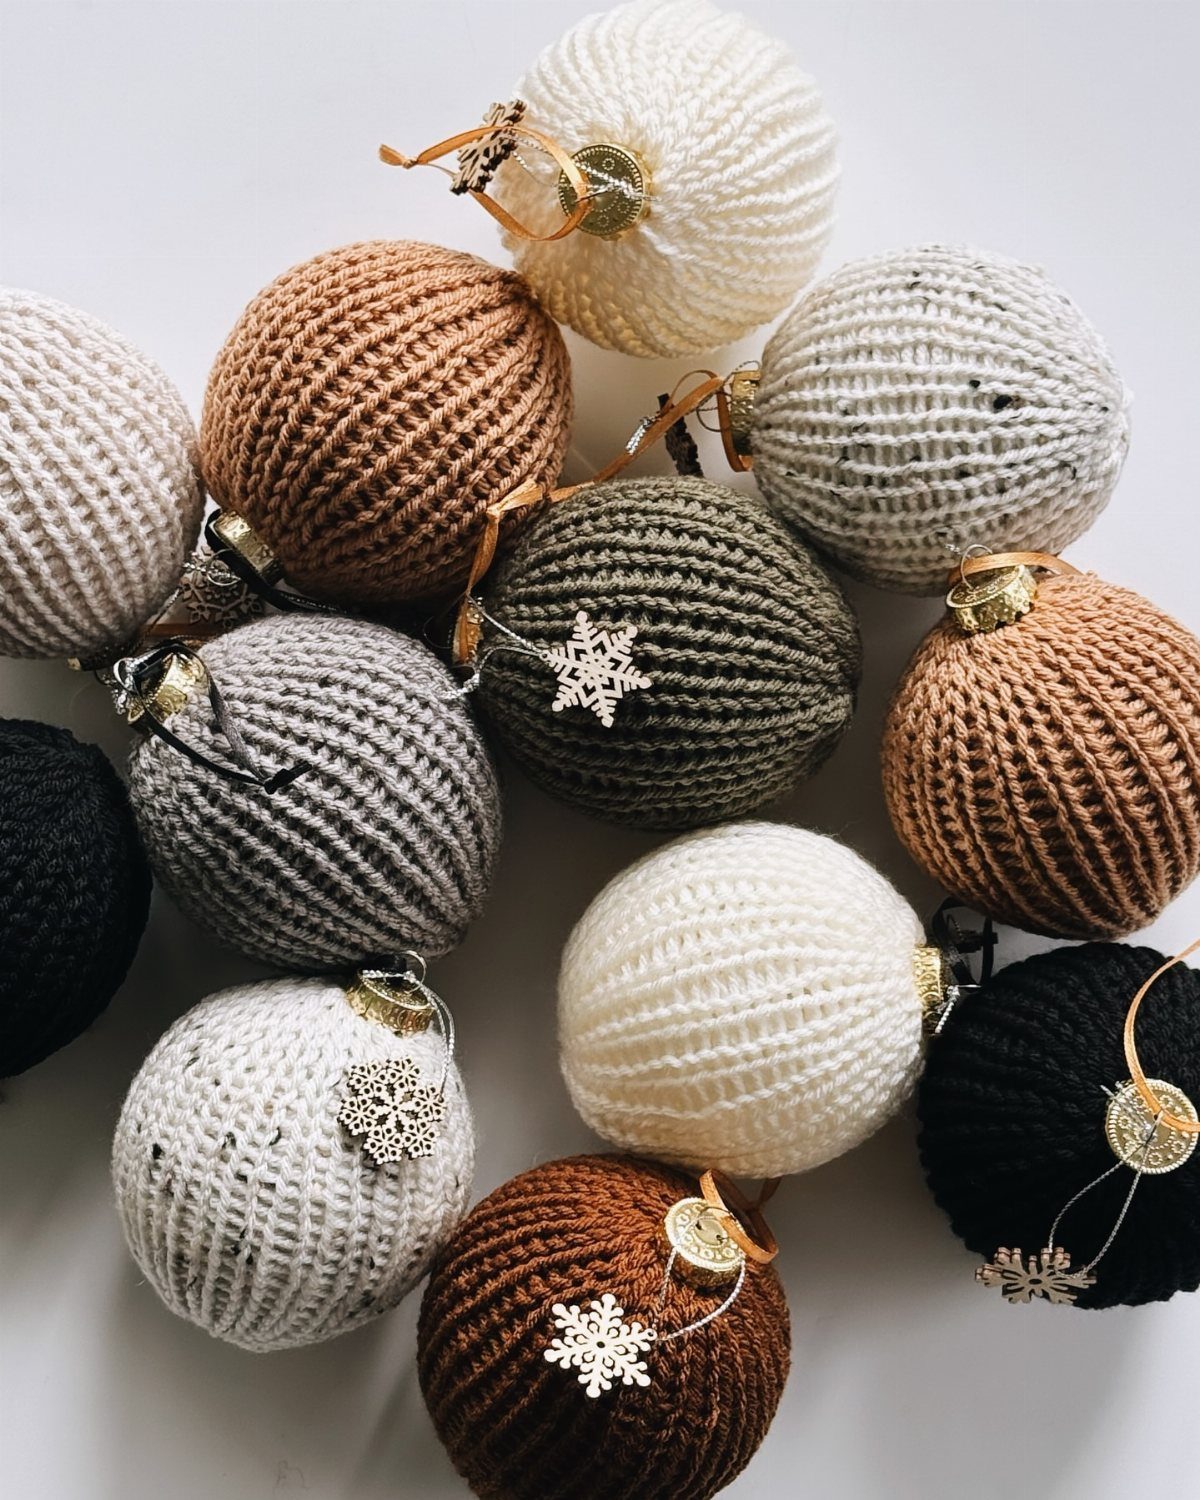
Clear plastic ornaments wrapped in yarn warm up a tree without the weight of glass. I start with a dab of hot glue to anchor the yarn, wind until the plastic disappears, and snip the end tucked under a strand.
Neutral colors, cream through olive, suit a restrained palette; bright yarn would read differently. This is a good use for leftover skeins too small for a full project.
One caution: the glue sets fast, so plan your first wrap before you squeeze.
11. DIY Paper Candle Ornaments
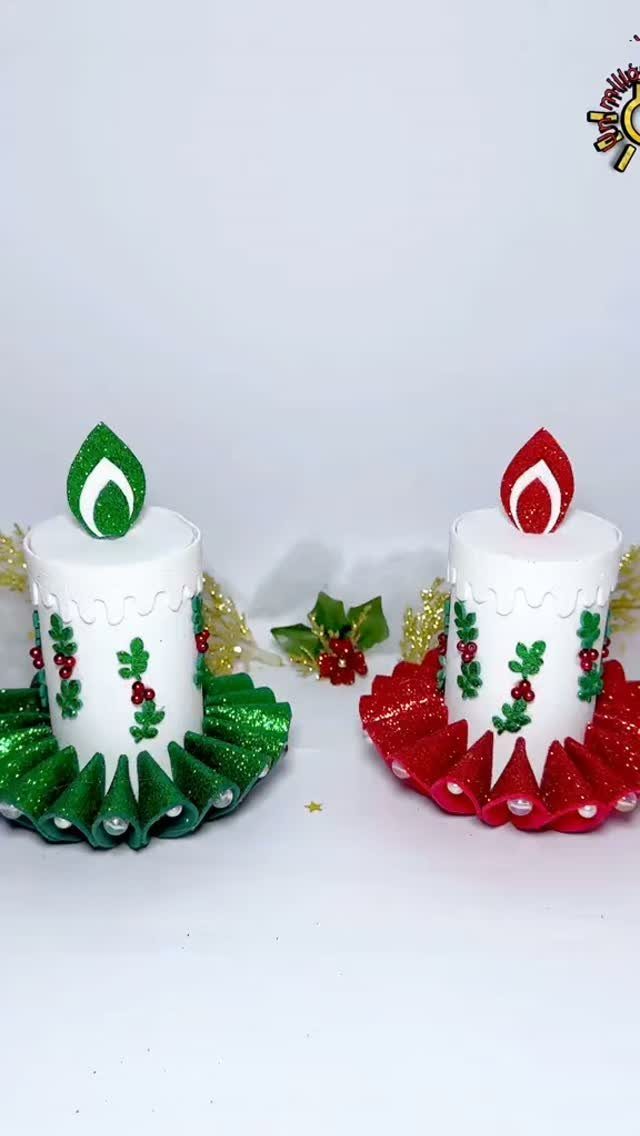
Flattened metallic mini cupcake liners become candle flames with the right backing.
I roll paper into a tube, slit the top with an X-Acto knife, and slip the liner in with glue; gold and orange metallic craft paper cut to flame shapes layer behind for depth. Silver punch-circles add the hot spot.
No light needed, though the metallic finish catches enough glow from room lamps to read as lit. Red and green follow classic holly colors, but cream and gold liners would suit a quieter tree.
These are light enough for thin branches.
12. DIY Popsicle Stick Sled Ornaments
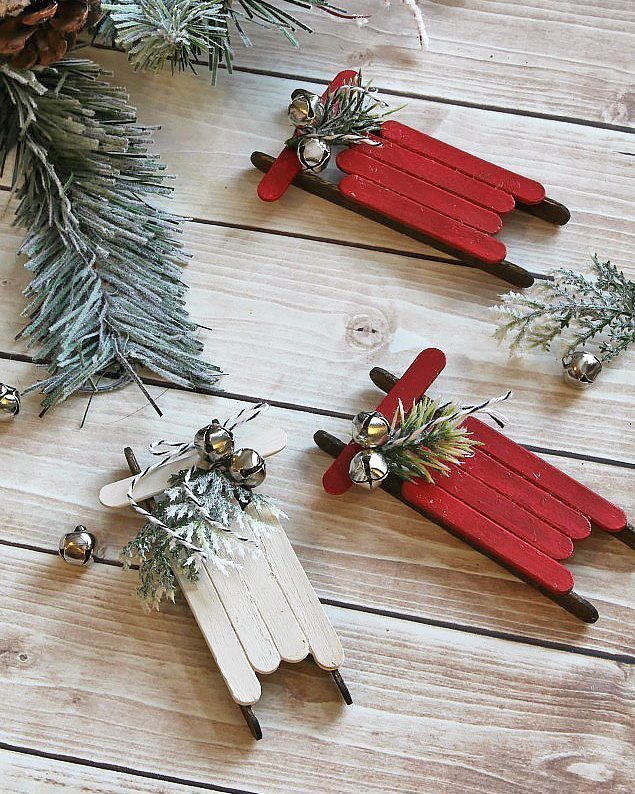
Popsicle sticks glued into a sled shape take paint and a few jingle bells without complaint.
I shape the runners first, add crossbars, and let the glue set before painting; red and white read as candy cane, but any two colors work.
Frosted greenery and silver bells are optional, though they do hide any glue that squeezed out. Standard sticks look right for a single sled; mini sticks would make a whole fleet for a garland.
This is a solid project for kids old enough to handle a glue gun, or for adults who want something handmade without the preciousness.
13. DIY Woodland Inspired Dollar Store Fillable Ornaments
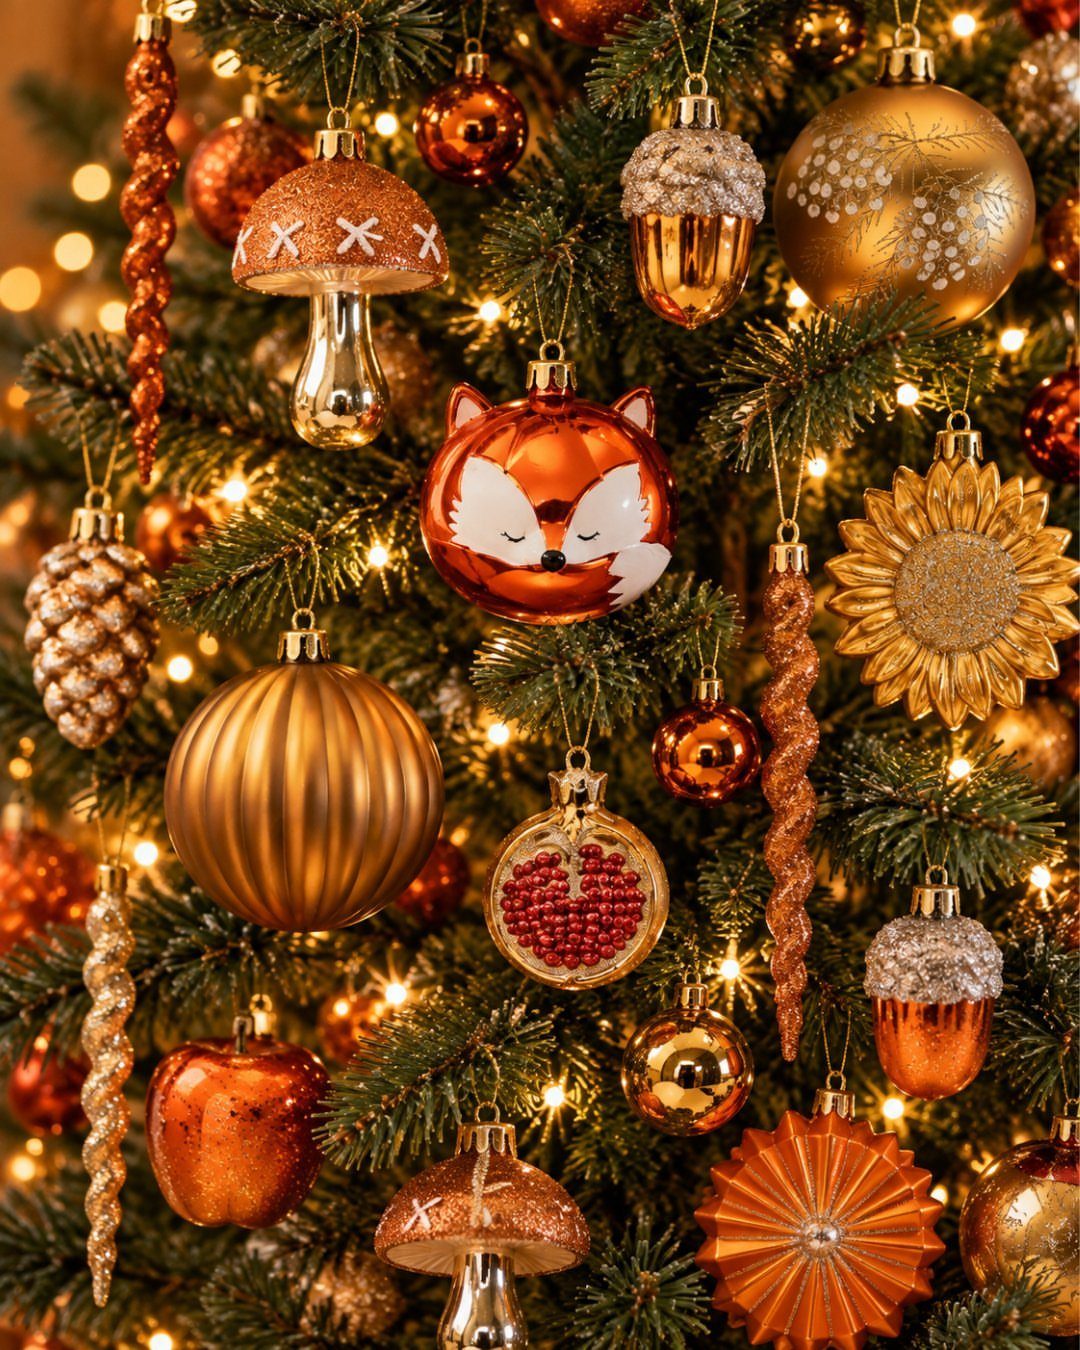
Dollar store fillable ornaments open up once you pop the cap, and that empty sphere becomes whatever scene you want.
I like the woodland route: a pinch of faux snow, a snip of evergreen from the craft store bunch, and a tiny mushroom or fox cutout tucked inside.
These suit anyone who wants a cohesive tree look without buying a dozen specialty pieces. A single fillable ornament and a few scraps from other projects, and you have an ornament that reads intentional rather than leftover.
Kids can stuff them; adults make them look styled.
Swap the woodland theme for dried citrus, mini pinecones, or a rolled paper village if your tree runs more rustic or more modern.
14. DIY Tassel Angels
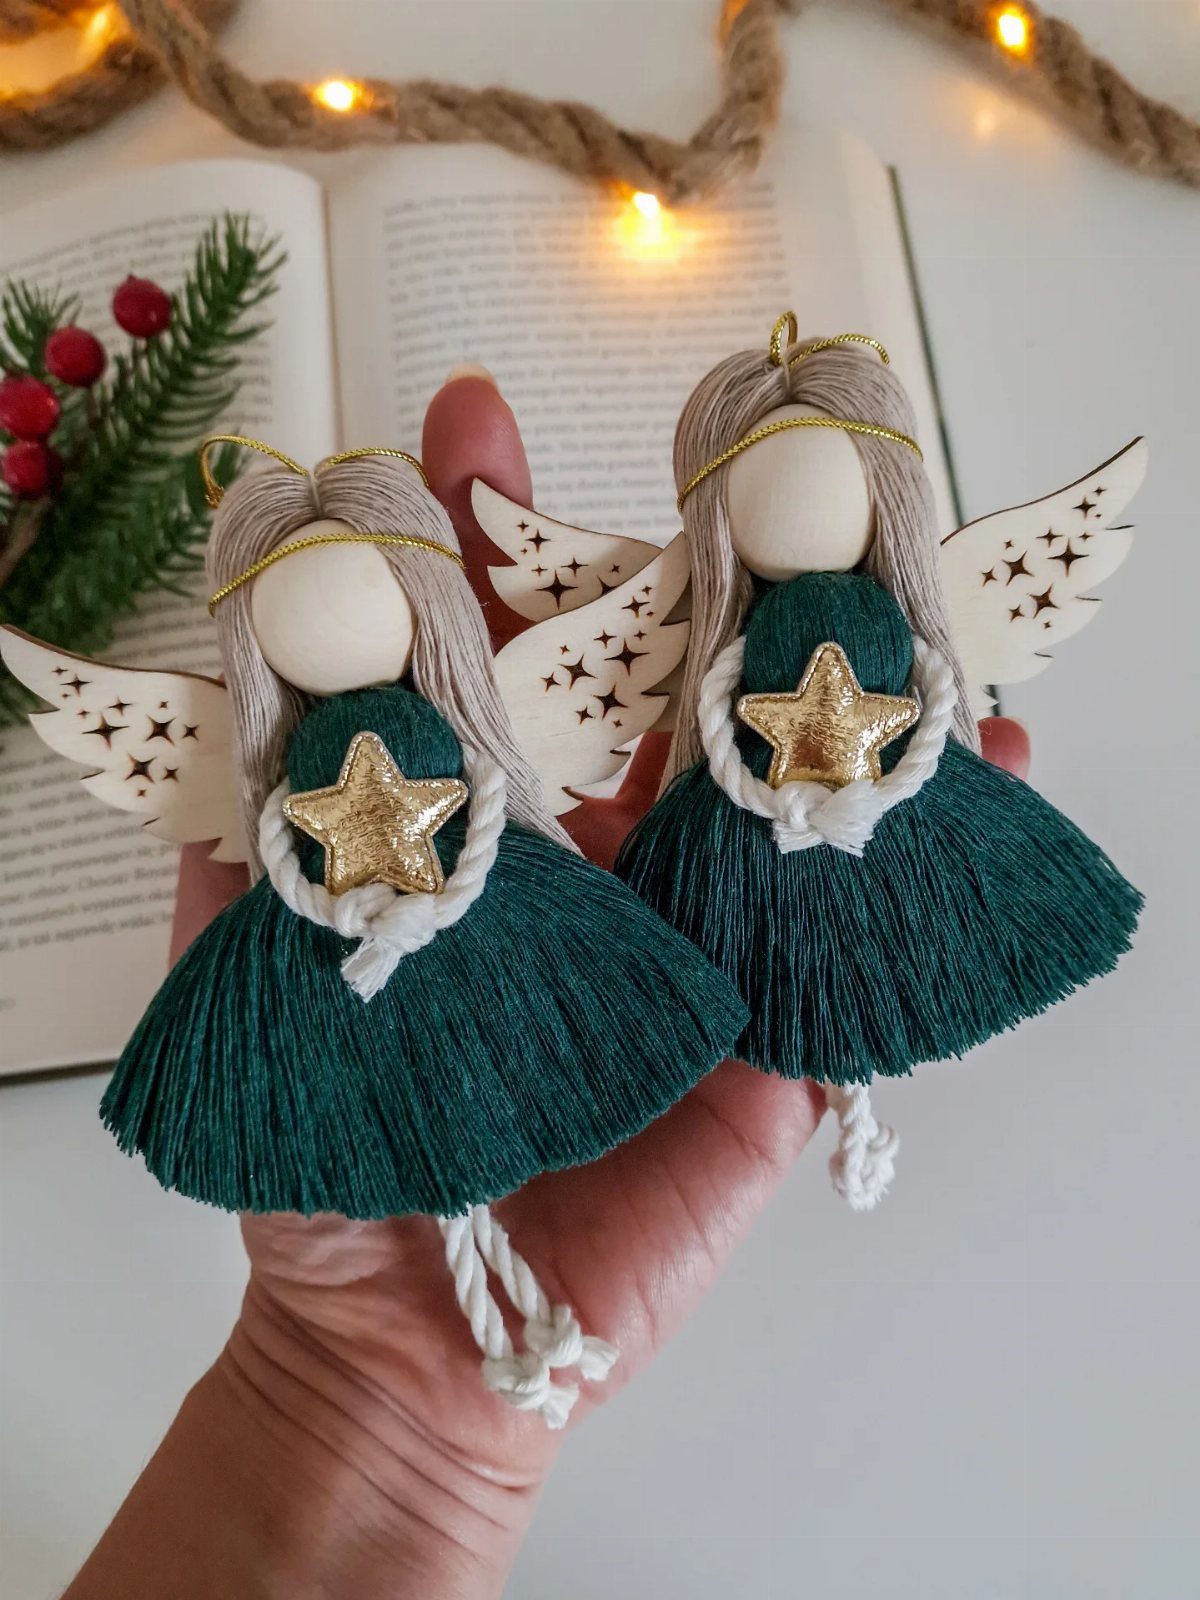
A wood bead for the head, yarn wound thick for the body, and a tassel skirt below: that is the structure, and the rest is detail.
The ones I have seen use wooden wings painted white, a gold star at the chest, and grey yarn for hair, but the colors are flexible.
The tassel forms from wrapping yarn around a card, tying the center, and snipping the ends.
This is a hand-sewing project, not a glue-gun project, which I would note for anyone who dislikes needle and thread. The finished angel hangs light and flat, good for a tree that already carries heavier glass or resin pieces.
I would pick this one for someone who wants a handmade topper they store flat and bring out year after year, rather than a store-bought angel that takes up half a box.
The scale matters: a tassel angel small enough for the branches reads ornament, not topper. Size up the bead and the wing span if you mean to crown the tree.
15. Doily Christmas Tree Ornaments
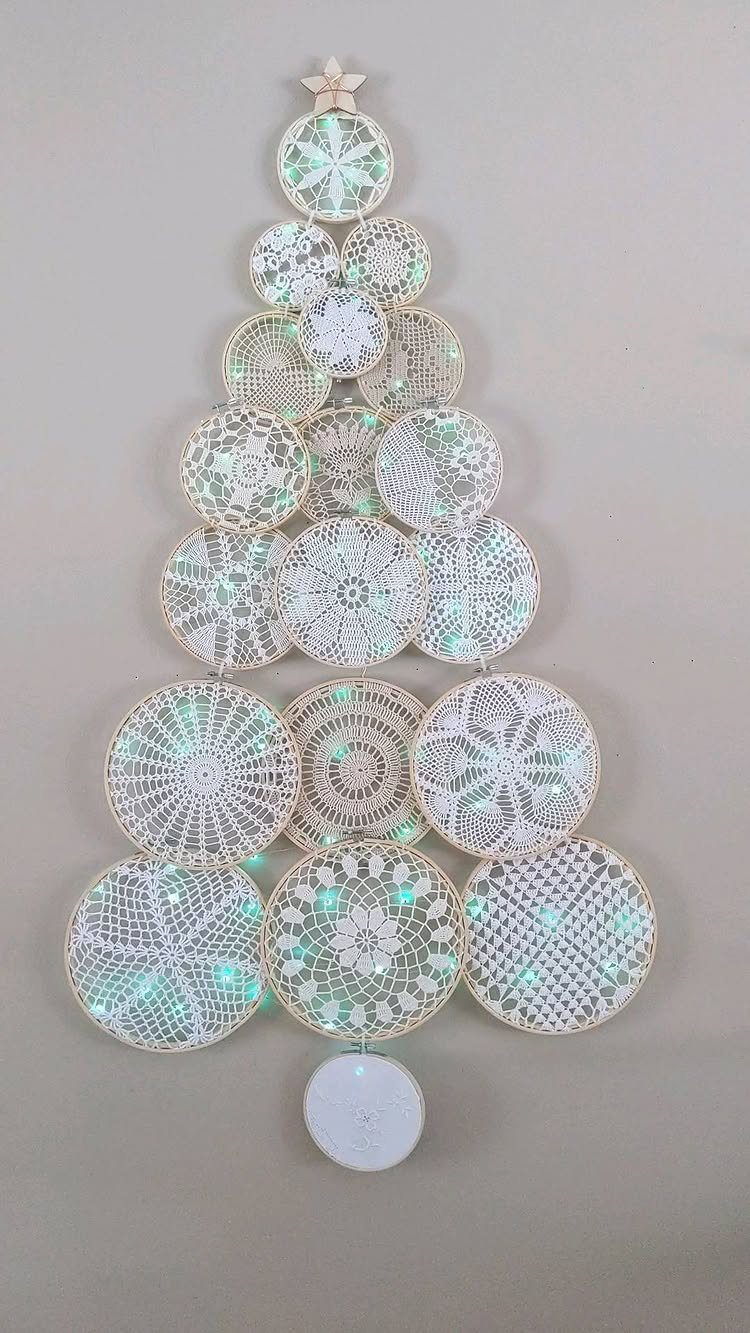
Paper doilies layer into a three-dimensional tree shape with a popsicle stick trunk, and the result is lighter than it looks. The doilies need no treatment; their own starch holds the fold.
A dab of glue at the center gathers each layer, and the smallest doily at the top takes a star.
This is the entry I would hand to someone with small children who still want the ornaments to look like something when hung.
The skill level is low, the mess is minimal, and the materials cost the price of a coffee.
I have seen versions where the doilies stay white for a snow-dusted look, or where they are tea-dyed first for an antique cream.
The finished tree is flat-backed, so it sits well against a branch rather than spinning. That is a small thing until you have an ornament that faces backward half the night.
16. Poured-Resin Ornaments
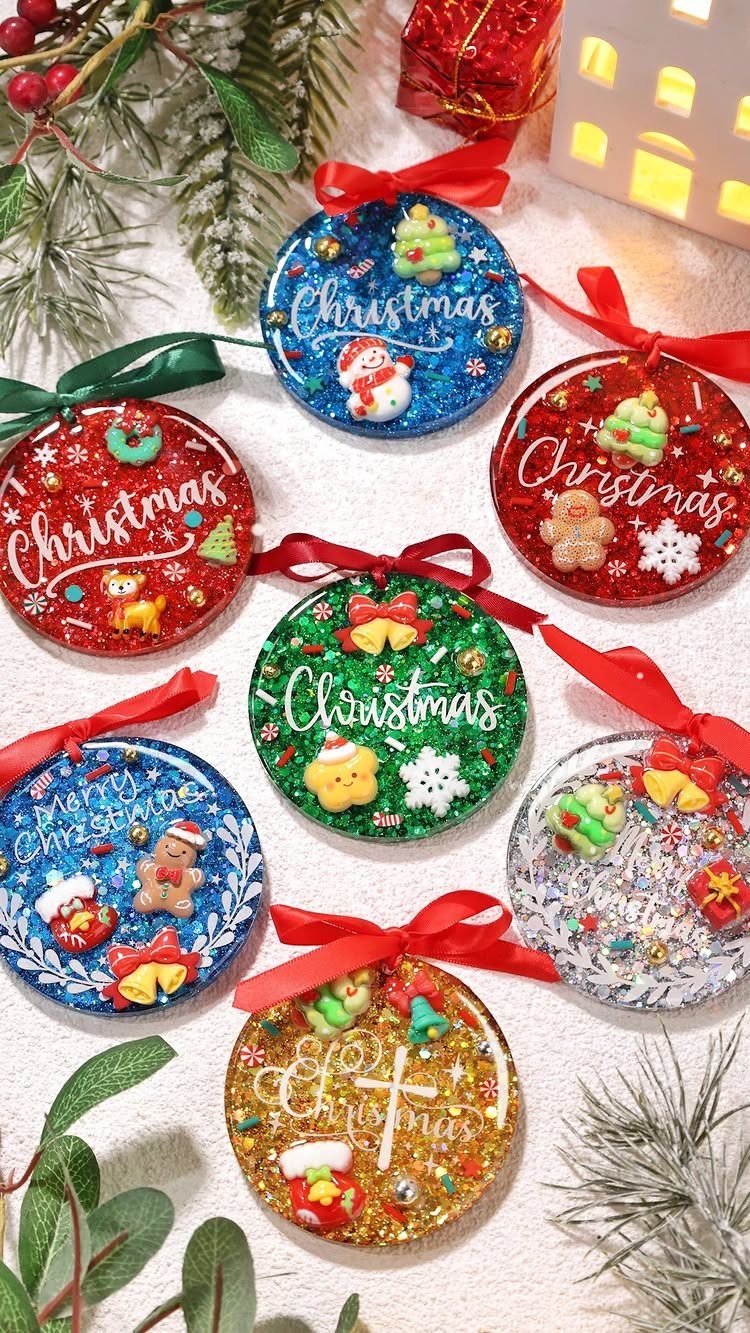
Clear resin over a wooden disk, with pigment and metallic flake swirled in while wet, gives a depth that paint cannot reach. A blow dryer on low moves the color into veins and pools before the resin sets.
The wooden base keeps the piece light enough to hang; solid resin would weigh down a branch.
The finish is glossy and modern, closer to a design shop piece than a craft fair piece, and that is the tradeoff. Resin demands a level surface, a dust-free hour, and gloves you do not mind ruining.
I would not start with this if my workspace was the kitchen table on a weeknight. The marbling hides small errors, though, which I count in its favor.
Test your pigment strength on a spare cup or coaster first. The resin reads deep and saturated; getting there takes more drops than you think, or fewer if your pigment is strong.
17. Glitter Scallop Ornaments
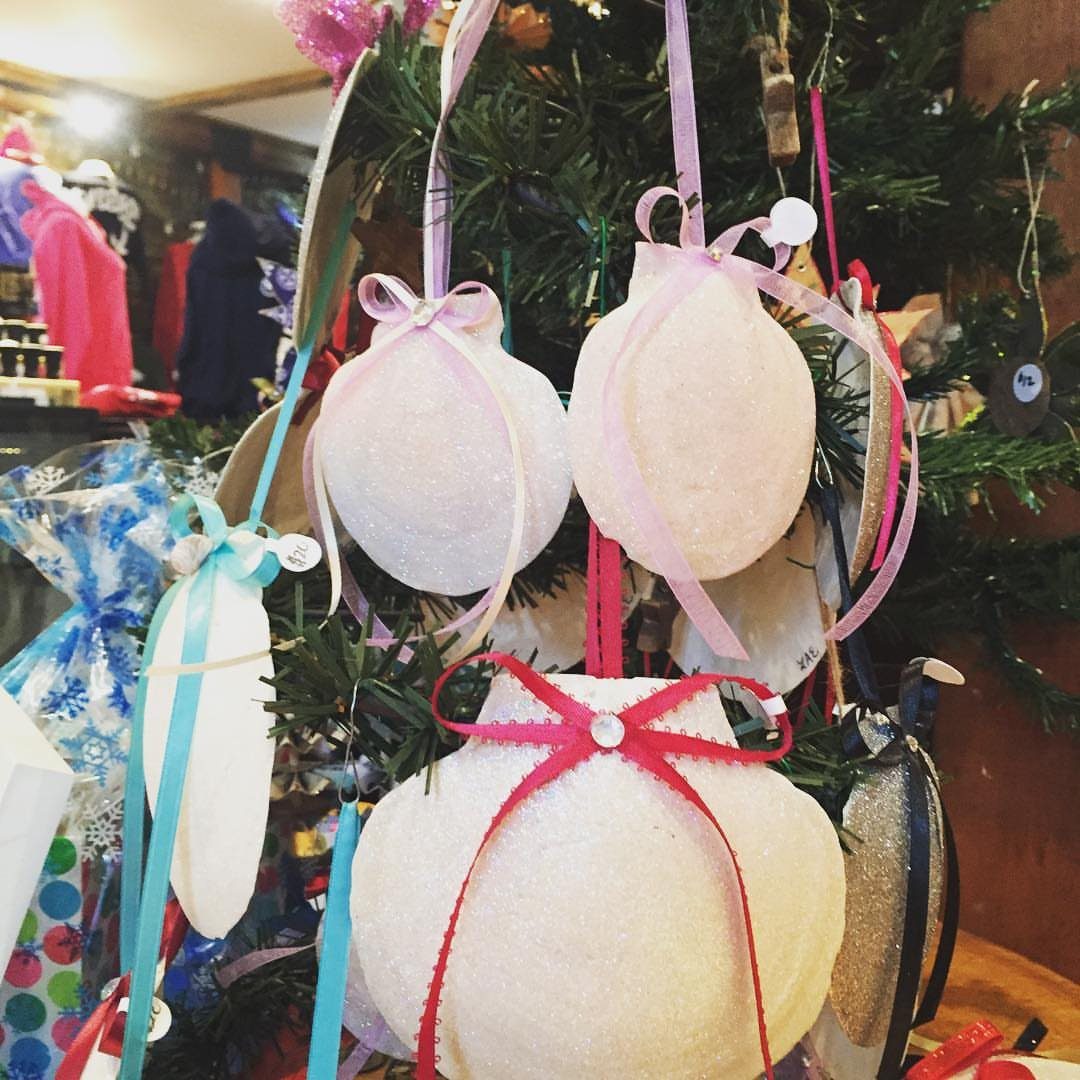
A scalloped edge and a glitter coat turn a simple sphere into something that catches the light differently from every angle.
The Pioneer Woman version uses a foam pouncer for the scallop pattern, decoupage to seal, and loose glitter on top. The result is textured and bright, not subtle.
I would not put these on a tree that runs all-gold or all-rustic; they read playful and they need company at that volume. The ribbon hanger is part of the look, so match or clash with intention.
The glitter sheds. That is not a flaw to fix; that is the nature of the material.
Store these in a box, not a bag, if you want the glitter to stay put for next year.
18. DIY Beaded Leaf Ornaments
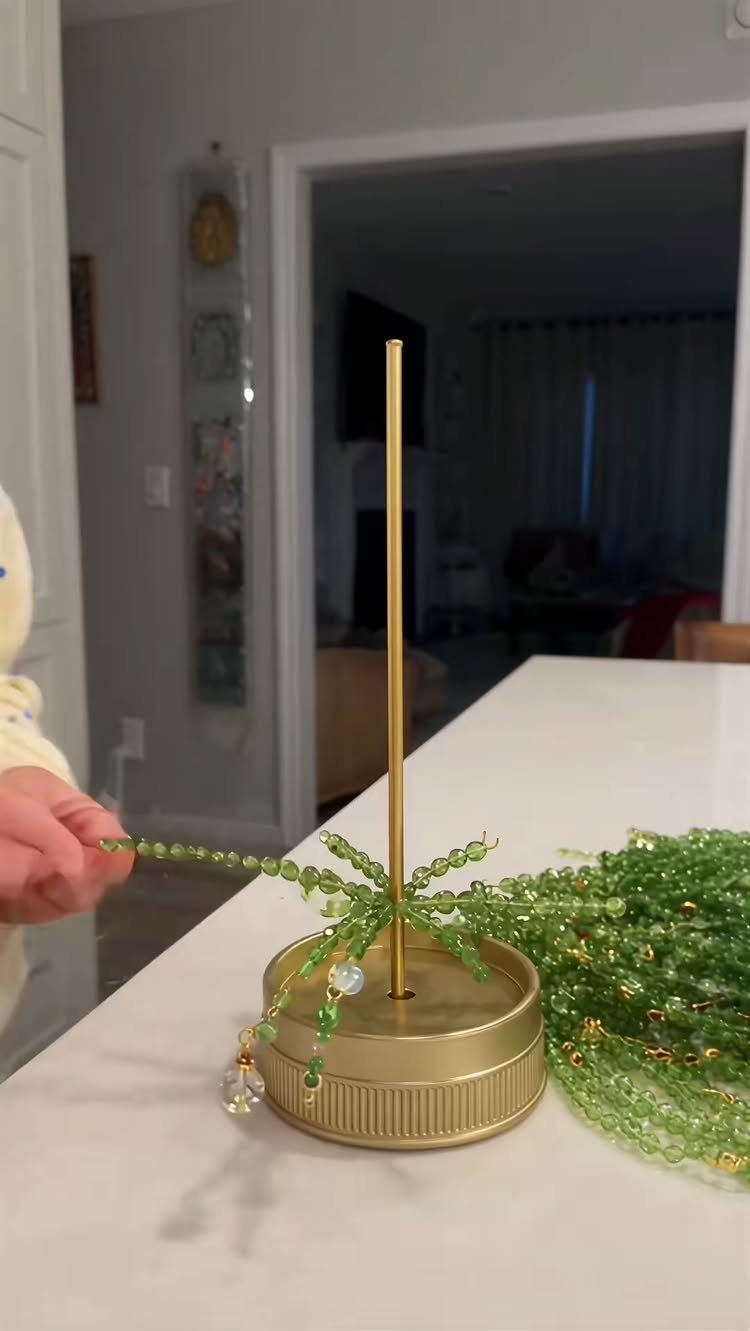
Wire bent to a leaf outline, with beads threaded and wrapped to fill the shape, gives an ornament that works for autumn and then stays out for December.
The green beads follow a real leaf’s color shift, darker at the spine and paler at the edge, though any gradient or solid color would hold the shape.
This is where I would send leftover beads from a bracelet kit or a single earring that lost its mate. The wire needs to be thin enough to thread through your smallest bead and stiff enough to hold the outline.
24-gauge craft wire needs doubling for larger leaves; 20-gauge holds its own but fights some bead holes.
The loop at the top is functional, not decorative, so make it small and tight. A large loop throws the balance off when hung.
19. DIY Beaded Moon Ornaments
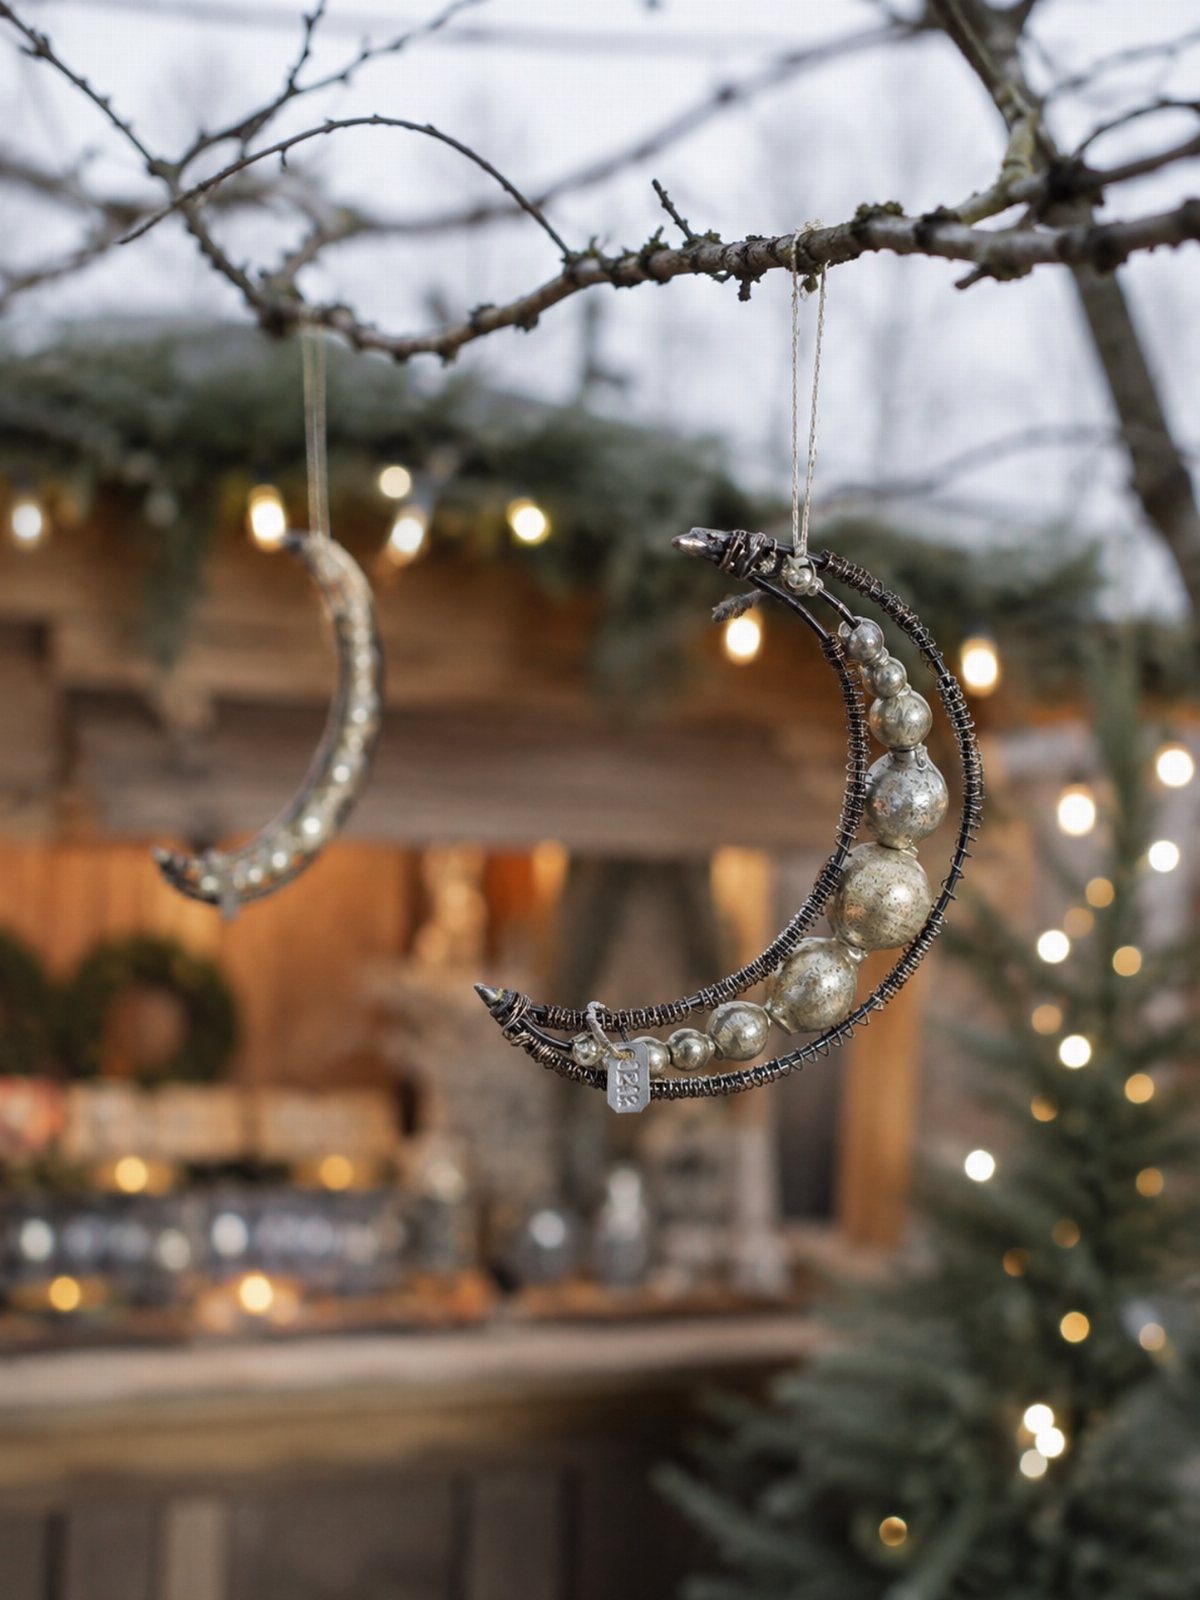
A crescent of wire and metallic beads catches light differently than any store-bought bauble. The shape reads as moon, but the beads give it weight and texture you want to run your fingers across.
Gold and silver metallic beads against dark wire give strong contrast, though birthstone colors would make these into markers for birthdays or anniversaries.
Felt backing is an option if you want to hide the wire runs and give the shape more body.
These suit someone who has patience for beading but wants a shape simpler than a wreath. One evening gets you two or three moons, and the repetition is calming rather than tedious.
I’d hang these on a tree with white lights and not much else; they need the space to read as moons and not abstract curves.
20. DIY Salt Dough Ornaments
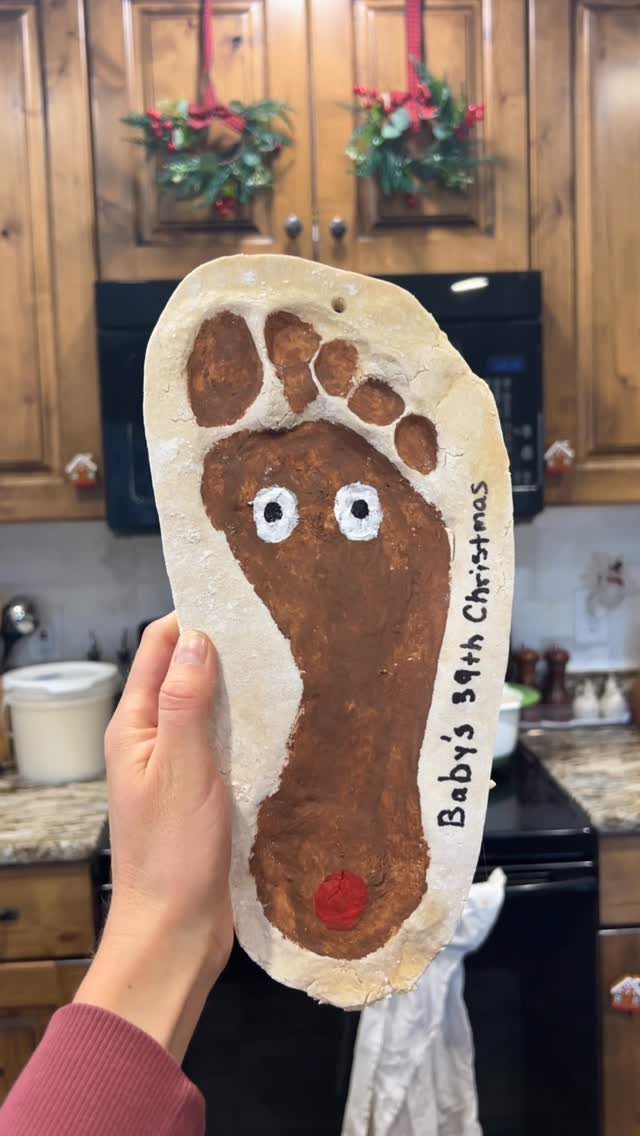
Salt dough is the one Christmas craft I return to when nieces and nephews visit, because the material forgives almost everything.
Flour, salt, and water in equal parts make a dough that bakes hard enough to last, and you can press in handprints or footprints while it is still soft.
Painting happens after baking, and acrylics hold fine. A hole poked before drying lets you thread ribbon later.
What works for babies works for dogs too, though getting the paw print flat takes an extra pair of hands.
These crack if rolled too thin or baked too hot. Half an inch is the safe thickness, and the oven really does need to stay low and slow.
For a family with small children, this is the project that occupies an afternoon and produces gifts for grandparents. The dough keeps a day wrapped in the fridge if you want to split the work.
21. DIY Beaded Spider Ornament
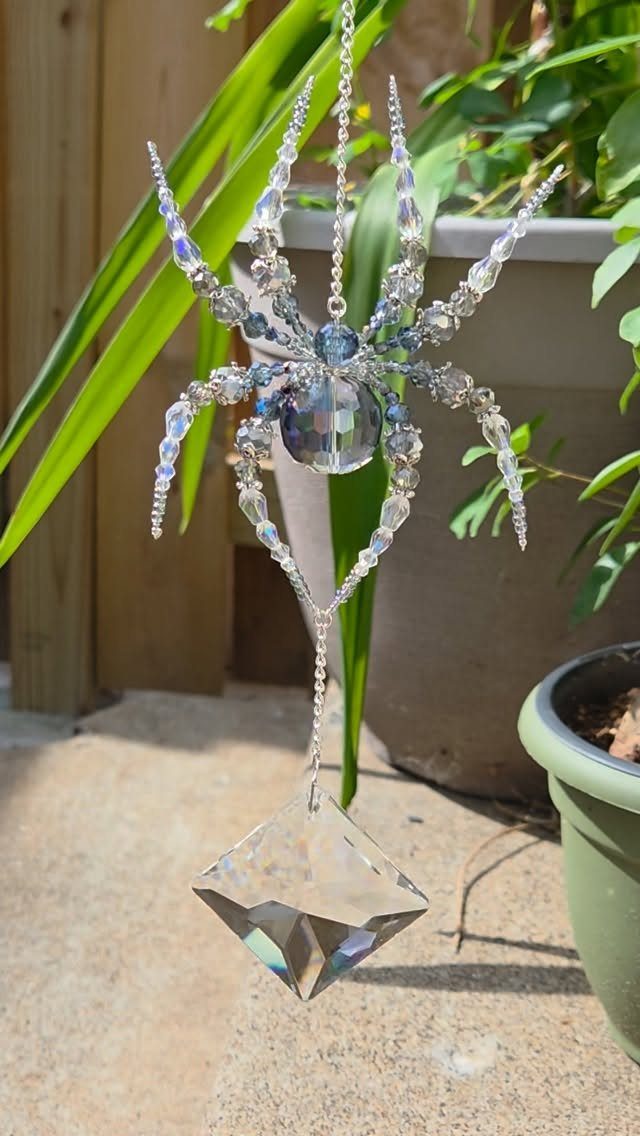
The spider carries a story: a poor family’s tree, visited by spiders who left cobwebs that turned to silver and gold overnight. Eastern European in origin, and useful if your tree trends slightly dark or gothic rather than purely cheerful.
Beaded spiders build from a central body bead with wire legs strung with smaller beads and crystals. Legs are the fiddly part; needle-nose pliers help bend the wire at body and foot.
This is the ornament for someone whose tree has skulls, black glass, or a general witchy bent the rest of the year. It also works as a gift for the person who already owns every conventional decoration.
One spider per tree is enough; they read as signature pieces rather than repeats.
Materials and Tools
Resin work needs more setup than paint or paper routes. Epoxy resin and hardener come in two parts you mix by ratio, not by eye, and the measuring cups matter as much as the resin itself.
Silicone molds shape the pour; wood disks keep the finished piece light enough for branches. A small torch or heat gun removes bubbles before the resin sets, and tweezers place inclusions like metallic flake without leaving fingerprints in the gloss.
Pigments run stronger than you expect, so testing on a spare surface first saves a whole ornament. Sandpaper smooths edges after demolding, and ribbon or hooks finish the piece for hanging.
Gloves are non-negotiable; resin does not wash off.
For the non-resin projects, felt and wood slices need less gear. A hot glue gun covers the yarn balls, the gnome bodies, and the tassel angels, though the angels themselves sew better than they glue.
Crafting with Friends
A Christmas ornament party works best when everyone works on the same project, not when one person waits for resin to cure and another is already done.
The yarn ball ornaments and the popsicle stick sleds suit a group because the steps repeat and the timing stays loose. Set out bowls of pre-cut yarn, glue guns, and jingle bells; the conversation carries the gaps while glue sets.
The resin and alcohol ink projects need ventilation and drying space you cannot share around a kitchen table. Save those for a solo afternoon or a pair of crafters who do not mind working in shifts.
The beaded snowflakes and the felt hearts travel well, so a friend could string beads at your table while you stitch hearts, then swap.
Food complicates the party. Glitter sheds, hot glue strings, and resin residue do not mix with snacking.
I would serve drinks after the crafting, or set a separate table entirely.
Upcycling Ideas
The gnome ornament starts with a shipping box triangle; the tassel angel’s yarn can come from a half-used skein.
Cardboard, twine, and fabric scraps are the materials already in most junk drawers, and the projects read better for looking slightly mismatched.
Egg cartons press into small cups or flower shapes with a coat of paint.
The fillable ornaments from the dollar store pair with dried citrus or mini pinecones from a walk, which costs nothing and ties the tree to a particular December.
Leftover bracelet beads become the leaf ornaments; the yarn ball ornaments specifically call for scraps too small for a full project.
The upcycling is in the approach more than the material.
A 2-inch triangle from cardboard looks intentional once wrapped in twine; a scrap of red fabric with white dots reads as mushroom cap because of how it is placed, not because of what it cost.
Green twine and mini Christmas baubles transform plain old Mason jar screw lid into the cutest little wreath ornaments.
Personalization Ideas
Names and dates turn the Cricut ornaments from generic to specific; the machine cuts lettering I would never manage freehand. Metallic vinyl catches tree light and reads as intentional against plain glass or acrylic blanks.
The felt hearts flip from Christmas to Valentine’s Day with a date stitched in pink thread; the same shape holds two holidays in one box.
Birch slices take paint well, so a family initial or a short word fits where a full scene would crowd.
The resin ornaments hide personalization inside the pour: a tiny photo, a scrap of handwritten recipe, a pressed flower sealed under clear coat where only the maker knows to look.
The Mason jar snow globe holds more room for story.
A miniature house with the recipient’s actual door color, a tree from a trip you took together, a tiny figure of their dog: these are the details that make the ornament worth unpacking every December.
Frequently Asked Questions
What are some DIY Christmas ornament ideas for adults?
Beaded snowflakes, felt hearts, painted birch slices, and alcohol ink ornaments all work well for adults who want something beyond the grade-school craft look.
Resin snow globes, wire-and-fabric candy canes, clay mushrooms, and poured-resin disks with metallic flake all work well as adult-level projects. Most need only a weekend and supplies you can reuse for other projects.
What are some easy DIY Christmas decorations I can make myself?
Yarn-wrapped clear ornaments, paper doily trees on popsicle sticks, and gnomes from cardboard and twine all come together in under an hour.
The doily tree costs about the price of a coffee and needs no skill beyond folding and dabbing glue.