
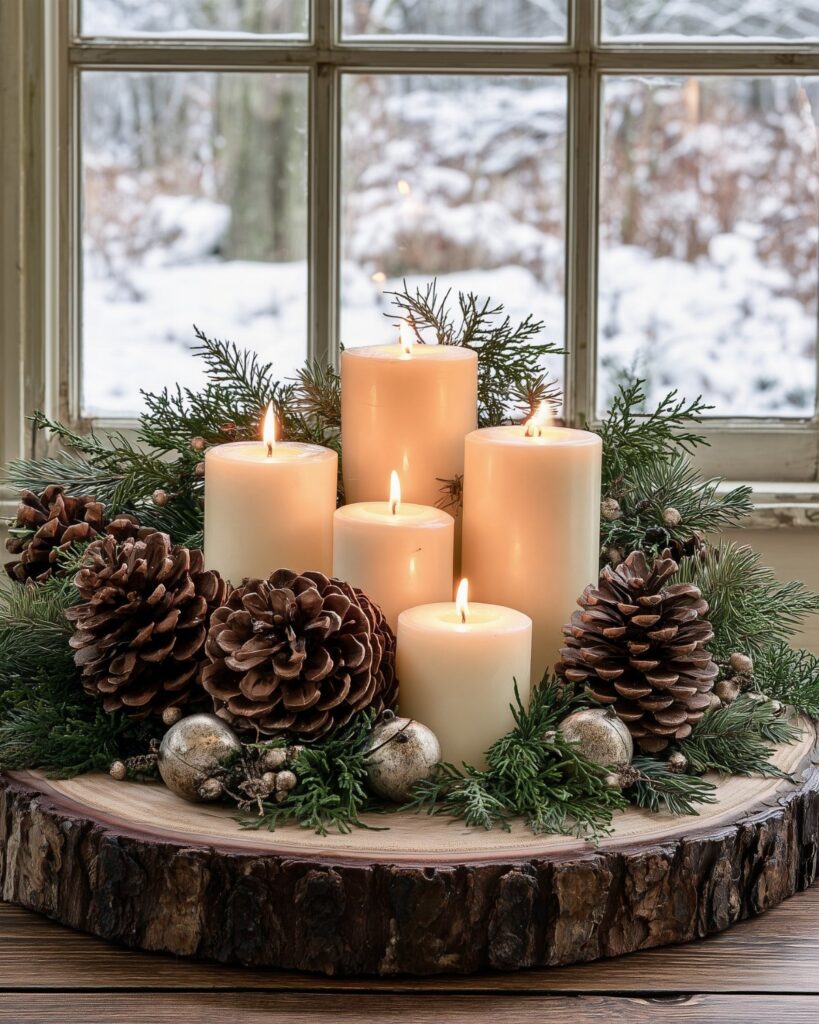
These ideas run from a half-hour wreath to a full evening with felt and glue, and the deciding factor is how much of your December you want to spend on them versus how much you want them to last.
Someone with a single free afternoon and a coffee table to fill needs a different project than someone ready to collect cones by the bag and paint them white.
The dough bowl centerpiece that leaves room for actual dinner plates, or the pinecone owl that needs a Lia Griffith template traced onto two colors of craft felt, shows the range in one list.
1. Make a Wreath from Pinecones
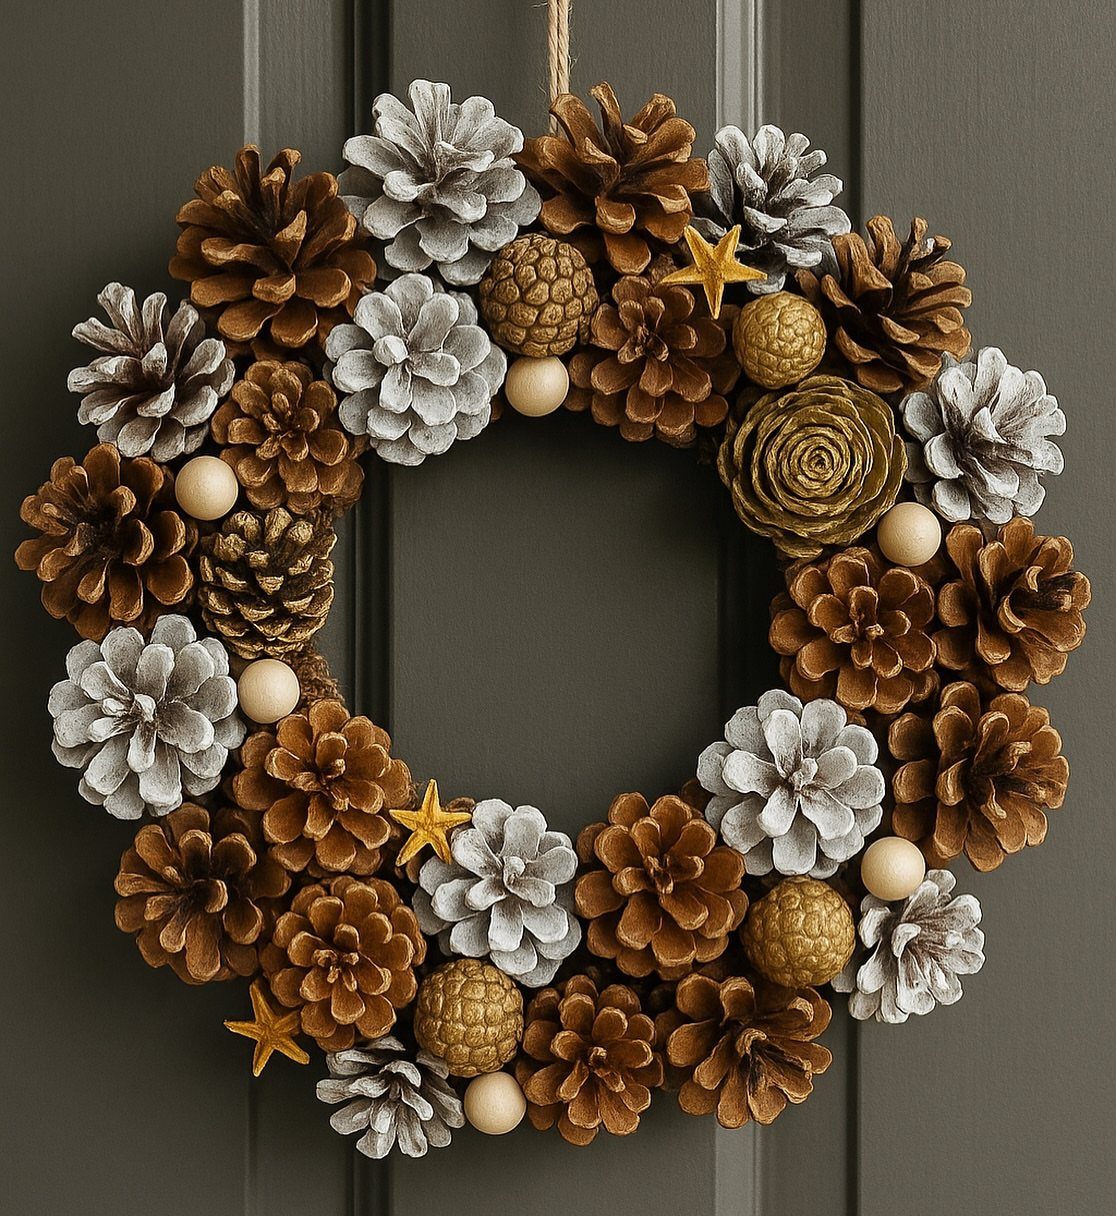
A wreath built entirely from pinecones takes more cones than most people guess, and the work is slow. Mini cones pack tighter and leave fewer gaps; regular cones need fewer pieces but show more of the wire between them.
Either way, a grapevine or foam ring saves hours over wiring each cone to its neighbor.
I’d start with a mix of brown, bleached, and gold cones for variation without paint. Fill thin spots with wooden beads or small stars so the wreath stays full all around.
The whole project stays cheap if you collect cones yourself, and it lasts years.
This one suits a front door that gets actual weather; unlike greenery, it won’t dry out by New Year’s.
2. Attach Pinecones to a Wreath
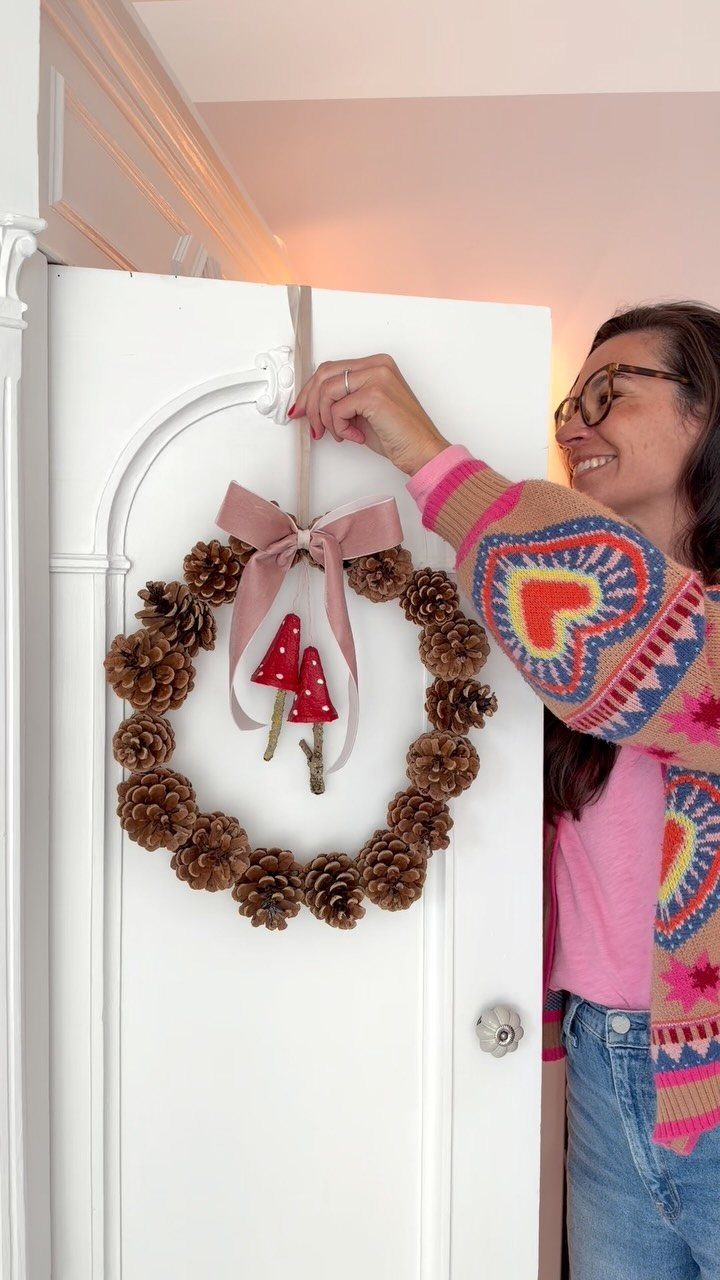
Wiring pinecones onto an evergreen wreath is the faster path to the same rustic look. A basic faux greenery wreath from a craft store gives you the shape; the cones add texture that makes the plastic needles read as real.
Dark cones tend to sink into dark green, so I add something light: white berries, a pale bow, or snow-flocked cones. A bold bow and tiny mushroom ornaments prove you can take this in any direction you want.
Cones wired at different angles catch light differently.
This takes an hour, not a weekend, and the wreath base stores flat for reuse.
3. Make a Pinecone Snowman Ornament

A pinecone snowman starts with a single cone held upside down, the wide end up. A felt ball or small wooden bead becomes the head; seed beads or a marker dot work for eyes.
Felt strips or a scrap of plaid flannel look more like actual winter than a feathery scarf.
I tried pipe cleaner arms once and they kept catching on the tree. Now I skip arms or use thin twigs glued tight.
Kids can manage the gluing with supervision. The whole ornament costs pocket change if you already have the felt.
I’d make three or four at once; they look better in a cluster than alone.
4. Pinecone Garland
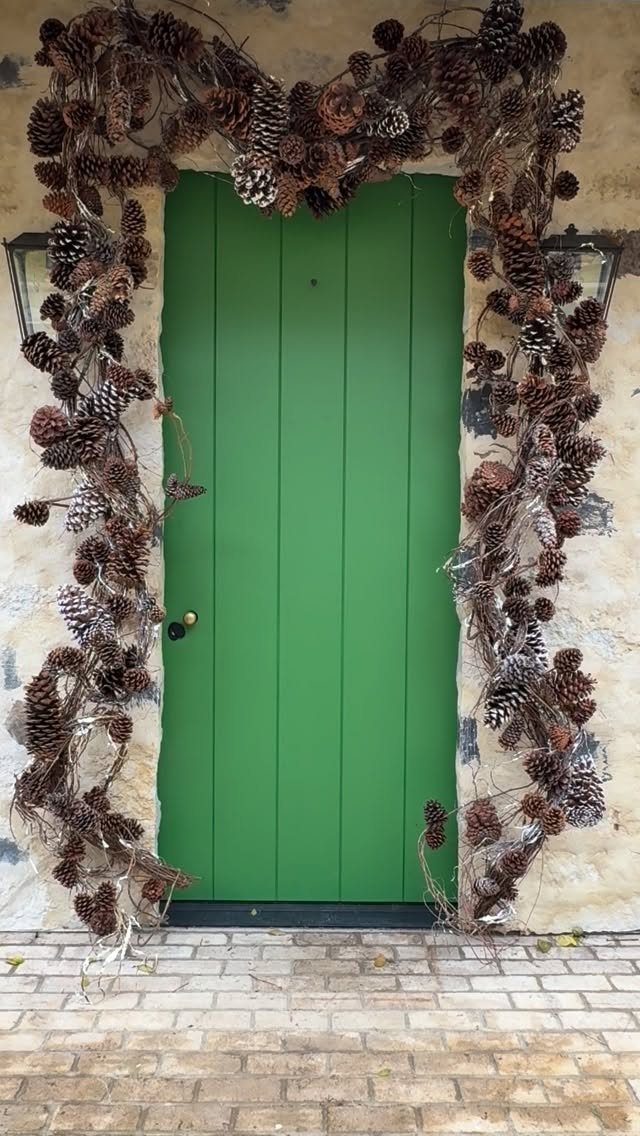
A garland of real pinecones and twigs has weight to it. A garland hung in a heart shape around a door needs a sturdy nail or hook at the center point; it will sag otherwise.
For a mantel or hutch front, I let it run straight and add battery lights woven through. The twigs keep the cones from knocking against each other and sounding like a wind chime every time someone walks by.
Kids can help string this if you pre-drill the cones. Felt pennants between the cones, like one version I’ve seen, add color but double the work.
Plain cones and twigs suit me better.
5. Decorate a Christmas Tree
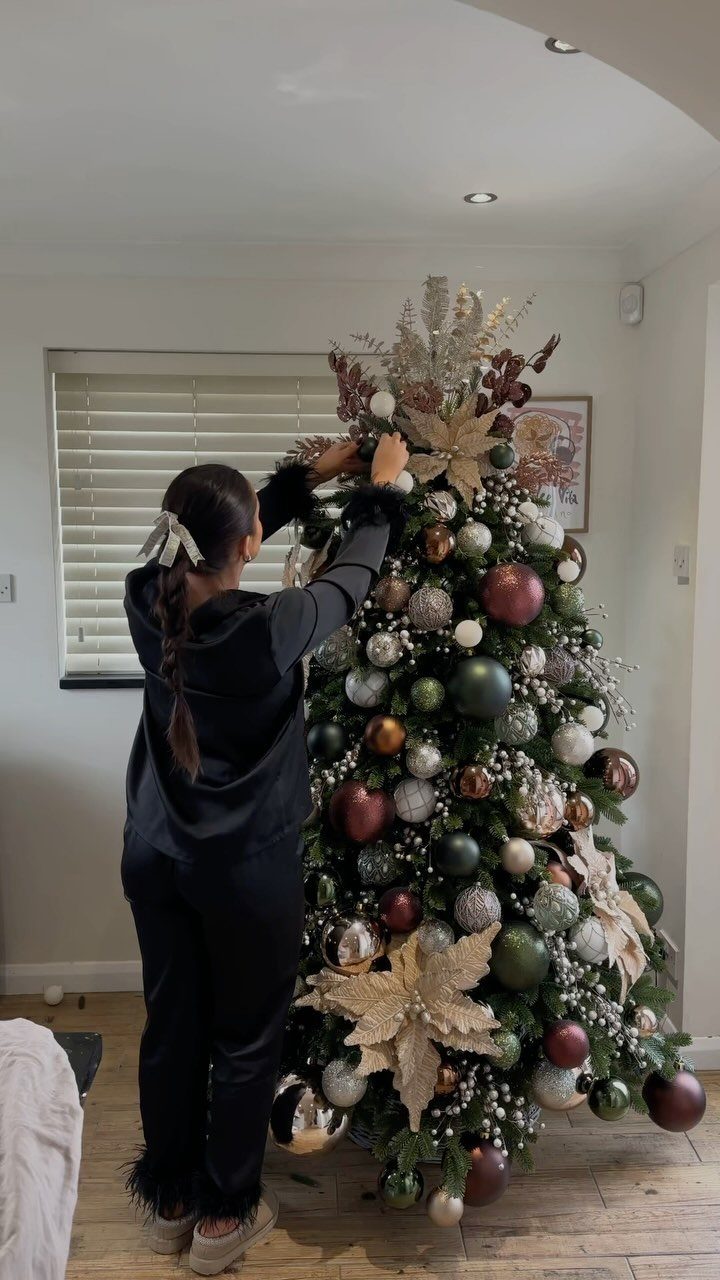
Pinecones on a Christmas tree solve the problem of filler ornaments, the ones you buy cheap because you need volume. They’re free, they weigh almost nothing, and they break up the shine of glass balls.
I turn some cones so the bottom faces out; it reads like a wooden flower and catches light the top never would. Mixing cone sizes matters more than mixing types.
Small ones tuck deep where branches thin; large ones sit on the outer edges.
A wire loop or hot-glued twine hanger works. Flocking the cones first, or painting them gold, pushes them further from "yard debris" toward "intentional decor."
Either way, they store in a paper bag year to year.
6. Make a Pinecone Christmas Tree
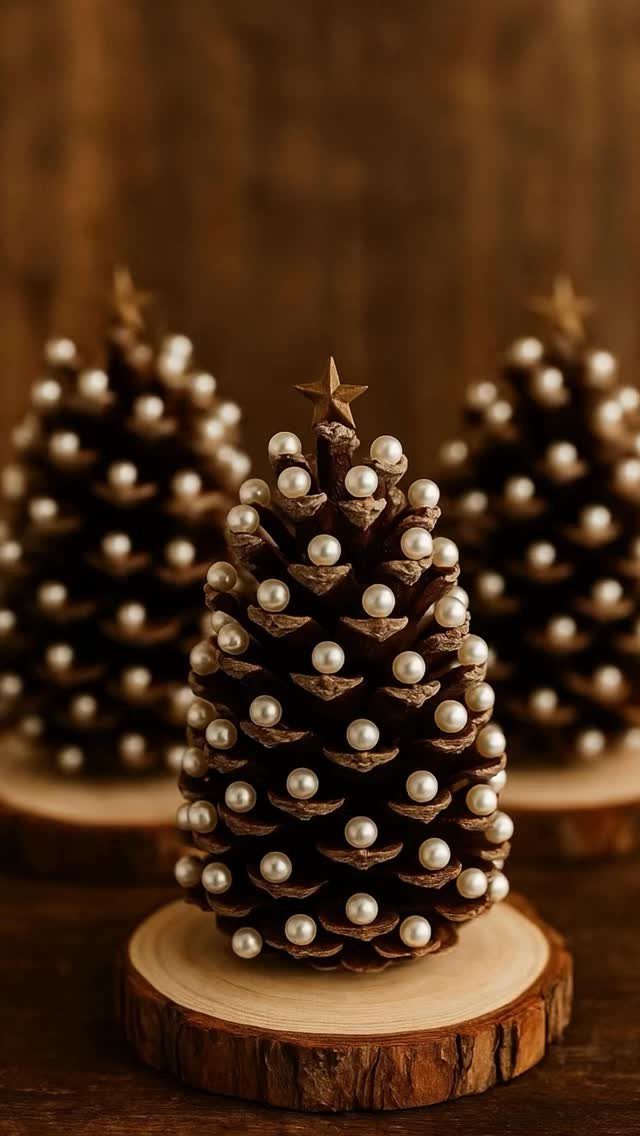
Gluing pinecones into a cone shape, small to large from top to bottom, builds a miniature tree that sits on a shelf or groups on a mantel.
Wood slices make solid bases, and tiny beads or stars dress the tree up as much or as little as you want.
A foam cone from the craft store is the armature; hot glue sets fast but burns fingers, so I use tacky glue and pin the first few rows while they dry.
The gaps between cones show less if you choose similar sizes for each row.
Three at staggered heights look like a small forest. One alone is lost on a large surface.
7. Decorate with Pinecones on the Mantel

A mantel already dressed in garland gains depth when you tuck pinecones between the leaves rather than lining them up like soldiers.
I like to stand a few on their bases so the stem end shows; it reads more found-in-the-woods than store-bought.
Vary the sizes and let some lie on their sides in twos or threes. A single big sugar pinecone can anchor a whole corner if the rest of the mantel stays simple.
Wire smaller cones into a greens swag if you want them to stay put through the season. Dried hydrangeas and a strip of burlap ribbon layered in with the greenery round out the texture without adding cost.
This suits renters who can’t hang much; the mantel carries the whole statement.
8. Paint Pinecones
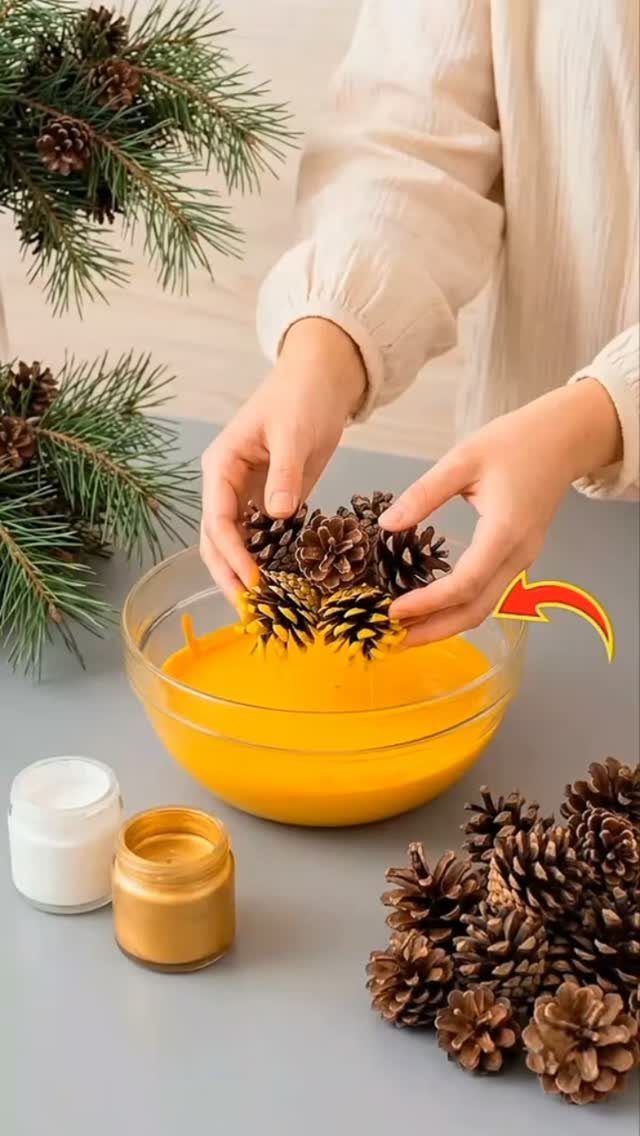
Dipping pinecones into paint takes almost no time and changes their whole attitude.
White acrylic thinned with water gives that snow-dusted look that reads winter rather than Christmas specifically; a batch kept in a jar from year to year saves mixing again.
Work over newspaper and hold the cone by the tip. Roll it through the paint, then tap the stem against the bowl edge so it doesn’t pool in the scales.
Gold or yellow reads cheerful on a tree; an ombre from dark at the base to light at the tip takes two coats and looks intentional enough to gift.
Glitter while the paint is tacky if you want sparkle without the full craft-store effect. Bleached or flocked versions are another route, though paint is the one you can do with what you already own.
9. Create a Christmas Pennant Garland
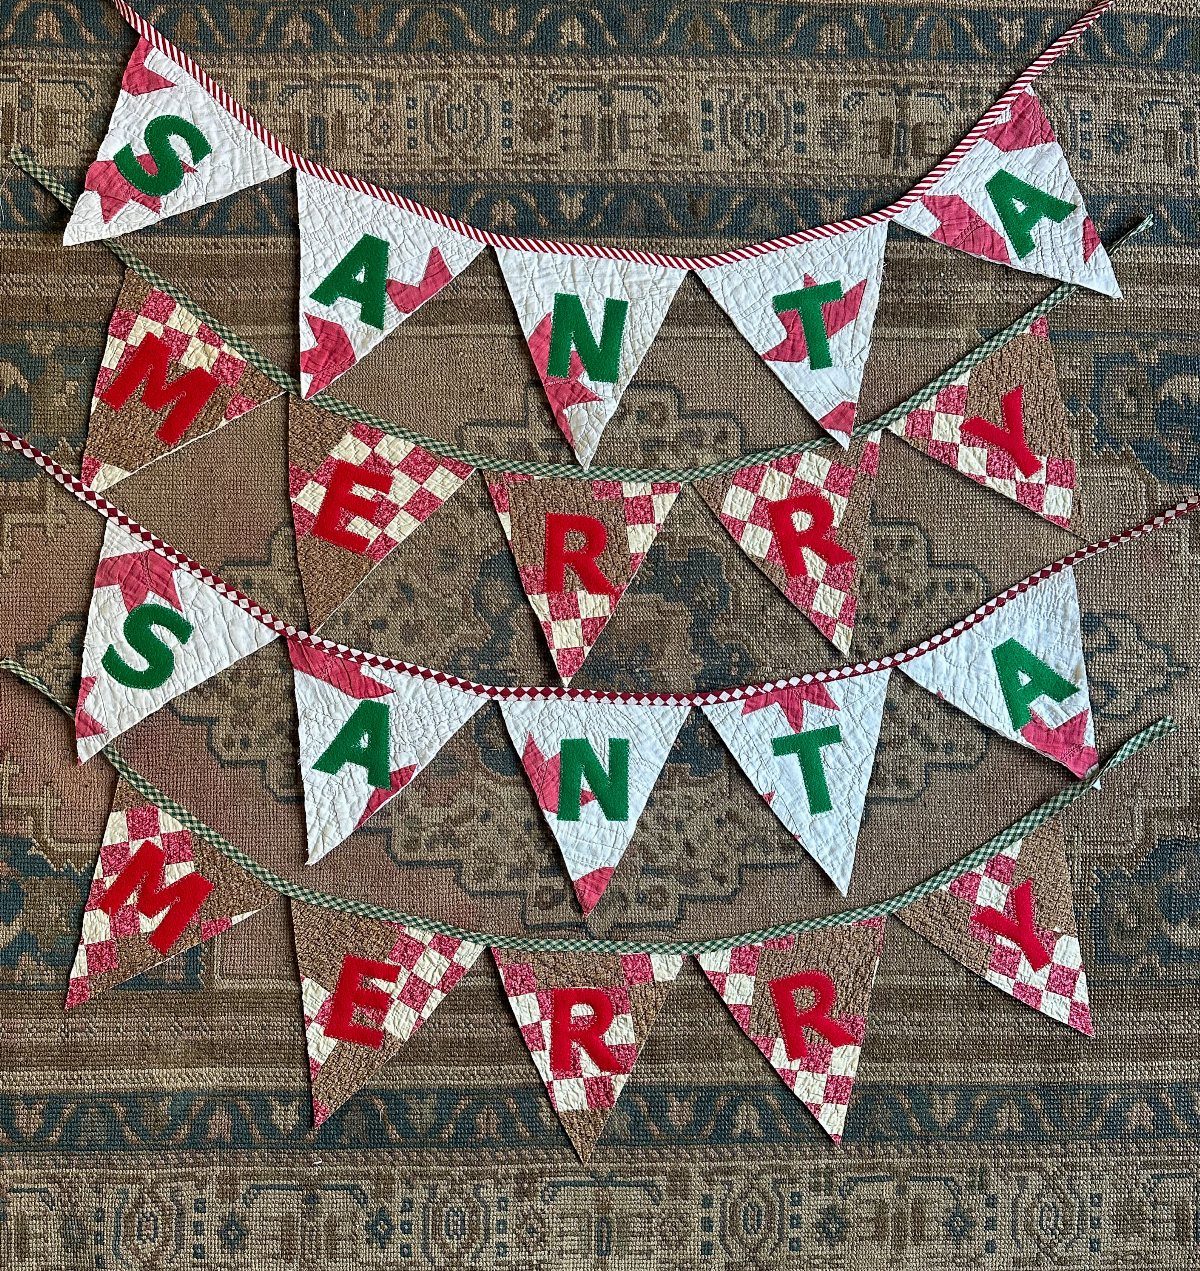
Felt pennants strung with pinecones make a garland that works across a doorway or the front of a hutch where a full wreath would hang too heavy.
Cut felt into 1.5 by 6 inch rectangles, notch both ends to flag them, and fold each over twine with a dab of hot glue.
Alternate pinecone and pennant; the cones add weight that keeps the line from fluttering every time someone walks past.
Red and green lettering on white felt is traditional, but plain cream felt and brown cones make a look that stays up through January.
Little hands can manage the folding and gluing while an adult handles the hot glue. The whole project runs under an hour and stores flat in a shoebox.
10. Decorate a Coffee Table
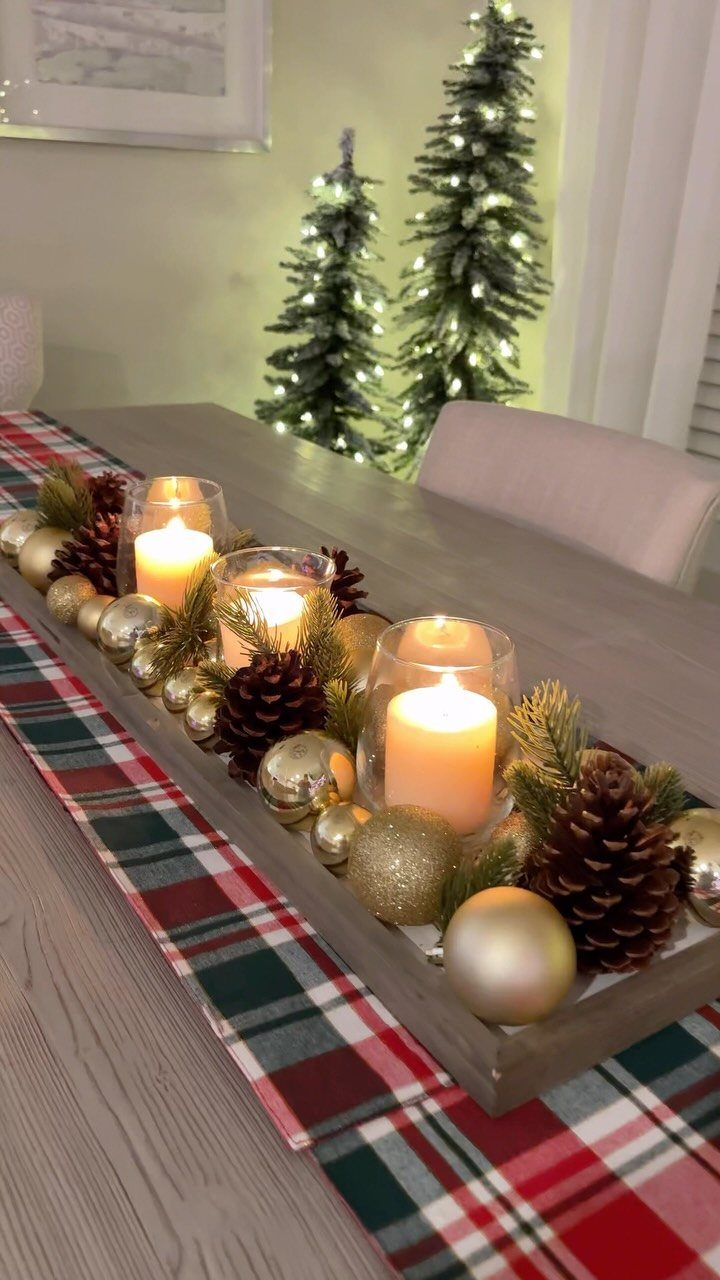
A dough bowl on the coffee table collects the small stuff of the season into one contained moment.
Pinecones fill the bulk of it cheaply; I add a handful of rusty jingle bells for the color shift and the faint rattle when someone sets down a mug.
Three votives in glass holders, a few evergreen sprigs tucked between the cones, and gold ornaments scattered where they catch the lamp light finish the arrangement. The plaid runner underneath grounds it so nothing looks lost on a big table.
This is the centerpiece you build from what you already have, or nearly. The dough bowl itself is the only piece that costs, and a wooden trencher from a thrift store works the same way.
11. Use Pinecones for Placeholders
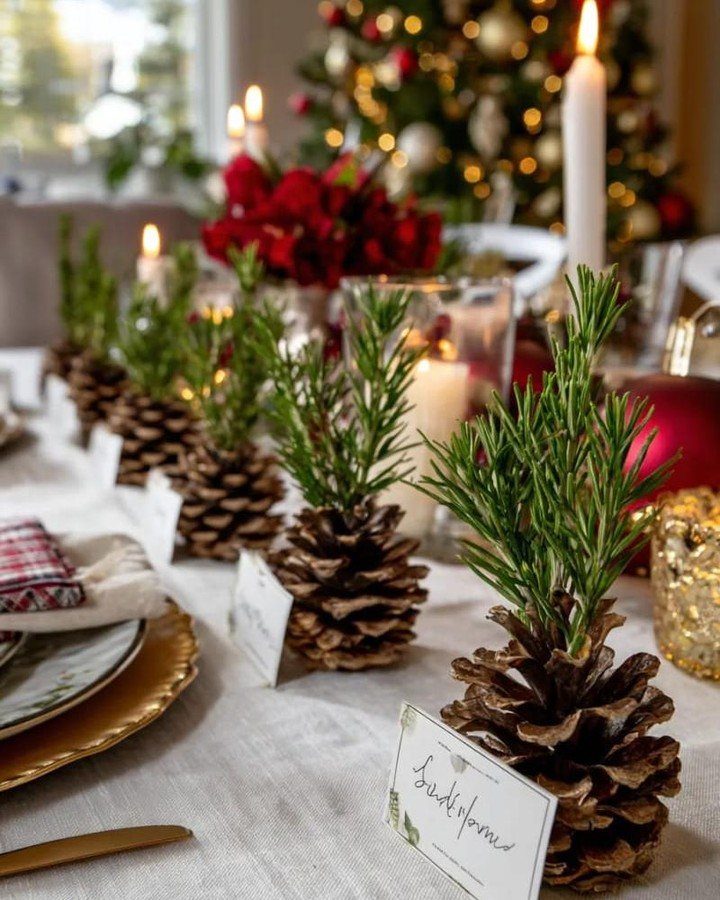
A pinecone place card holder costs nothing and takes less time than printing the names.
Tuck a folded card between the upper scales where they open wide enough to grip; a sprig of rosemary behind the card adds scent and keeps it from sliding.
I set one at each plate for a winter dinner and found the uneven heights more interesting than matching holders would have been. The stem end sits flat, so they stay put on a cloth or bare table.
Print names in a clear font and cut the cards small; the cone is the visual weight, not the paper. This suits a sit-down dinner where you want the table to feel considered without a centerpiece fight for space.
12. Create a Centerpiece
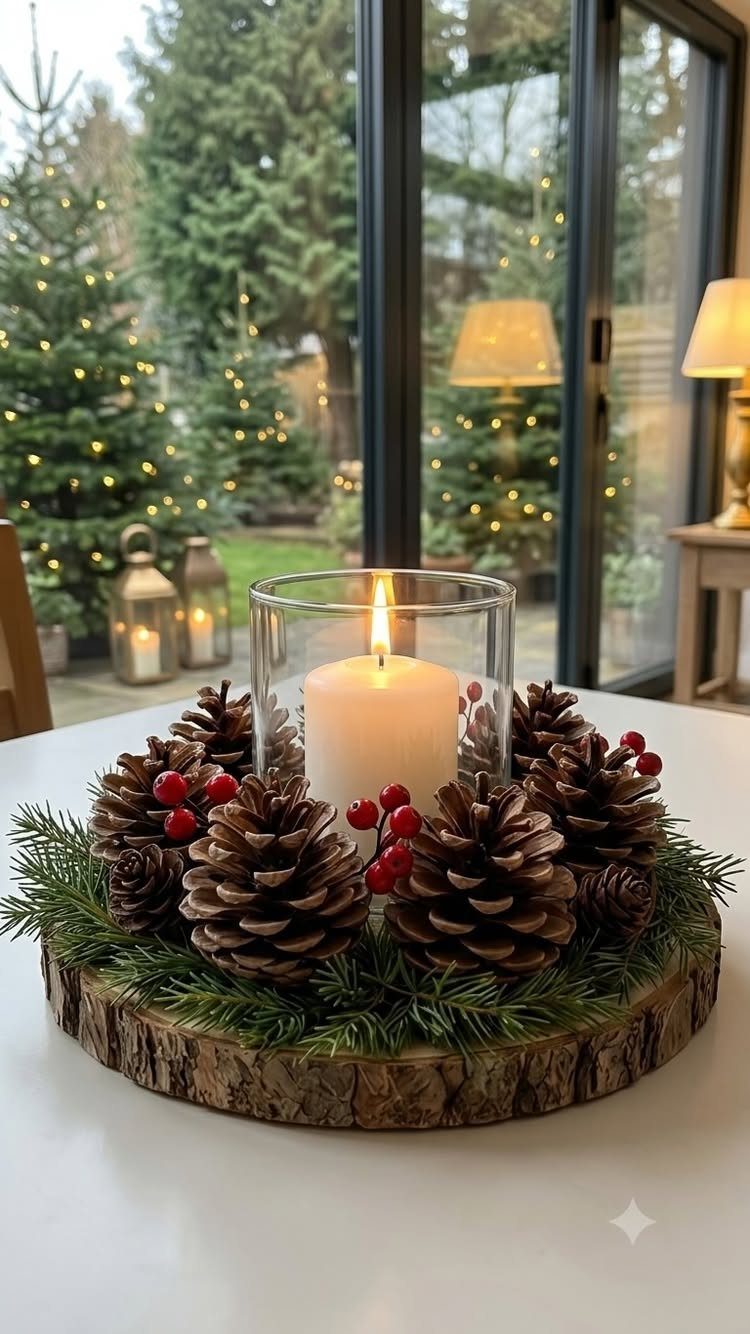
The pinecones fill the gap between candle and edge so you need less greenery than a full arrangement would; evergreen sprigs tucked between them carry the scent.
A mirrored tray underneath gives a cleaner look that reflects the flame, though the wood slice reads warmer against a white table. Red berries add the color hit; without them the whole thing goes brown and quiet.
A bowl or basket works the same way if you don’t have the slice. Keep the candle in glass; pinecones are flammable and you want the barrier.
This scales to a long table with repeats, or sits alone on a small table without dominating conversation.
13. Decorate with Pinecone Vignettes
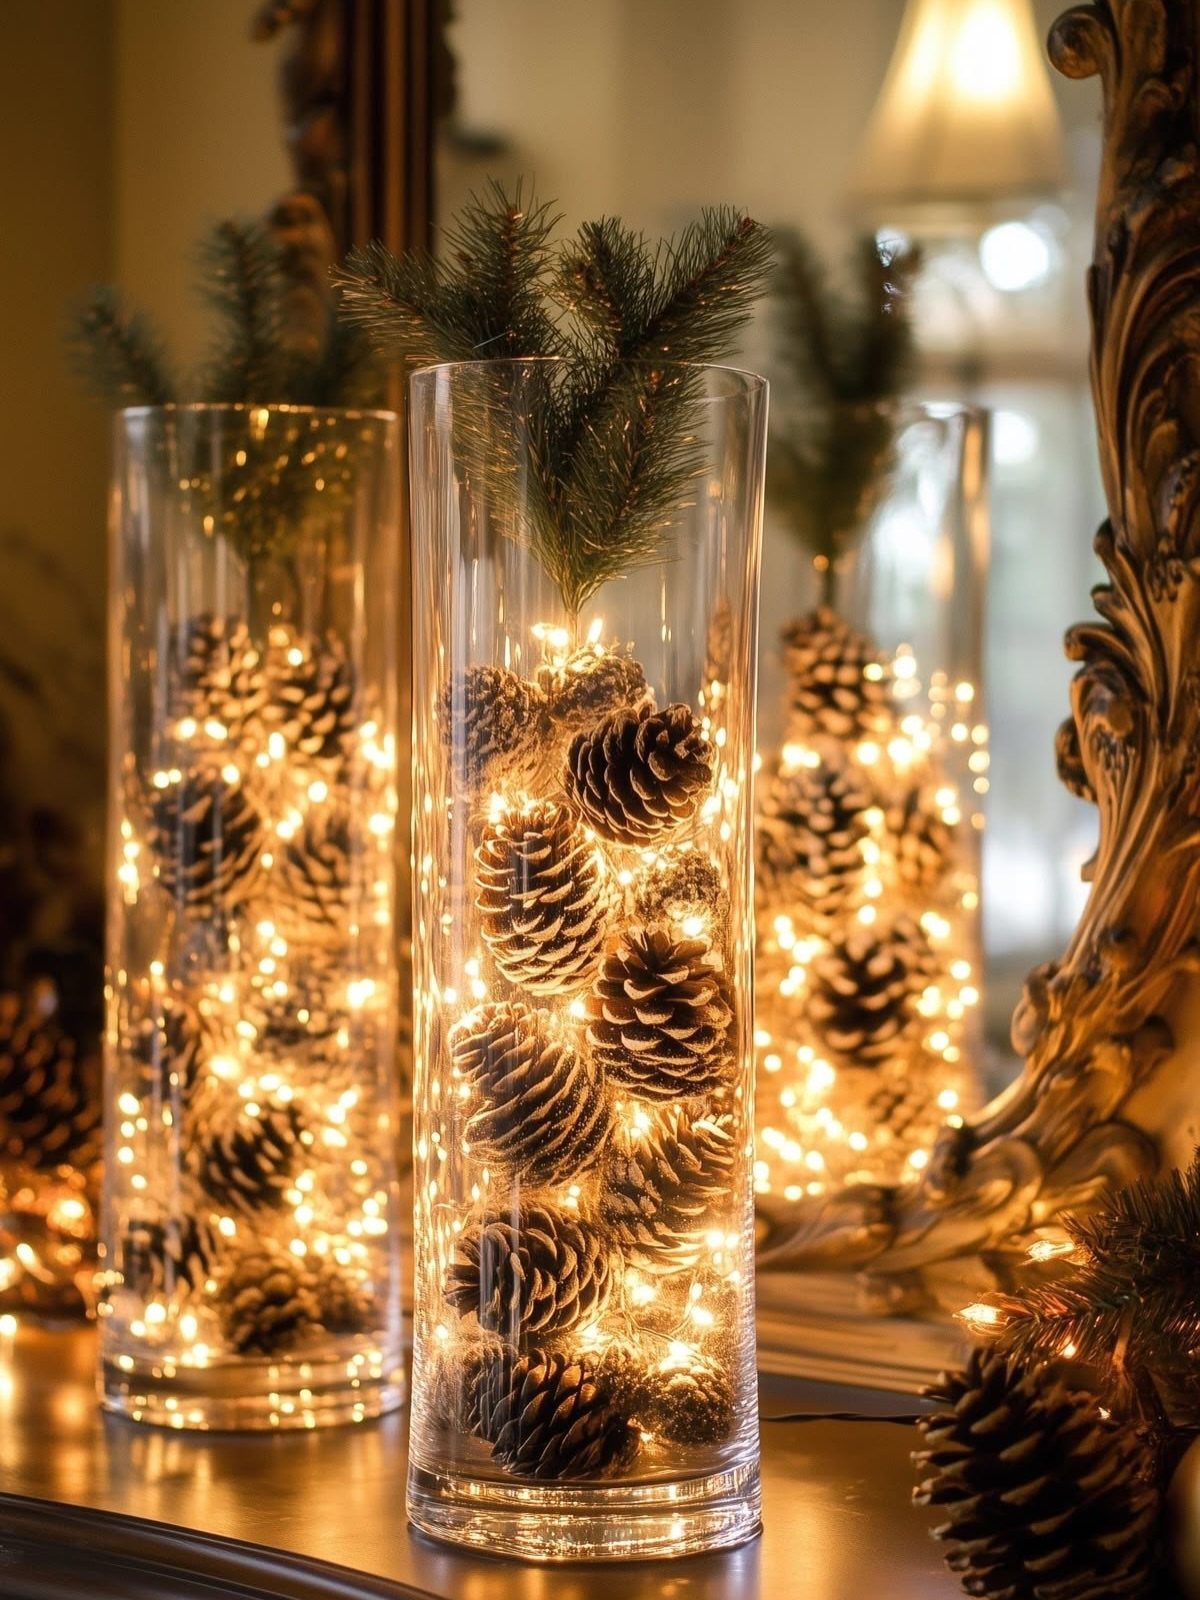
Glass cylinders at different heights let you build a small scene without much floor space. Pinecones fill the lower half, fairy lights coil through the gaps, and a sprig of evergreen finishes the top.
I like this on a console table or a dresser where the mirror behind it doubles the light.
A little fake snow at the bottom of the glass reads as frost without looking like a craft project. Battery lights keep you free of outlets.
One cylinder works; three staggered heights look intentional.
This suits renters because it packs into a shoebox in January and costs little if you already own the vases.
14. Use Pinecones in Arrangements

Pinecones belong at the bottom of a basket arrangement, not because they are hidden but because they earn their keep there.
Their shapes lock together and hold the greens and berries above them in place, which saves you floral foam and the mess of cutting it.
The long slender white pine cones work best for this; their flexible scales let you wedge them tight. Imperfect ones, the kind with missing tips or odd color, work best for this job.
No one sees them once the arrangement is full.
15. Create a Dough Bowl Centerpiece
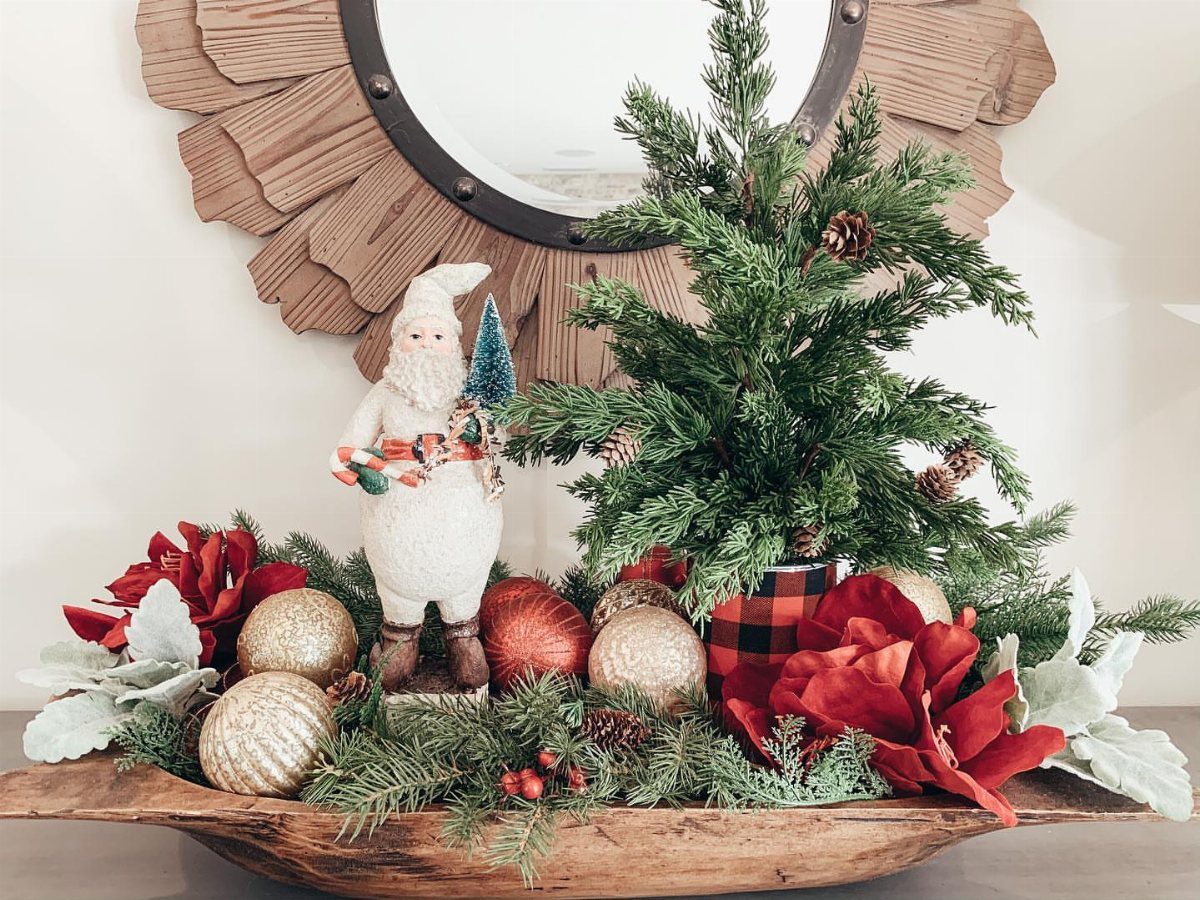
A dough bowl turns a table into a scene without blocking sightlines across it. Pinecones fill the base, then you layer in what reads as Christmas: a small evergreen cutting, a few ornaments, something vintage if you have it.
A single figurine with character carries a whole arrangement.
Printed ribbon or a small banner strung across the bowl adds height without bulk. Burlap ornaments do the same thing; they pick up the wood tone.
This works best on a table where people actually sit and talk. The long shape leaves room for plates and glasses at either end, which a round centerpiece rarely does.
16. Decorate with Pinecones on the Table
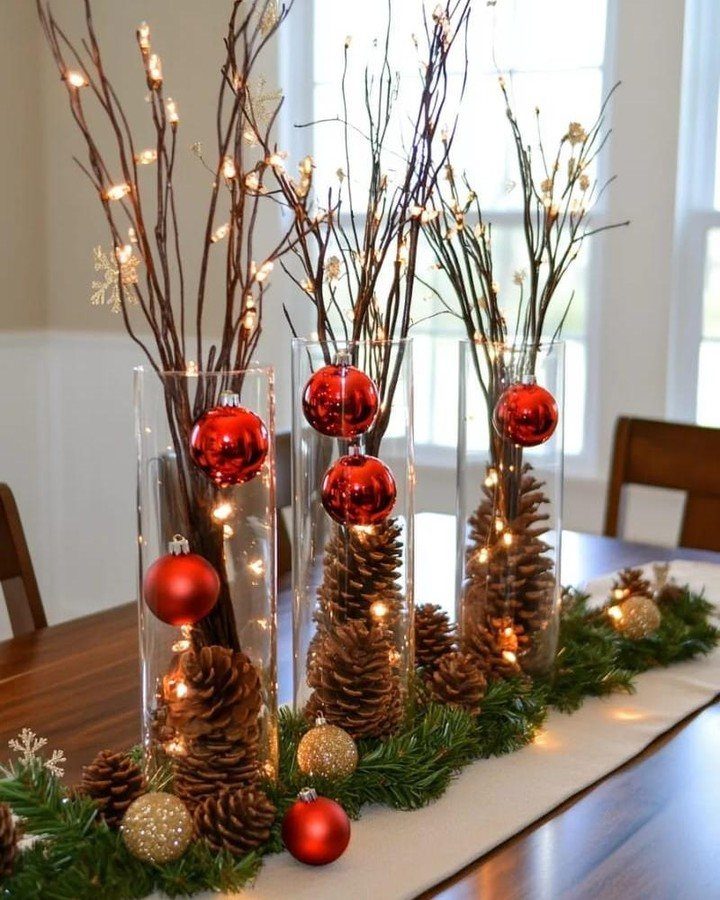
Scattering pinecones down a table runner is the fastest way to look like you planned ahead.
Mix them with evergreen branches and red and gold ornaments, but build around three tall cylinders: they give the eye somewhere to rest, and the pinecones inside them keep the theme from looking accidental.
I would not do this on a table that serves buffet-style. The runner and branches shift when people reach across.
For a seated dinner where dishes pass, it holds fine.
The cylinders do the work of a centerpiece at a third the width. That is the tradeoff: height for footprint.
17. Create a Pinecone Owl Ornament

A pinecone owl starts with a medium cone for the body and a smaller one, turned sideways, for the head. Felt wings and ear tufts, a glued-on beak, and a tiny Santa hat finish the character.
Lia Griffith sells a template for the felt pieces, but the shapes are simple enough to trace from a photo: two wing ovals, two ear triangles, a beak diamond.
I would use craft felt in two colors, cut with sharp scissors so the edges do not fuzz.
These take an evening and a handful of craft supplies. The size is right for a tree, a garland, or a kid’s gift topper.
Benefits of Pinecones
Pinecones cost nothing if you collect them yourself, and even purchased ones run cheap compared to wire or glass ornaments. Their texture adds something no factory finish can replicate: the irregular surface catches light differently in every room.
They suit almost any style you already have. A modern mantel reads as intentional with bleached or white-dipped cones; a rustic table looks fuller with natural brown ones mixed in.
The shapes vary enough that you can build whole arrangements from one type or mix sizes for more movement.
Because they are natural material, they compost when the season ends instead of joining storage bins. That matters if you are already short on closet space.
The only catch is sap and insects; fresh cones need handling before they come inside.
Preparing Pinecones for Crafting
Closed pinecones need heat before you craft with them. An oven at 230°F for about 30 minutes opens the scales and kills any insects living inside.
Lay them on foil or parchment, not directly on the rack; sap drips and hardens. The cones will click and shift as they open, which is the sound of scales releasing.
Let them cool fully before you touch them; the oils stay hot longer than the wood.
This step matters more for cones collected outdoors than for bagged craft store stock, but even purchased cones can harbor moisture that warps glue later.
A half hour of baking saves the surprise of a closed cone refusing to take paint, or worse, a living beetle appearing on the wreath you already hung.
Store cooled cones in paper, not plastic; any residual moisture needs to escape.
Frequently Asked Questions
How can I decorate my Christmas with pine cones?
Wire them into wreaths, tuck them into garlands, or hang them on the tree with twine loops. On a mantel, a few cones standing upright next to others lying on their sides looks arranged without trying too hard.
A dough bowl on the coffee table filled with pinecones, jingle bells, and votives works as a centerpiece that costs almost nothing if you collect the cones yourself.
What do pine cones symbolize at Christmas?
Pinecones carry old associations with fertility and new life, which fits the winter holiday that sits at the turning of the year. In practice, most people use them for texture and the found-in-the-woods look rather than the symbolism.
They read as rustic and intentional without trying hard.
Why do you soak pine cones in vinegar?
A vinegar soak cleans sap and dirt off foraged cones and helps open any that are still closed tight.
Warm water with a splash of white vinegar does the job; lay them out on newspaper to dry fully before you paint or glue them.
Baking the cones kills insects, which matters more than any rinse if you picked them up outside.