Your garage might still fit a car, or the car might have lost that fight years ago.
The bungee cord ball organizer flexes for a basketball or sits empty without looking abandoned, and a fold-down wall bench latches flat when you need the floor back.
1. Use Vertical Space
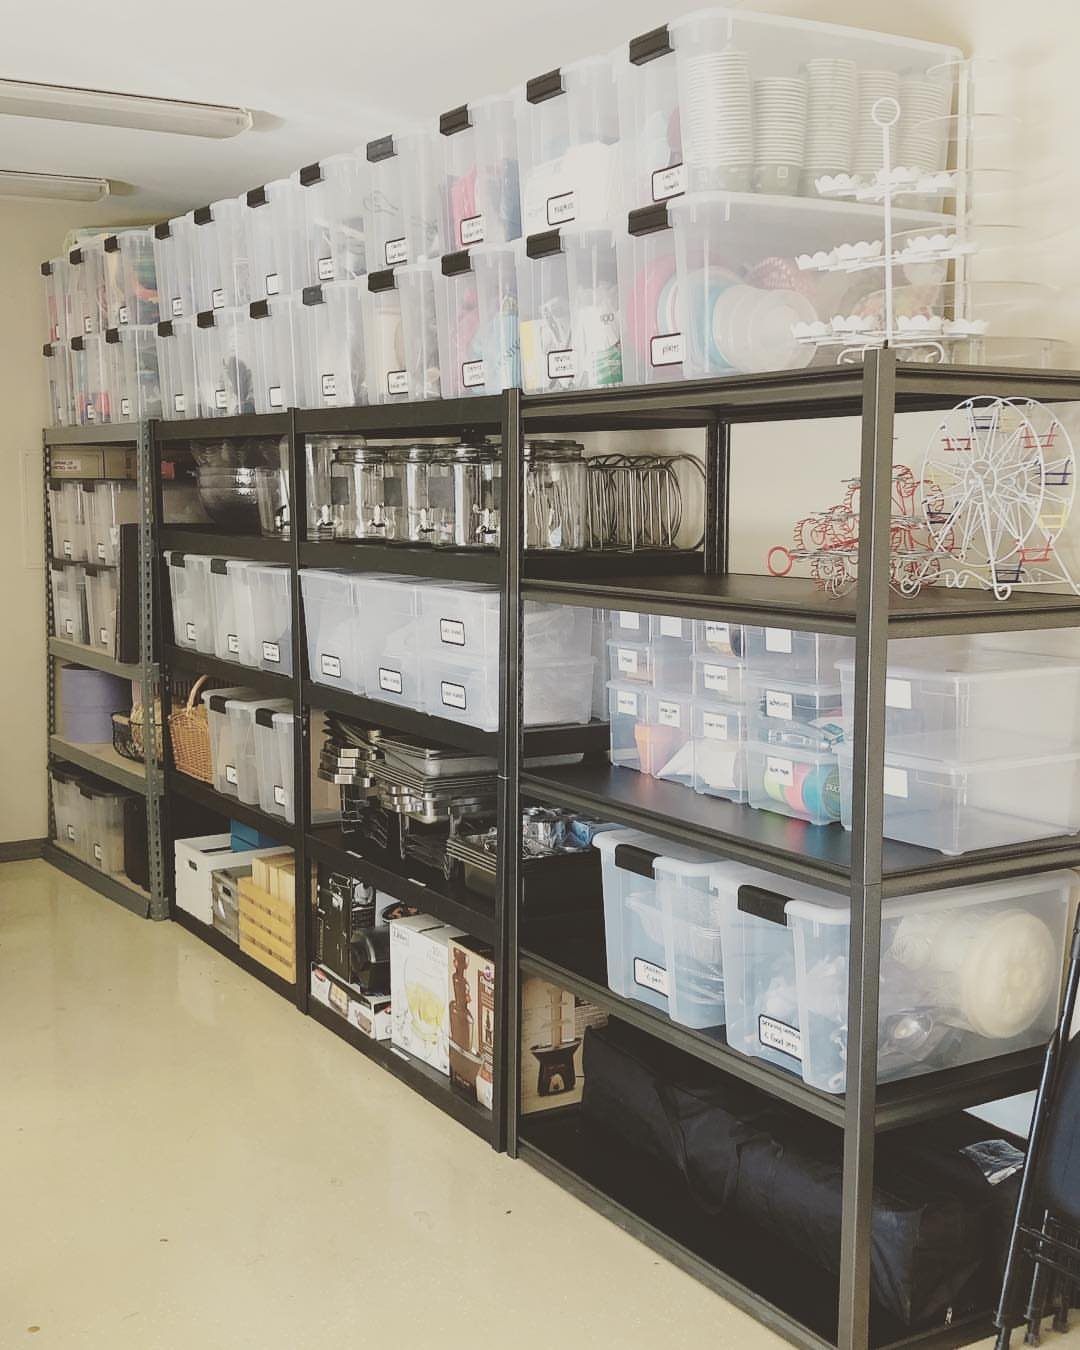
Metal shelving stacked to the ceiling turns a garage wall into storage that holds a lot without eating floor space.
I put the heaviest bins on the lower shelves and the holiday decorations I touch twice a year up top, where they stay out of the way until December.
Open wire or solid metal units both work; closed-back shelves keep small items from slipping through the rear. Wall-mounted track systems let you set shelf height to match your bins instead of living with fixed gaps.
Ceiling racks are the next step for kayaks or luggage you use seasonally, though they need a stud finder and lag bolts rated for the load.
A small garage benefits most from this approach because the floor is where you park or walk. Anything above shoulder height needs a step stool, so a lightweight one hooked nearby saves constant trips.
2. Use Hooks for Bulky Items
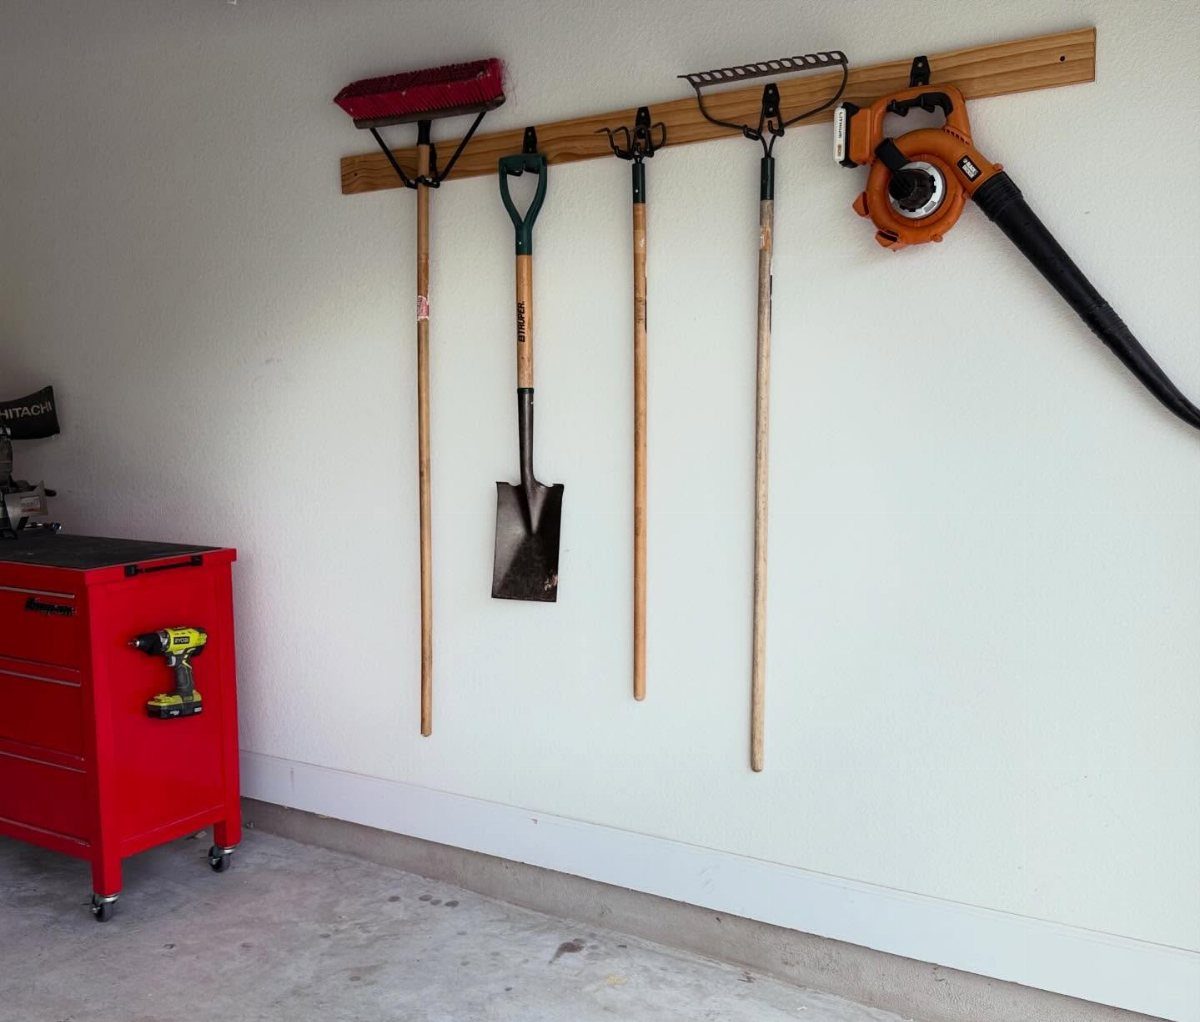
A simple wooden strip with heavy-duty hooks cleared my floor of rakes, shovels, and the leaf blower that used to fall over every time I brushed past it.
Long handles need room between hooks or they tangle, and the strip itself should hit wall studs, not drywall, if you are hanging anything heavy.
Bike hooks are a separate category; vertical ones let a bicycle hang by its front wheel, while horizontal mounts keep two wheels flat against the wall and stick out less into the room.
I learned the hard way that screw-in hooks meant for lightweight coats will straighten under a wet snow shovel. Spend the dollar or two more for garage-rated hardware.
This suits anyone whose garage doubles as garden storage, and it costs less than a single decent tool.
3. Build Shelves
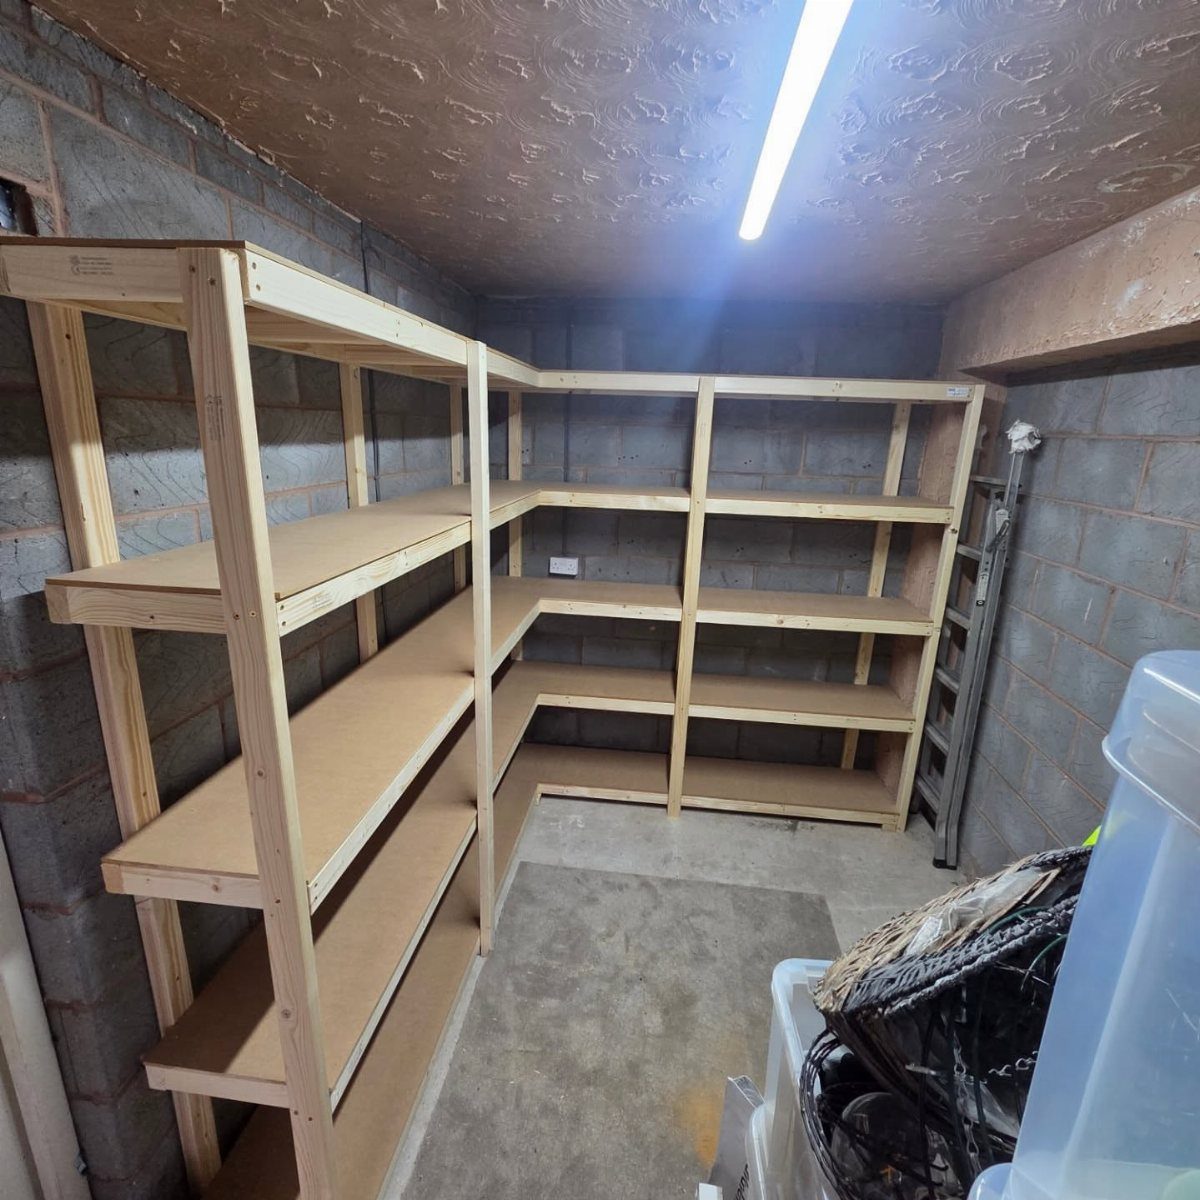
Custom corner shelves turn awkward angles into useful storage, which matters in a garage where every straight wall already has a plan.
Bare wood units against block walls pick up dust fast; paint or a couple coats of polyurethane keeps them cleaner longer.
A set built from 2x4s and plywood runs cheap; construction screws into the studs and a level are the only tools that really matter.
Store-bought metal shelving skips the sawdust and goes up fast if your weekend is already booked.
Put the shelf that sees the most use at a height where you are not bending or reaching every time you need a bin.
The downside of DIY is time; the downside of ready-made is that fixed shelf heights rarely match your containers perfectly.
4. Use Pegboards
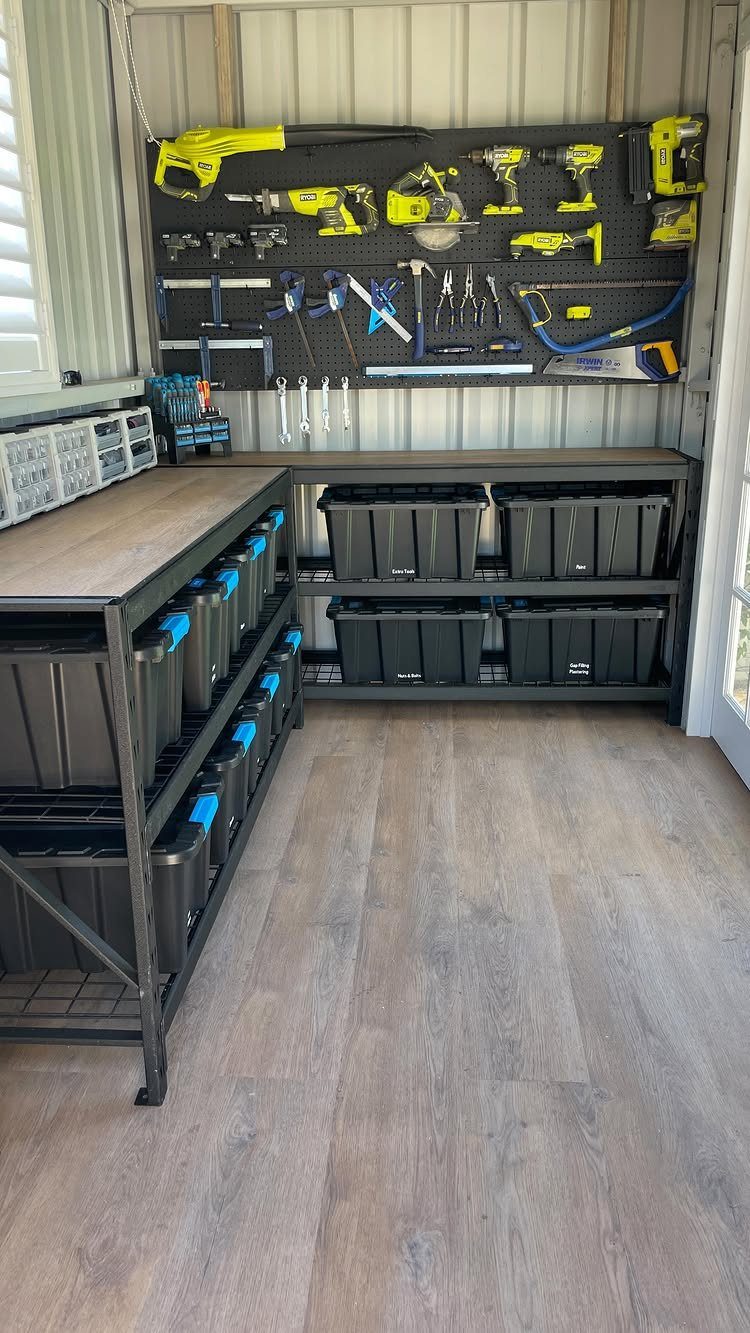
A pegboard above the bench puts tools where you see them, which saves the digging through drawers that used to slow every job.
Map the layout before you drill: trace each tool on paper, tape it up, and live with it a few days before committing to hook placement.
Hooks come in single, double, and loop styles; a small bin of extras is worth keeping because the collection always grows.
Pegboards suit hand tools and smaller power tools that are not too heavy. A circular saw or full-size drill will need a shelf below or a heavier wall system instead.
5. Create a Workstation
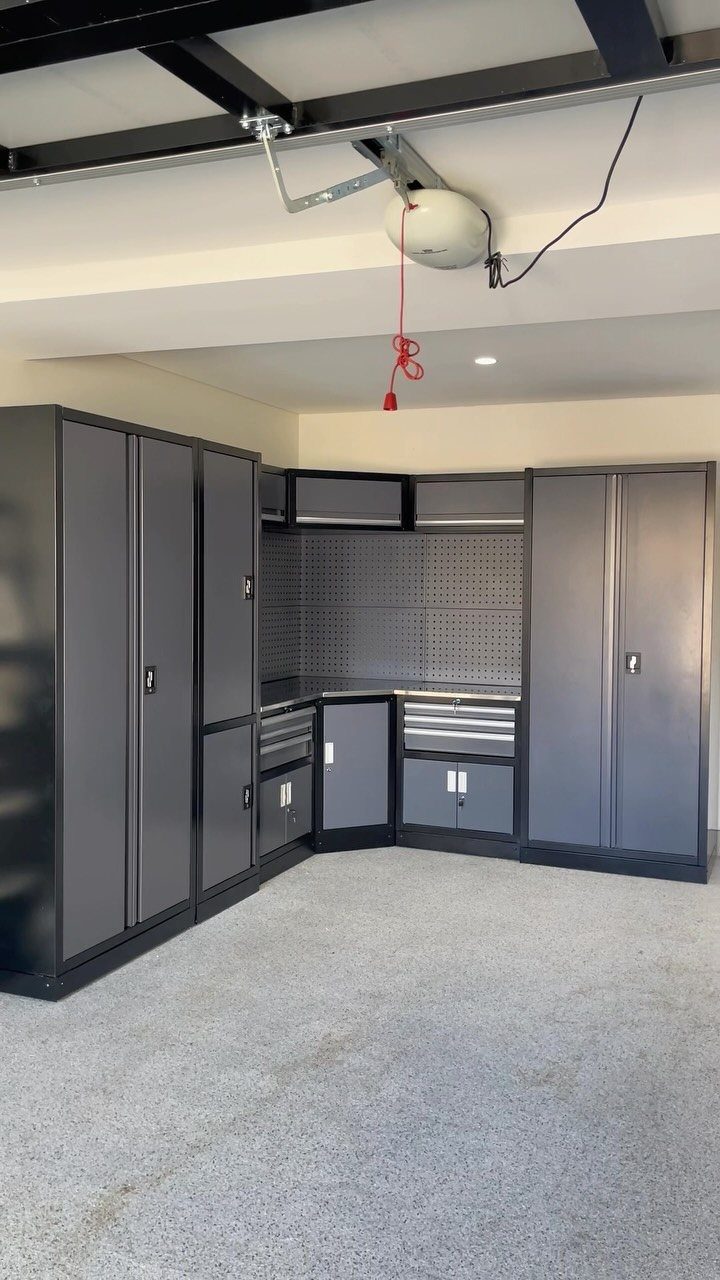
A designated workstation means projects stop migrating to the kitchen table, which was reason enough for me to carve out wall space.
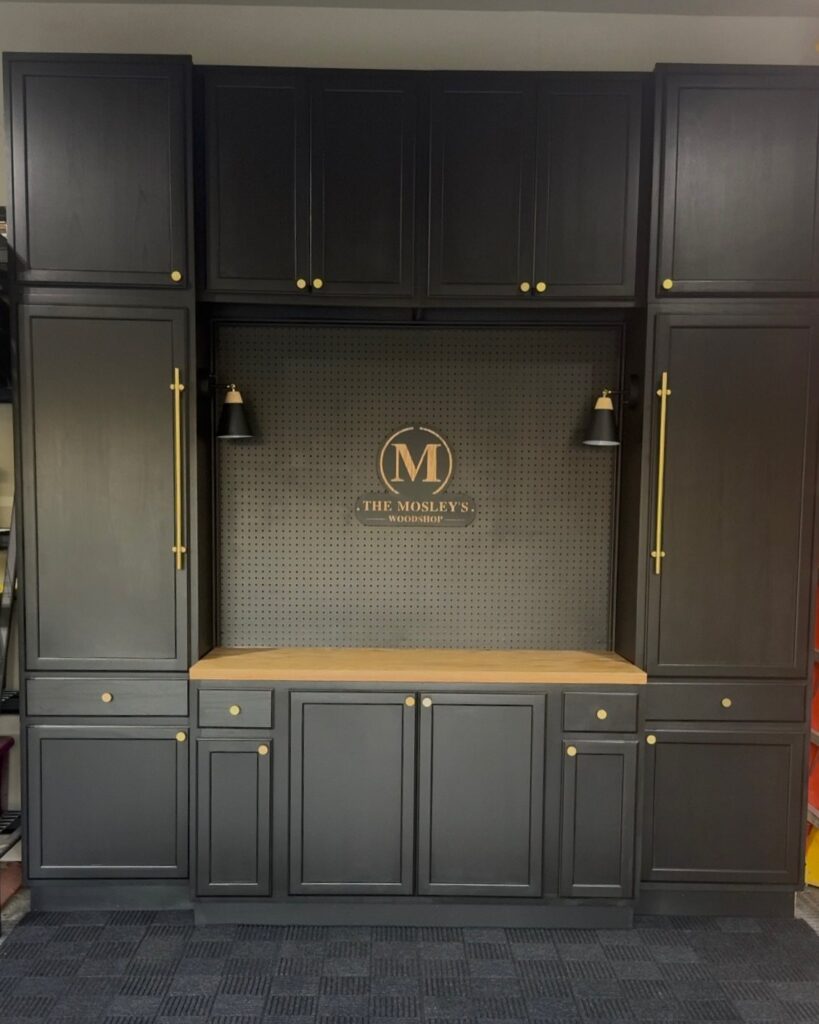
The modular system in the photo is one route; an old solid-core door across two filing cabinets is another I have used in a rental where I could not install anything permanent.
A corner setup like this one uses space that is otherwise hard to reach, and the upper cabinets keep paint and finishes away from the bench where they get knocked over.
Add a power strip mounted to the side, not the back, so cords do not drape across your work.
This idea trades floor space for focus; if your garage barely fits a car, a fold-down wall bench that latches flat is the better call.
6. Create a Space for Sports Equipment
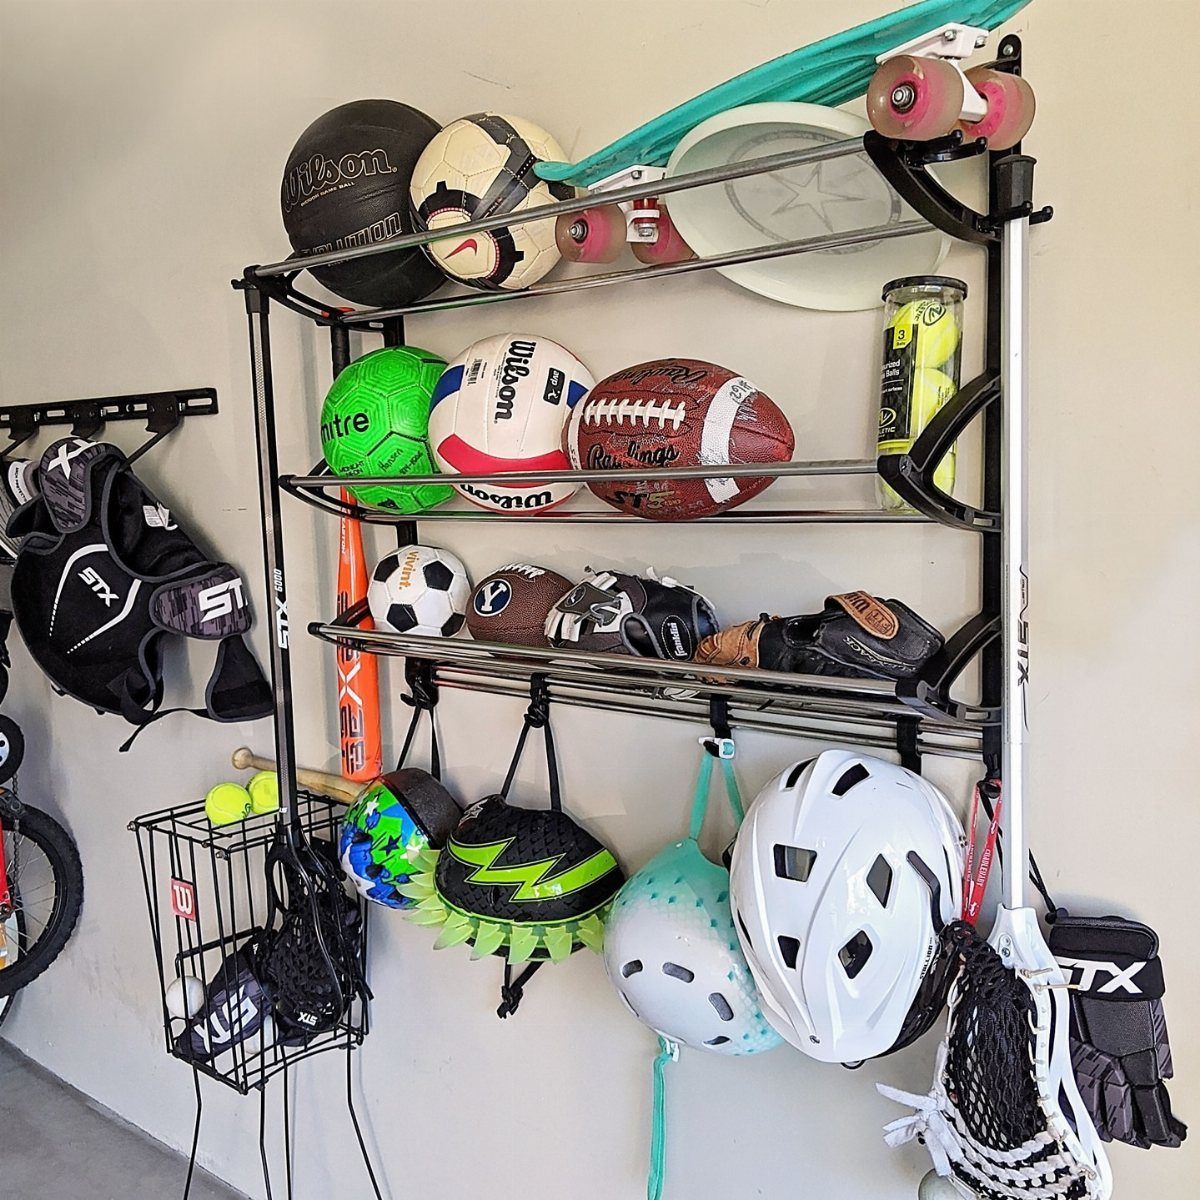
Sports gear has a way of spreading from trunk to mudroom to hallway unless you give it a door to stop behind.
The wall rack in the photo holds balls, sticks, and helmets in one zone, which means my kids know where the equipment lives and I know where to look when practice starts in twenty minutes.
Open wire or mesh bins let wet items dry instead of souring in a closed tote; a few S-hooks on the side handle lacrosse sticks or baseball bats that do not fit the main shelves.
Low shelving works best for anyone with younger kids who need to put their own stuff away.
Dedicated sports storage takes wall space you might have used for tools or seasonal items, so I would only commit a full section if athletics are a year-round presence in the house.
7. Contain and Label
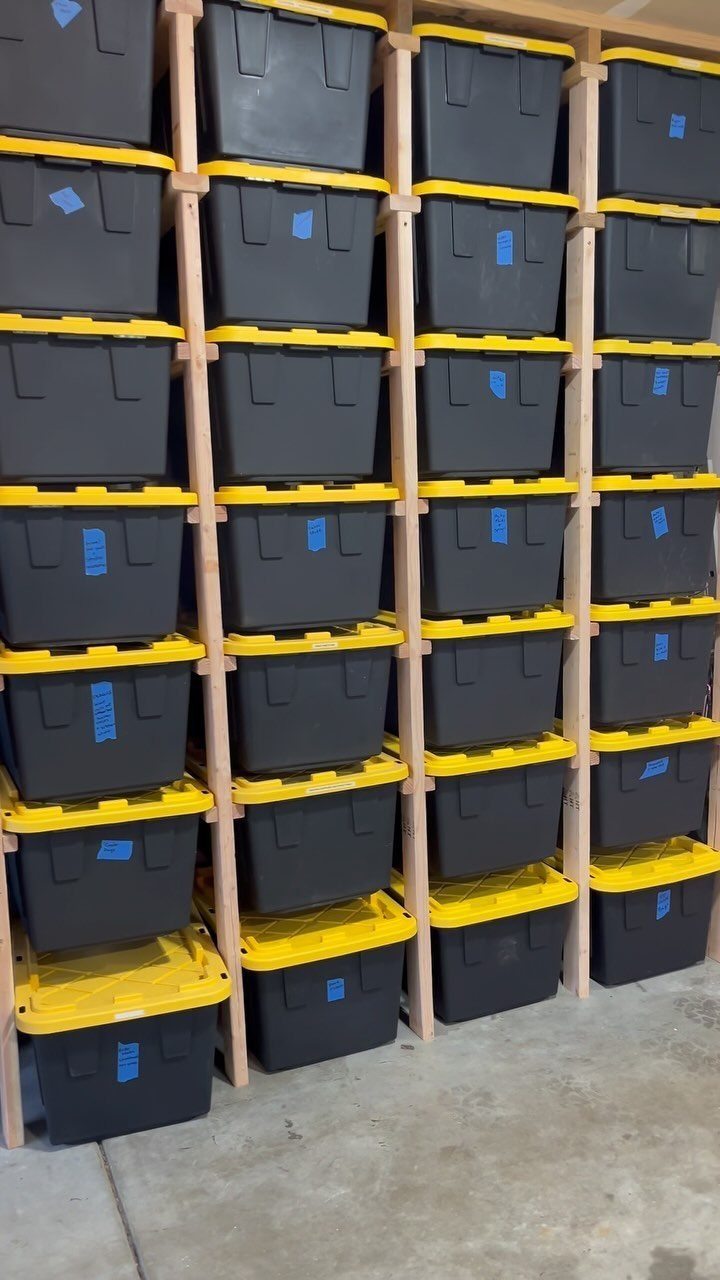
Blue tape labels on black bins with yellow lids turn guessing into finding. I sort by category, one bin per job: automotive, holiday lights, camping, paint supplies.
The tape peels clean when I change my mind, which happens.
A wooden shelf unit keeps everything off the concrete and out of the dust that settles on everything in a garage. I stack two high at most; three becomes a hassle to reach and a hazard to pull down.
This setup suits anyone who has tried to guess which cardboard box holds the extension cords. It trades curb appeal for function, but garages are already garages.
8. Use a Bungee Cord Ball Organizer
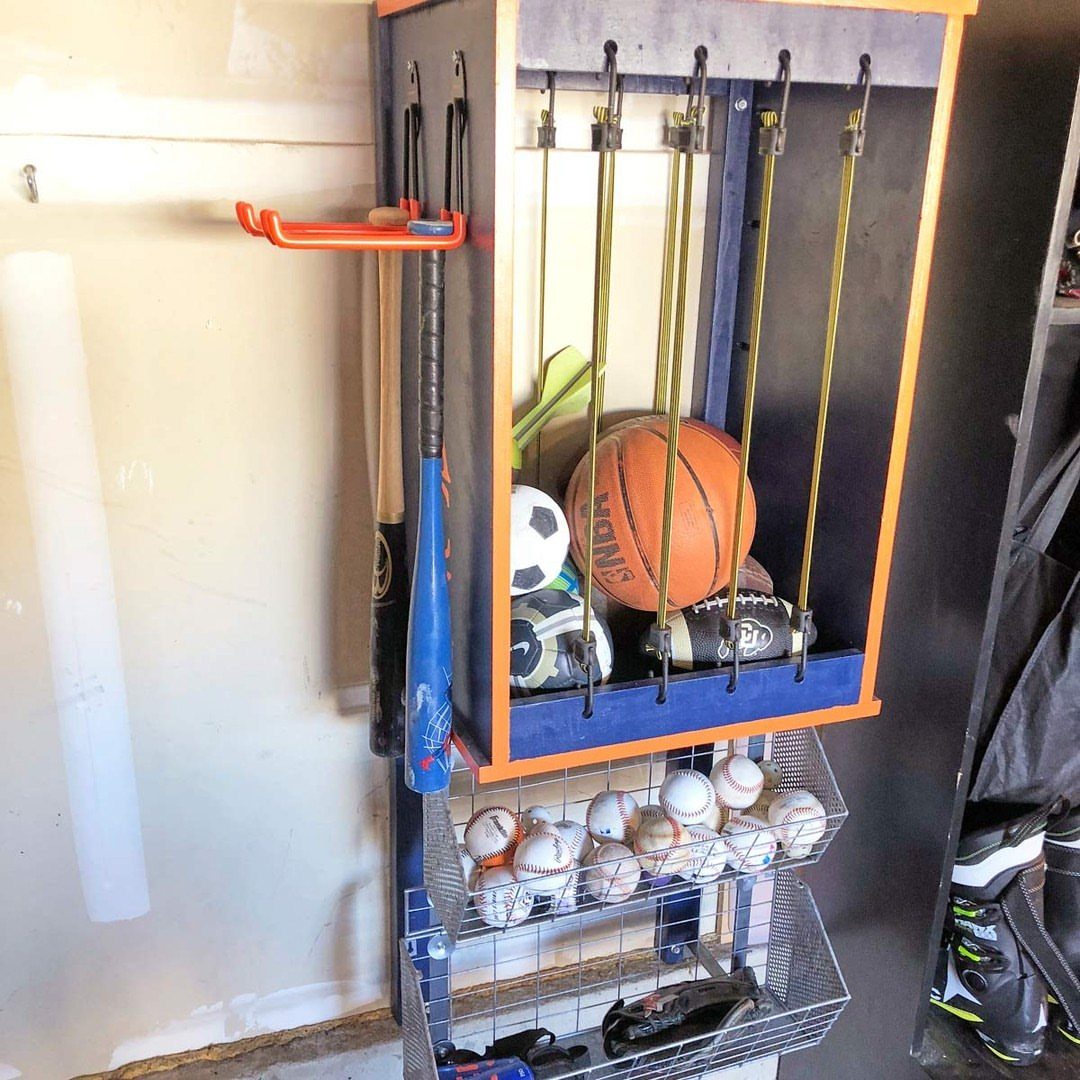
Bungee cords stretched across a wooden frame grip balls better than any net I’d pick for a small group. The cords flex for a basketball or a soccer ball, and they spring back empty so the frame never looks half-abandoned.
I mount the frame to studs, not drywall; a full basketball pushes harder than it looks. Wire baskets underneath catch the loose baseballs that always escape, and side hooks for bats keep the full picture in one place.
The open front means dust, so I skip this for gear I store long-term. For balls in weekly rotation, the grab-and-go speed pays off.
My neighbor’s boys use theirs daily; the cords still hold tension without going slack.
9. Create a Fishing Rod Holder
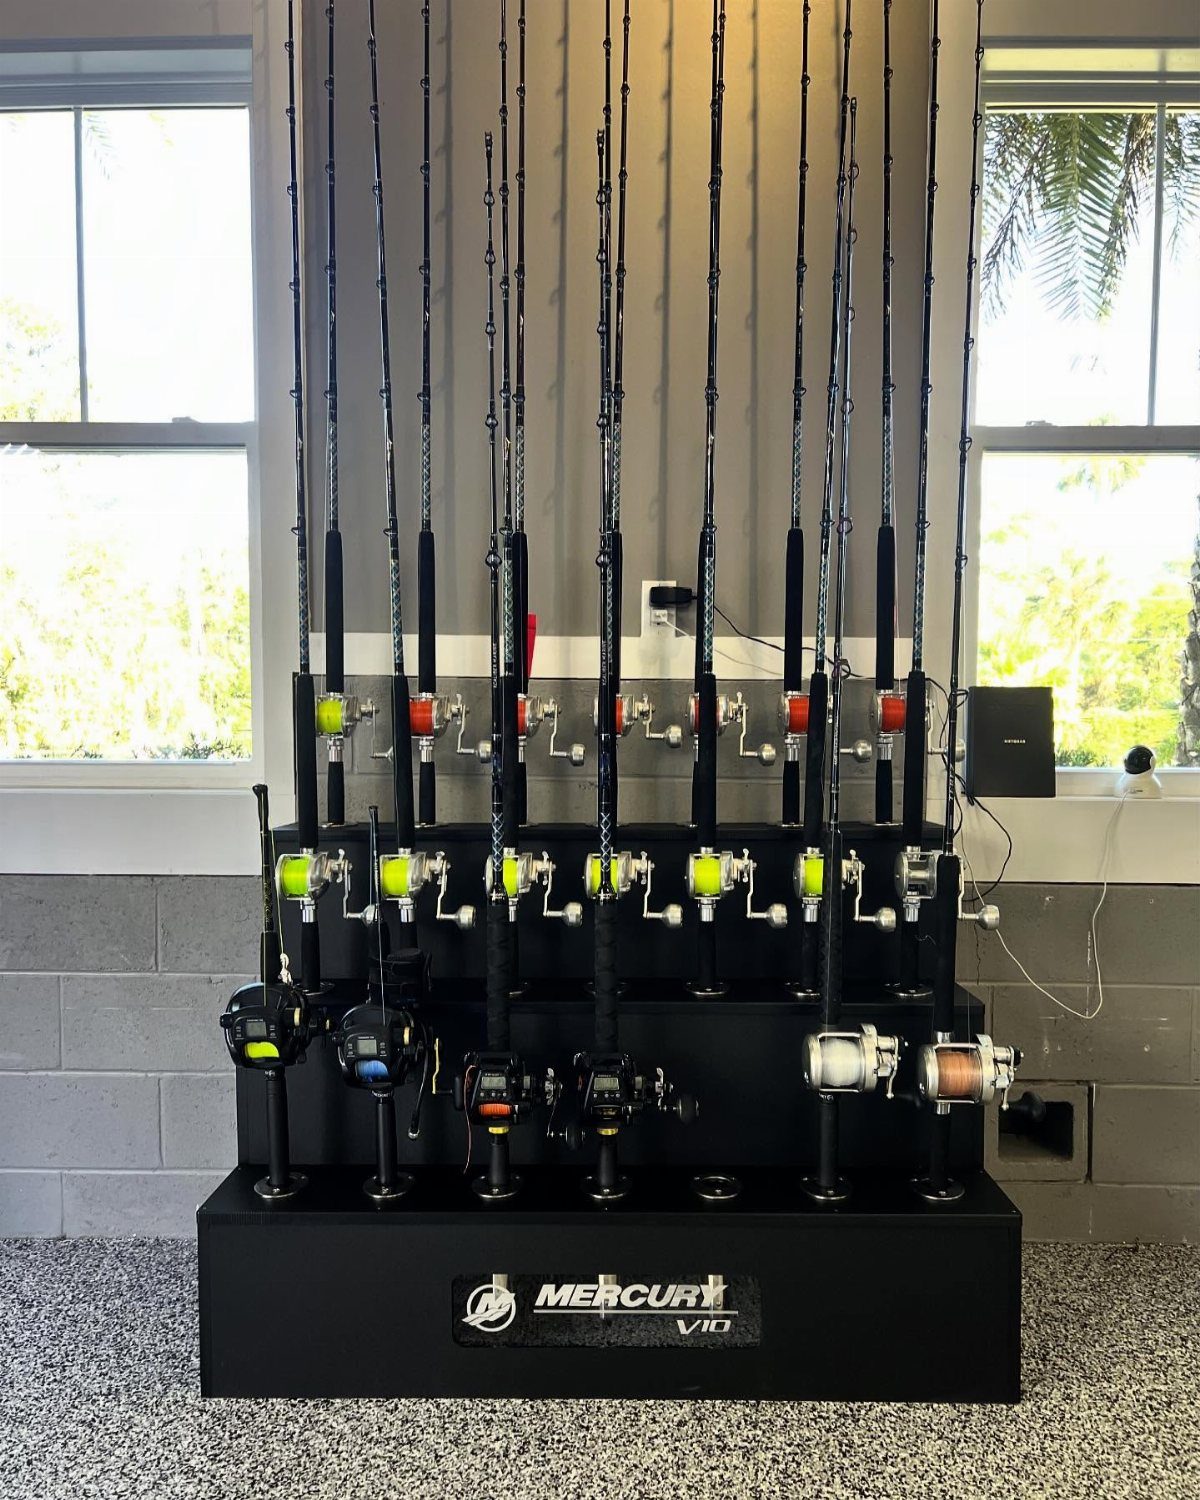
A pool noodle sliced halfway through every five inches cradles rod tips without the cost of a store-bought rack.
I pair it with a PVC pipe drilled to match, so the reel seat drops in and the rod stands straight instead of leaning into a corner tangle.
A black metal rack looks sharp, but the noodle-and-PVC version costs pocket change and an hour with a kitchen knife and drill.
I glue the pipe to a plywood base or screw it to wall studs; either keeps the assembly from tipping when I grab a rod in a hurry.
This suits anyone with more rods than patience. My version is garage-functional, not living-room-ready.
10. Use Mason Jars for Small Items
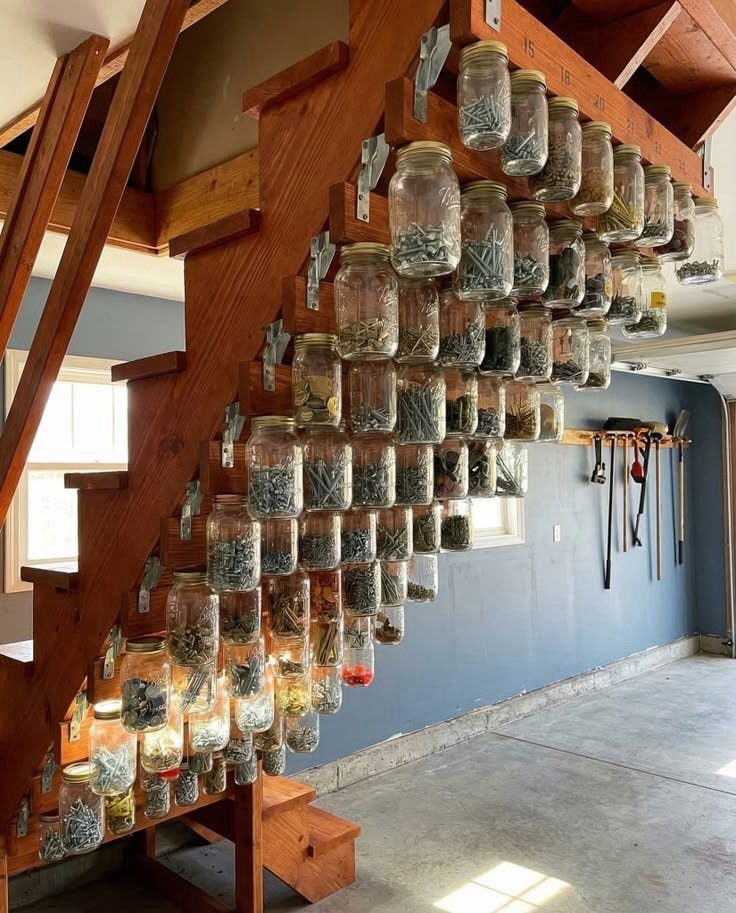
Screwing mason jar lids to the underside of a shelf and twisting the jars up gets small hardware off the workbench and into clear view.
I can see the washer size without opening anything, and the threads keep dust out better than open bins.
Staircase mounting saves shelf space I don’t have; I use the same trick under my garage workbench and a basement stair.
Any jar with standard threads works, so I collect the ones my household empties and run them through the dishwasher.
Glass breaks if you drop it, so I keep a dustpan nearby and I don’t hang these where I swing a hammer. For screws, nails, electrical connectors, and the other debris that multiplies in drawers, this beats rummaging every time.
Plan for Maintenance
I build maintenance into the plan from the start.
Tools go back to their hooks. Empty boxes break down for recycling.
Sweep the corners where dust and leaves collect.
Without it, the floor fills back in and the whole project feels wasted.
Safety and Clearance
Storage should make the room work better, not turn parking or walking into a squeeze.
Heavy items go low. Frequently used items stay off ladders.
Kids’ gear sits where they can reach it; sleds and fishing equipment live higher because those only get touched in season.
Weight matters too. A loaded shelf tipping toward the car is the wrong setup entirely.
Budget-friendly Solutions
Many organization ideas work with what you already own or cheap materials. Old filing cabinets work as a workbench base, and mason jars hold hardware just as well as bought bins.
Start with the problem, not the product.
Consider Seasonal Storage
Seasonal items belong in the harder-to-reach spots: overhead racks, back corners, top shelves. Holiday lights, the turkey fryer, and the artificial tree live where I need a step stool because I only touch them once a year.
Everyday items earn the easy real estate. The camping bin sits at eye level because we use it monthly.
This trade only works if everyone in the house knows the rule. I label the seasonal zones so nobody hunts through summer storage for the snow shovel in January.