The deciding factor is whether you fold your chairs flat or roll them into bags: that single habit eliminates some of the options before you lift a saw.
PVC pipe holders only work for the roller; the 2×4 rack and its angled front edge assume a fold.
1. Wall-mounted Storage Rack
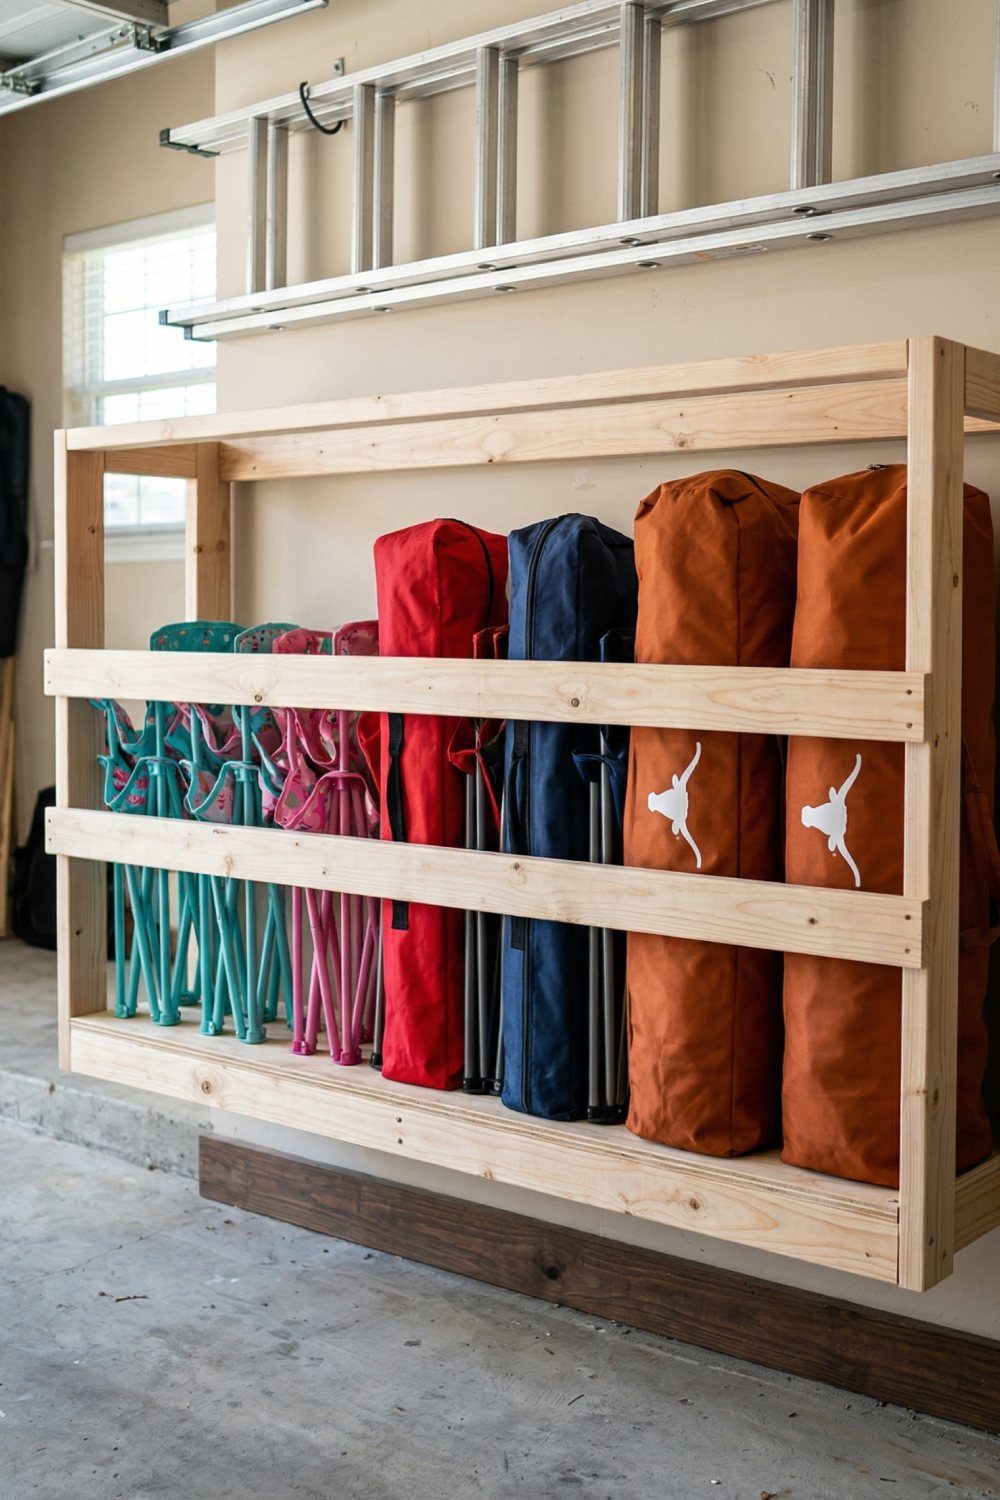
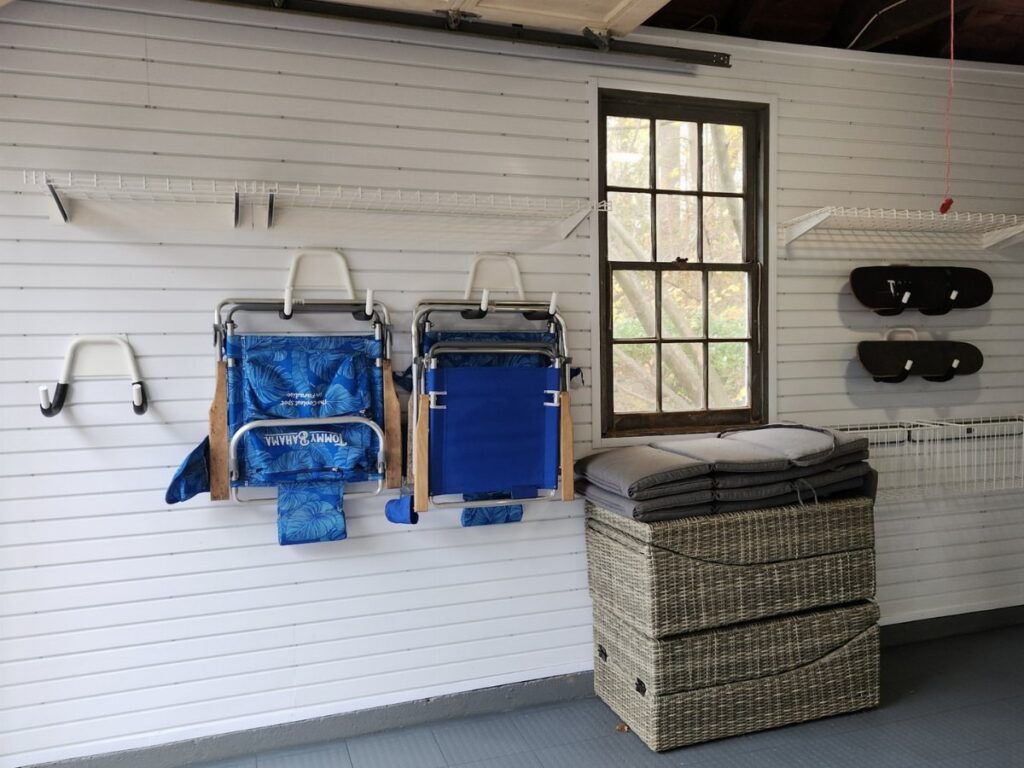
A wall-mounted rack keeps chairs off the floor and out of the way of the car.
I like this approach for renters who can patch a few screw holes later; standard stud spacing lines up with most folding chair widths.
Metal versions run about half to three-quarters of a shop-built price if you would rather buy than build.
What you give up is height. You need a stretch of clear wall and arms long enough to lift chairs onto the top pegs.
Low garage ceilings make the ladder hook impractical.
2. DIY 2×4 Chair Rack
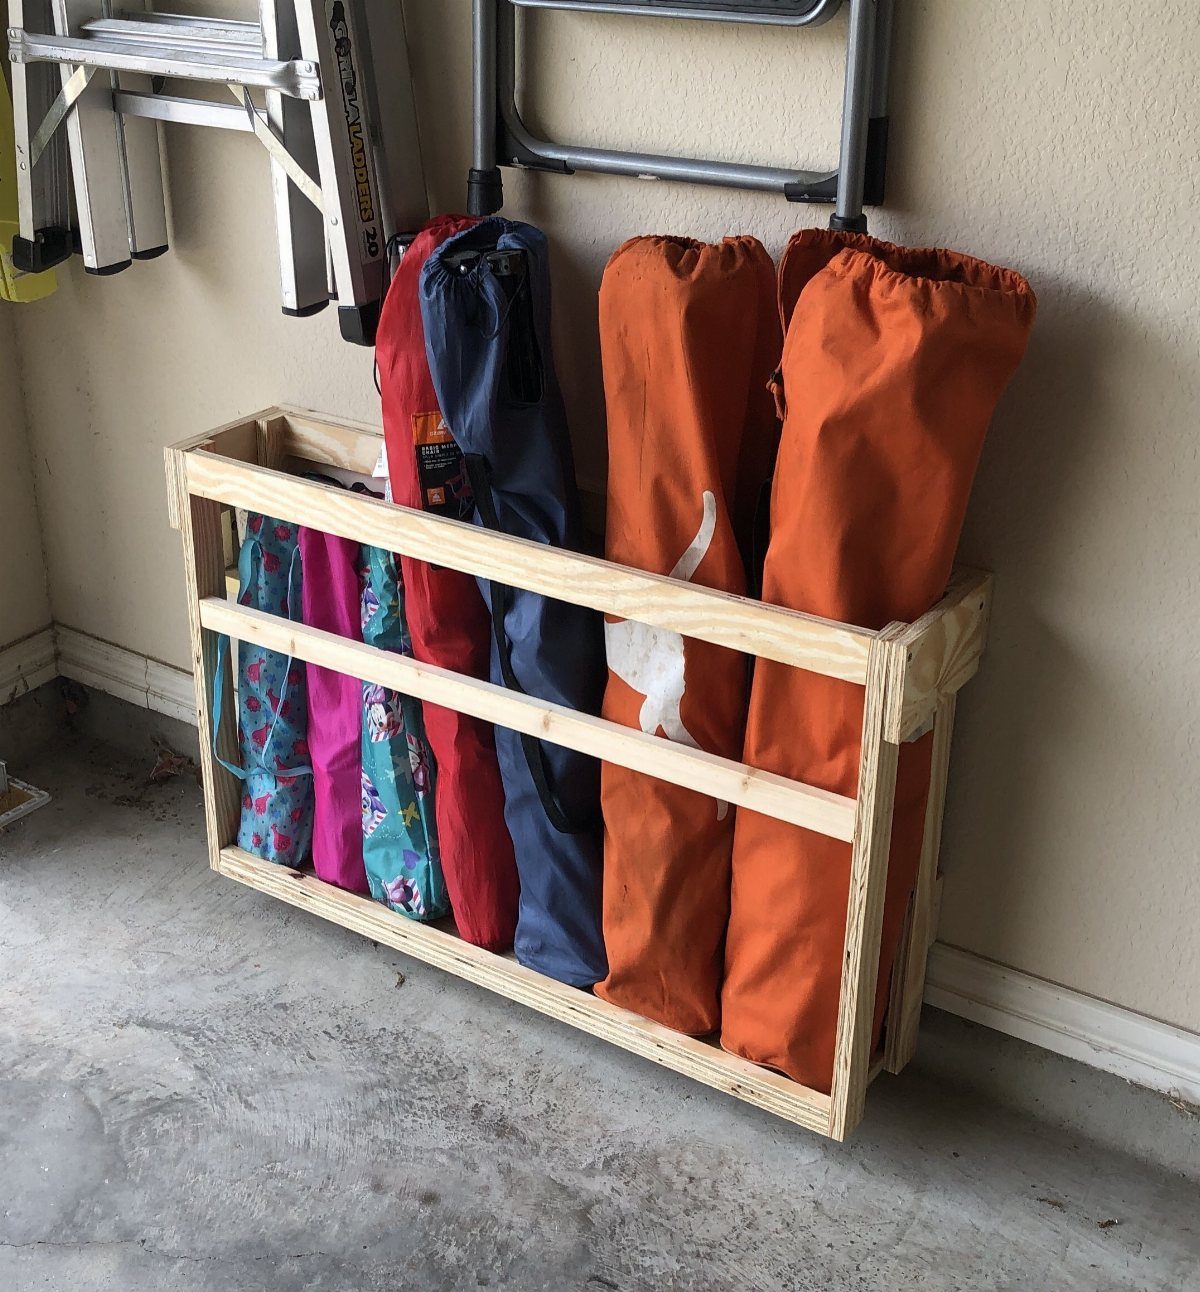
A 2×4 rack costs about the lumber for a single sheet of decent plywood and an hour with a miter saw. Staggered horizontal boards let each chair rest on its own shelf rather than hang.
I built something similar for my own garage and learned to angle the front edge of each board up slightly so chairs settle back instead of sliding. Otherwise chairs slide forward every time you drive in.
The tiered layout works because folded camping chairs taper; the seat pack is wider than the legs, so each chair nests partly over the one below. Cut your first 2×4, test one chair, then cut the rest.
No two garages give you the same stud spacing, so a rigid plan will fight you.
3. PVC Pipe Wall Holders
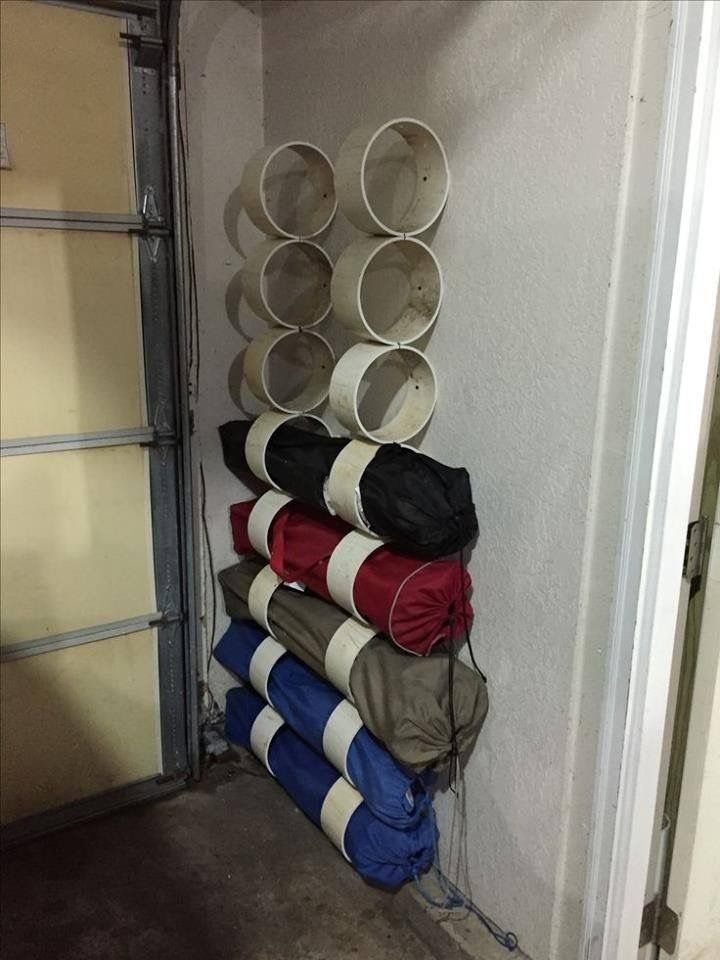
PVC pipe holders suit the reader who wants to roll chairs rather than fold them flat. Short vertical segments mounted in pairs cradle each rolled bag.
I would use 3-inch diameter pipe for standard camp chairs, 4-inch if yours are the oversized quad-fold type. Space the pairs so the chair drops in but does not wallow; arm’s width apart works for most.
Glue is unnecessary. A single screw through the pipe into a stud at each end grips hard enough and lets you reposition later.
Empty pipe segments suggest room to grow, which is honest; most of us buy more chairs than we retire.
4. Bungee Cord Corral Shelf
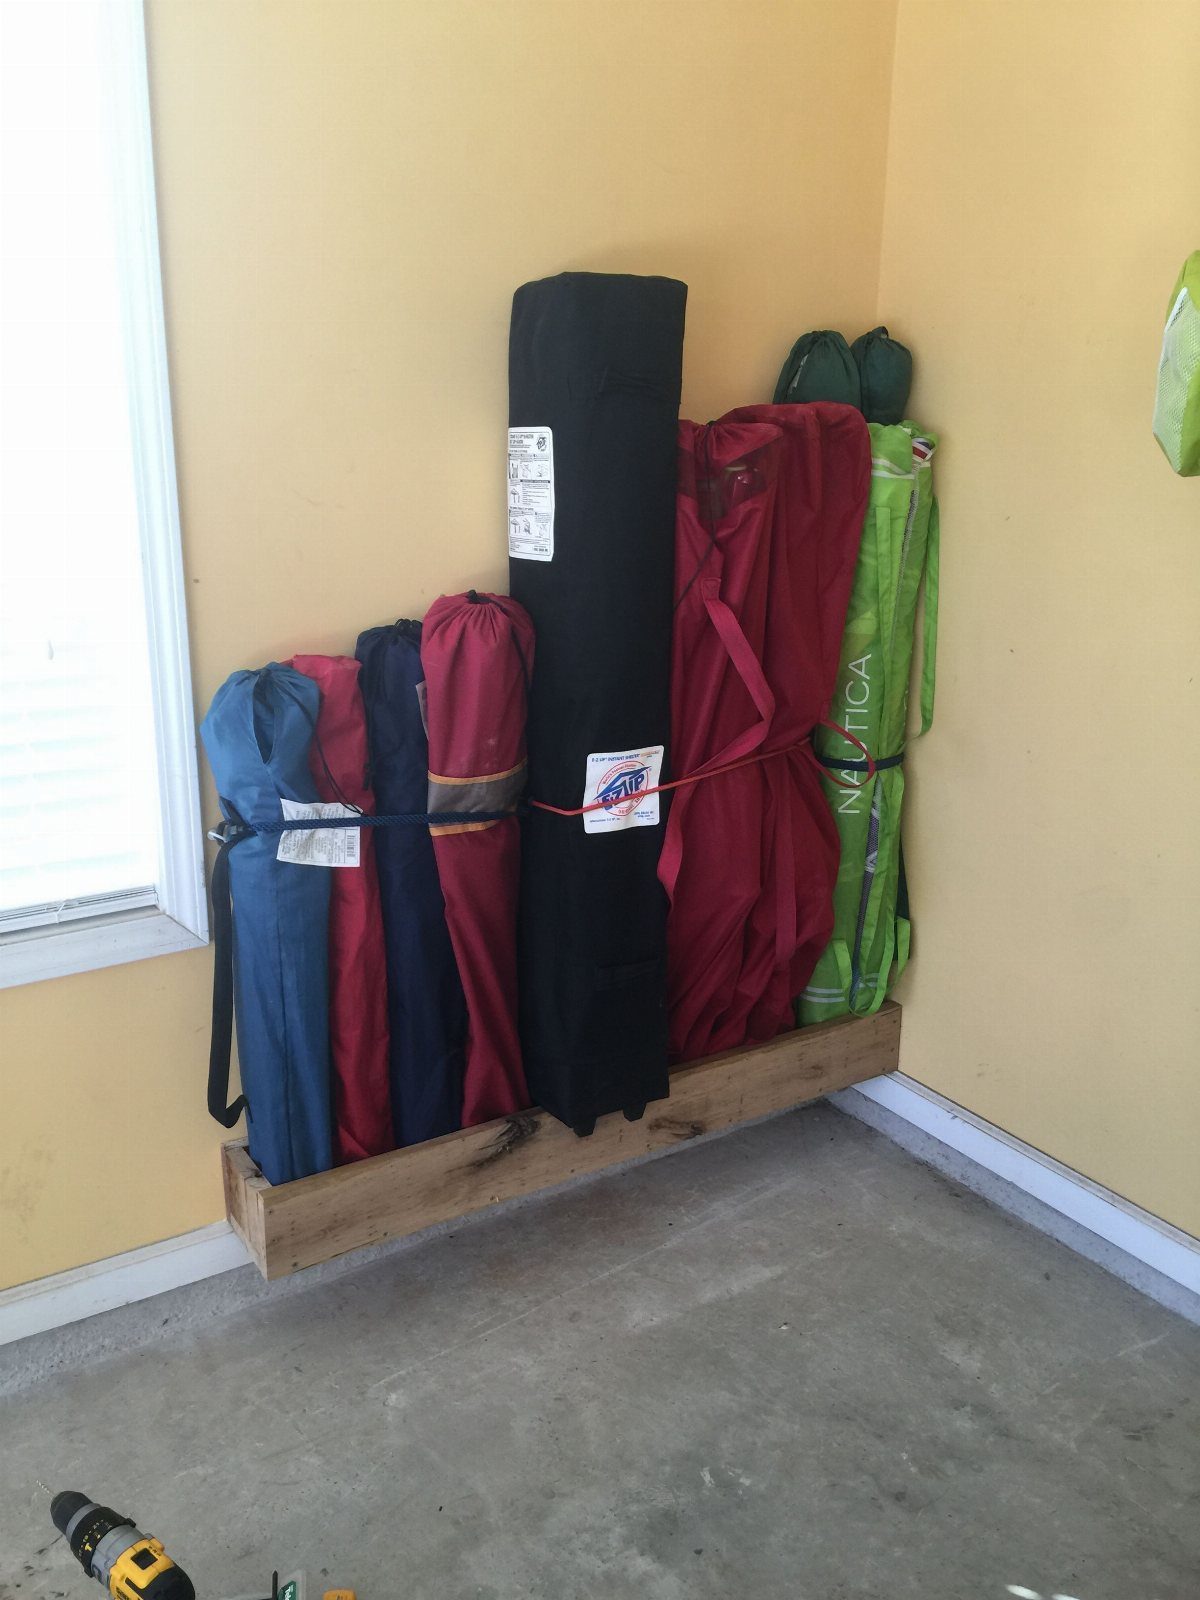
A bungee cord across a shallow shelf is the fastest build on this list and the most forgiving of odd sizes.
A wooden trough, shallow enough to keep chairs upright, corrals them with a single red cord along with a canopy.
I would use shock cord rather than the hardware-store bungee with metal hooks; the hooks clatter and eventually gouge wood. Drill holes through the shelf sides, knot the cord inside, and you have a cleaner line.
This setup shines for the mixed collection: one camp chair, one lawn chair, one canopy you use twice a year. The cord stretches to hold whatever arrives.
What you give up is side access; you cannot slide something out from the side without undoing the whole cord.
Maximizing Garage Space
Wall hooks against concrete block turn the least usable surface into storage without sacrificing floor space.
I would mount a rail of heavy-duty pegs before I built anything that stands; the chairs hang, the car still parks, and the only cost is hardware.
A plastic bin for drawstring bags works if you store the chair bags rather than the chairs themselves. I would keep the bin on a high shelf, since you only reach for it seasonally.
The floor stays clear for what you use weekly.
DIY Solutions
Most of these builds need little more than a drill and a saw you already own. A miter saw, a drill, and a stud finder cover every project in the list.
I would borrow the miter saw if you do not own one; most builds need 10 cuts or fewer, and a rental weekend costs less than a single metal rack from a big-box store.
PVC pipe cuts with any handsaw, though a miter box keeps the ends square enough to sit flush against the wall. I would buy the pipe in standard lengths and cut at home; the store rarely cuts short pieces cleanly.
Durability of Materials
Metal wall-mounted racks outlast the 2×4 version if your garage sees humidity swings, but the wood holds up fine if you paint or seal the cut ends.
I would spend the extra on metal only if I planned to leave it for the next owner.
Plastic bins fatigue in heat. A white bin on a shelf, not the garage floor, stays cleaner and keeps the contents drier.
I would keep fabric bags off concrete too; the temperature cycle wicks moisture up through the slab.
Accessibility of Stored Items
A pegboard mount above a wooden shelf gives you two heights of access without bending or reaching overhead. I would hang the chairs I grab monthly on the pegs, set the rarely used canopy on the shelf below.
The board itself is light enough to move if your needs shift.
Floor storage means dust, rodent sign, and the occasional puddle. Even the bungee corral, shallow as it is, lifts chairs above the concrete enough to clear dust and small puddles.
I would take that lift over direct contact every time.
Frequently Asked Questions
How to store camping stuff in a garage?
Wall-mounted racks and shallow shelves with bungee cords keep chairs upright and off the floor. I would rather use wall space than floor space because the car still needs to park there.
Bungee cords hooked to wall studs make a quick corral for the mixed pile of chairs, bags, and a canopy that shows up after a trip.
What are some genius garage storage ideas?
A 2×4 tiered rack costs about the lumber for one sheet of decent plywood and an hour with a miter saw.
Staggered horizontal boards give each chair its own shelf, and the tapered fold of camping chairs lets each one nest partly over the one below.
What are some clever storage hacks for campers?
Short PVC pipe segments mounted in pairs on the wall cradle rolled chairs without glue or permanent placement. I would use 3-inch diameter for standard camp chairs, 4-inch for the oversized quad-fold type.