Outdoor plant stand ideas run from a quick X-frame build you can finish between breakfast and lunch to a concrete cube that stays where you put it.
What settles the choice is not budget alone but whether you are allowed to drill into the wall you have, or whether the stand needs to walk out with you when the lease ends.
That split shows up early: cedar fence pickets keep a ladder stand light enough to lean and lift, while a powder-coated iron arch wants an anchor checked against HOA rules first.
1. Tiered Plant Stand
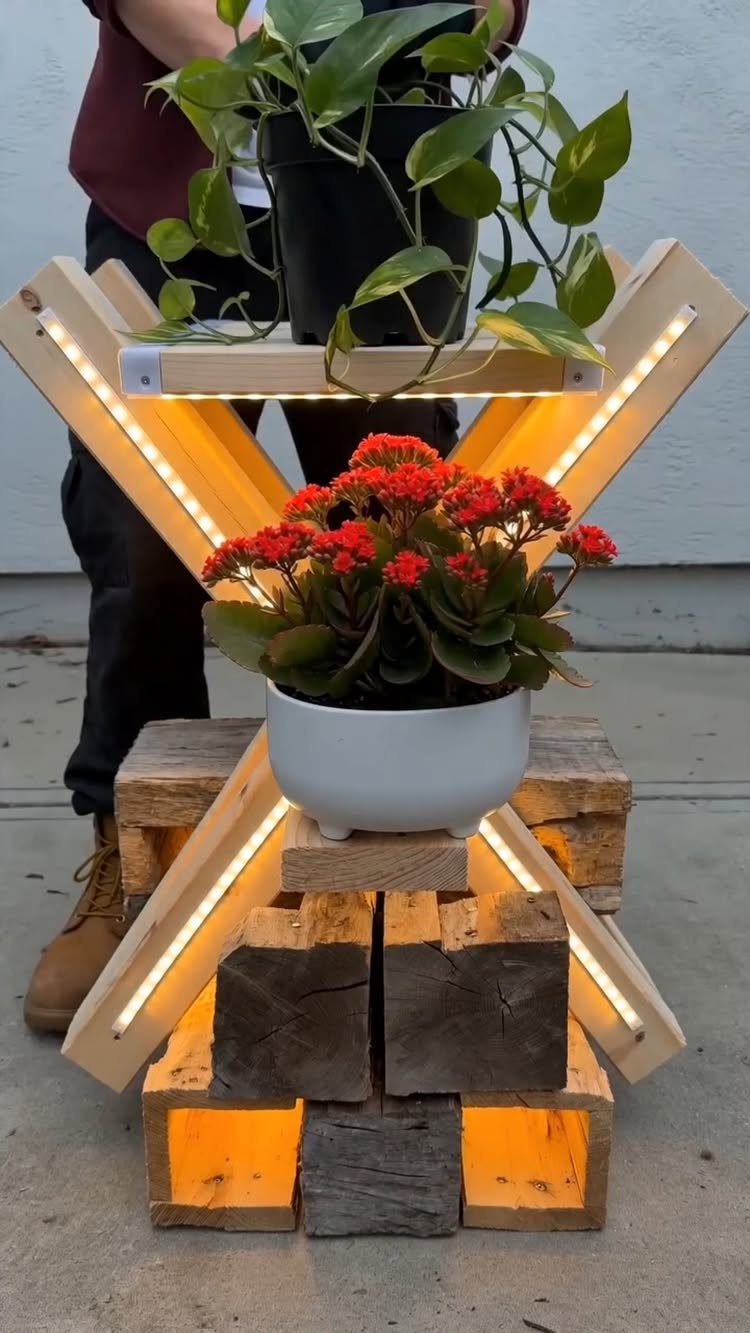
An X-frame built from 1x and 2x lumber steps pots at three heights without eating floor space.
LED strips tucked into the joints turn it into something you notice after dark, though the lights are optional; the structure works fine without them.
Slatted shelves let rainwater run through instead of pooling under pots. Anika’s DIY Life built hers in under half an hour for under $40, which tells you the scope.
A Kreg jig helps but is not required; a drill and a sander cover the cuts.
This fits a corner near an outlet when you have a handful of pots to lift off the ground.
Skip it if your plants need deep spacing; the eight-inch gap between tiers suits herbs and trailing pothos better than tomatoes or tall perennials.
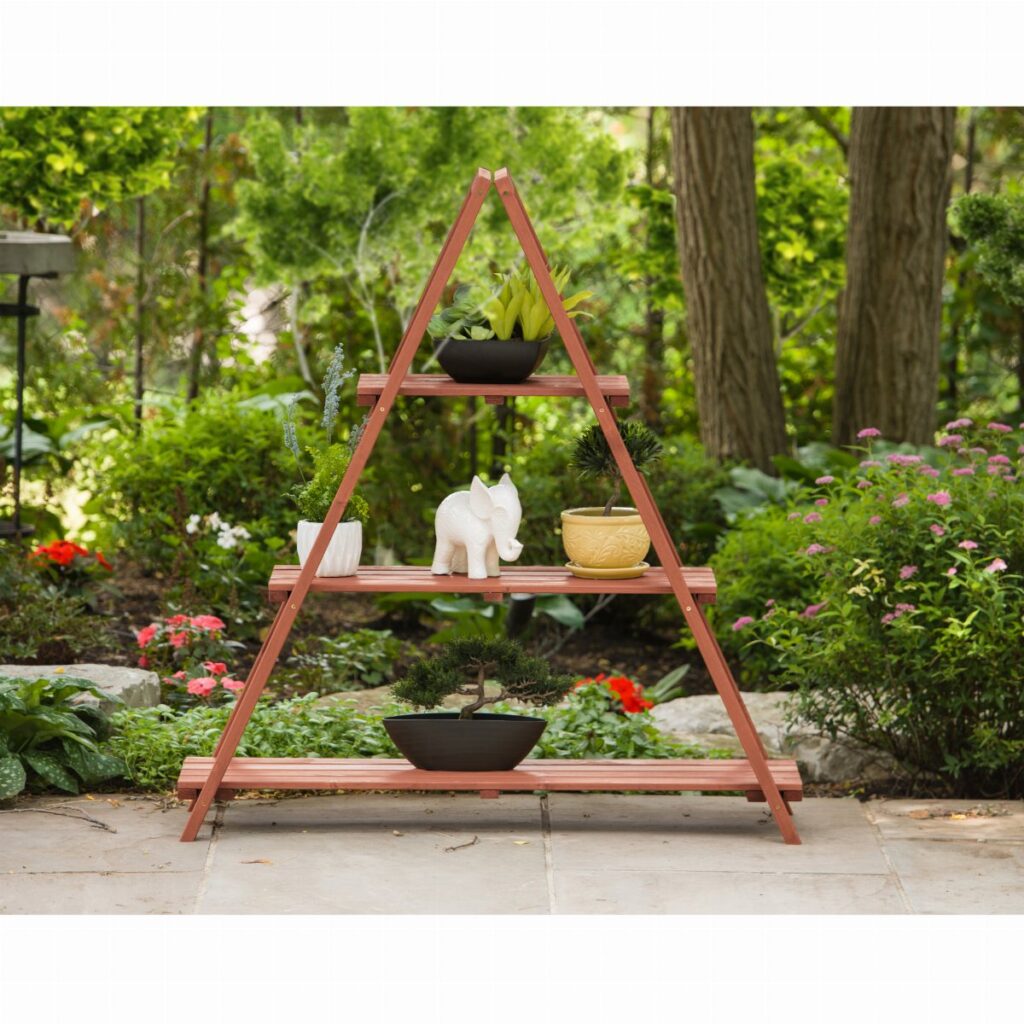
2. Ladder Plant Stand
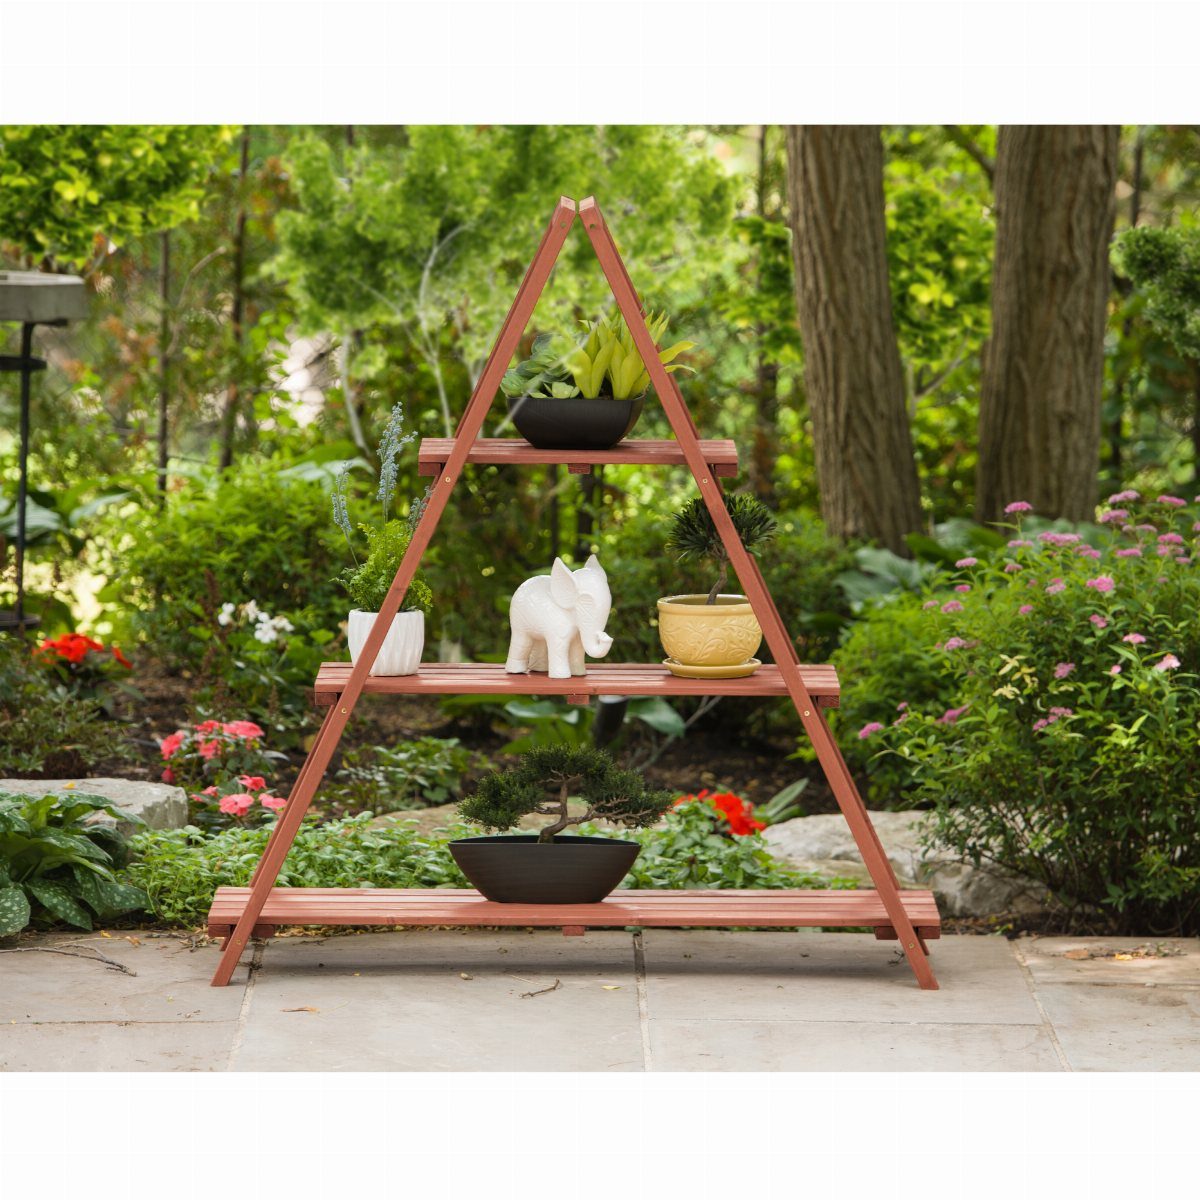
A-frame ladders turn vertical wall space into stepped growing spots, which matters when floor space runs out.
Cedar fence pickets keep the cost low and the weight manageable; you lean it, stand it in a corner, or set it on a patio stone.
The tiered boxes climb the frame in a single footprint, so several plants get light instead of shading each other on the ground. Scrap wood works, though cedar lasts longer outside.
A small stepladder from a garage sale does the same job with no cutting.
This one suits renters best. Lean it against the wall, load it, and move it when the lease ends.
A freestanding ladder catches wind more than a box bolted to siding, so you will want to weight the feet or lean it against a wall.
3. Hanging Plant Stand
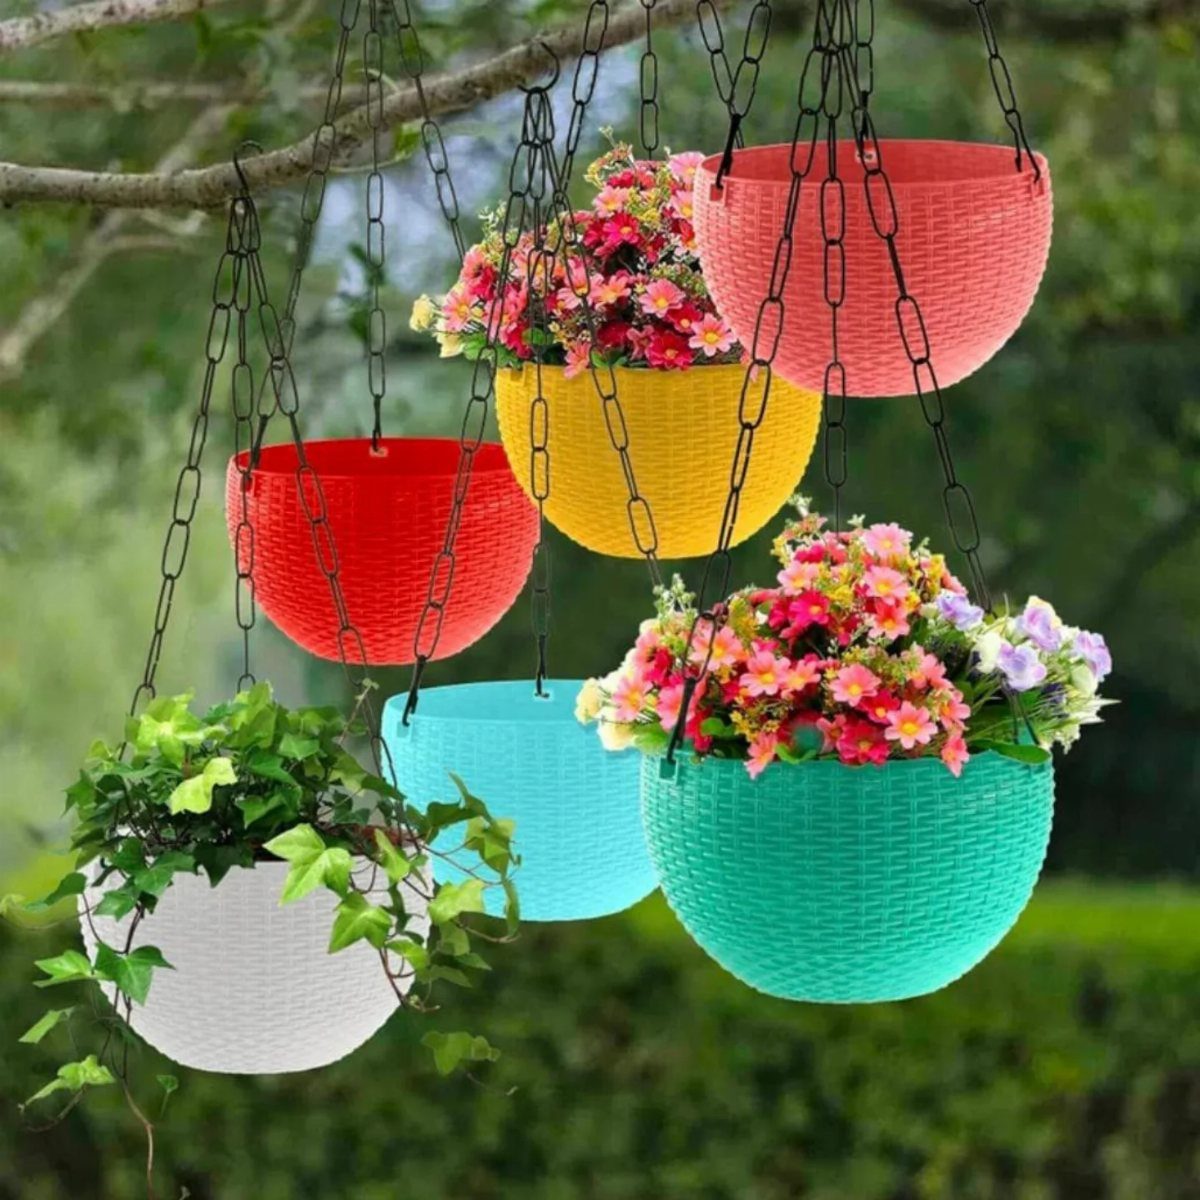
Freestanding arms solve the problem of a basket with nowhere to hang. A couple of common boards and an overhead arm let you park a trailing planter on a porch without drilling into a ceiling you do not own.
Styles run from wrought iron loops to simple wood frames, so the choice depends on whether you want the stand to show or disappear.
Check the height against your reach before you build or buy. Watering a basket above your head gets old fast, and a stand that puts the pot at shoulder level wins for maintenance.
Autumn at Mama Needs a Project built hers as a beginner project and a Mother’s Day gift, which gives you the skill level.
4. Copper Plant Stands
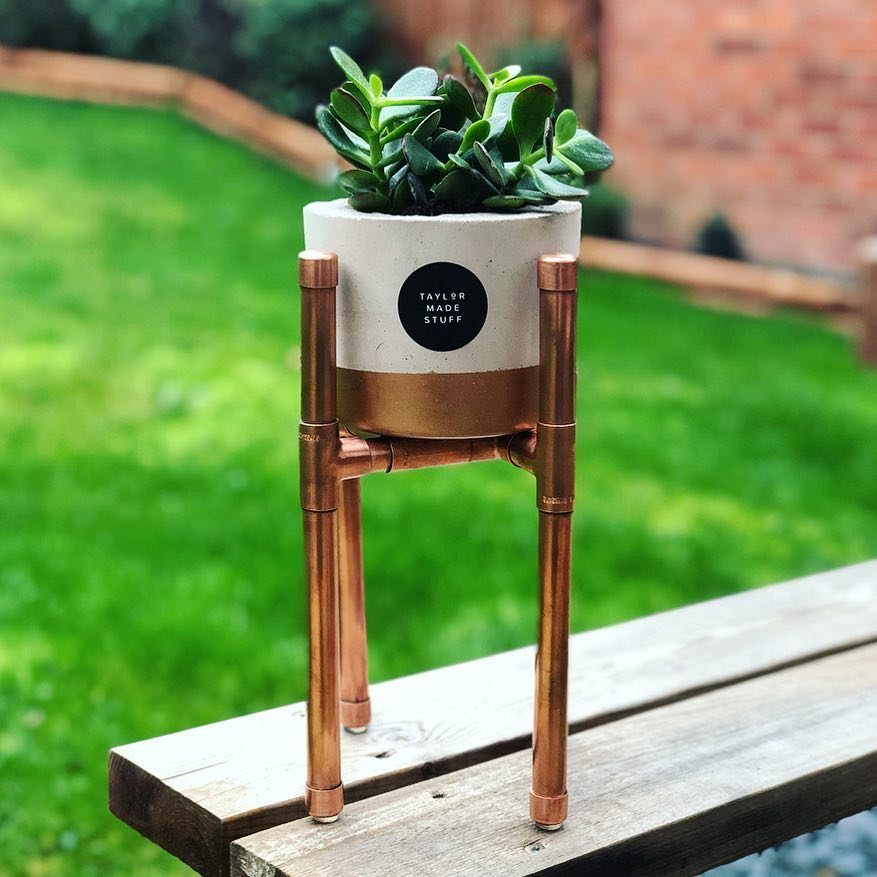
Copper pipe bent into a simple frame holds a single pot and reads modern against brick or wood.
The metal starts bright and shifts through oxidation whether you polish it or not; I prefer letting it age, since the patina protects the metal and hides small scratches.
Keep copper separated from other metals and from masonry that stays wet. A clear exterior coating slows the color change if you want the original tone longer, though it needs reapplication.
Brushed finish handles outdoor wear better than mirror polish.
This one wins for a covered entry or a spot against stucco where the warm tone picks up surrounding light.
Skip it for full sun on a lawn; the contrast with deep green leaves works best where the metal gets reflected daylight rather than direct beat-down.
5. Frame Plant Stand
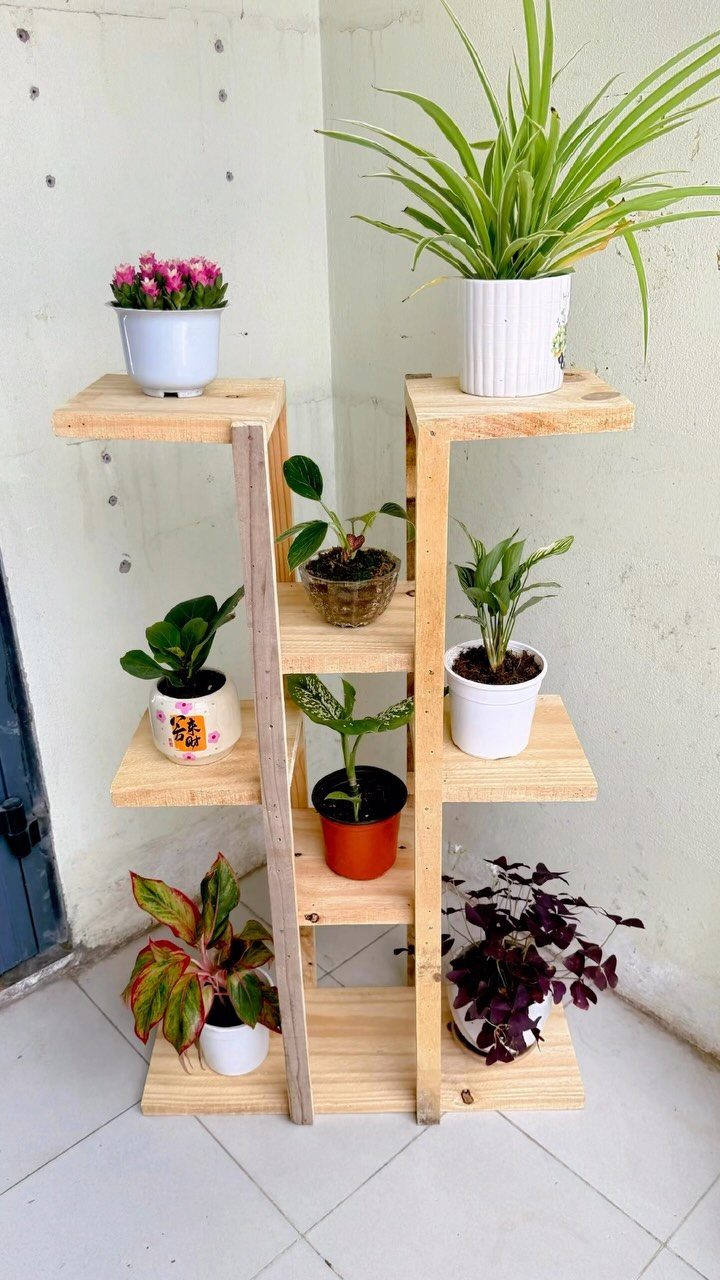
Scrap wood lined vertically and horizontally creates a grid of small shelves against a blank wall. Mason jars or small nursery pots fit the openings; the structure reads as built-in even when it is not.
1x and 2x material and a Kreg jig handle the joinery. You build to the wall you have, so dimensions shift; measure the space and cut to fit rather than following a fixed plan.
This suits a narrow side yard or a balcony where floor space is gone but wall space remains. It fills fast, so plan on small plants or a tight rotation.
I’d use it for herbs or starts rather than a collection that keeps growing.
6. Plant Bench

A bench with integrated planters turns seating into a garden edge. Reclaimed hardwood works if you know the species and its treatment history; otherwise, exterior-grade timber and stainless steel screws keep the structure from rotting where soil meets wood.
The planter box runs the front or wraps both ends. Drainage holes and a gap between soil and the bench frame keep water from sitting against the legs.
Fiberstone bowls inside the box lift the root ball and let air under it.
42 inches wide by 14 deep by 18 high fits a side-yard terrace with a woven chair nearby. I’d pick this for someone who wants to sit where they garden, or who needs a low divider between patio zones.
The maintenance doubles: you are keeping both furniture and plants presentable.
7. Concrete Plant Stand
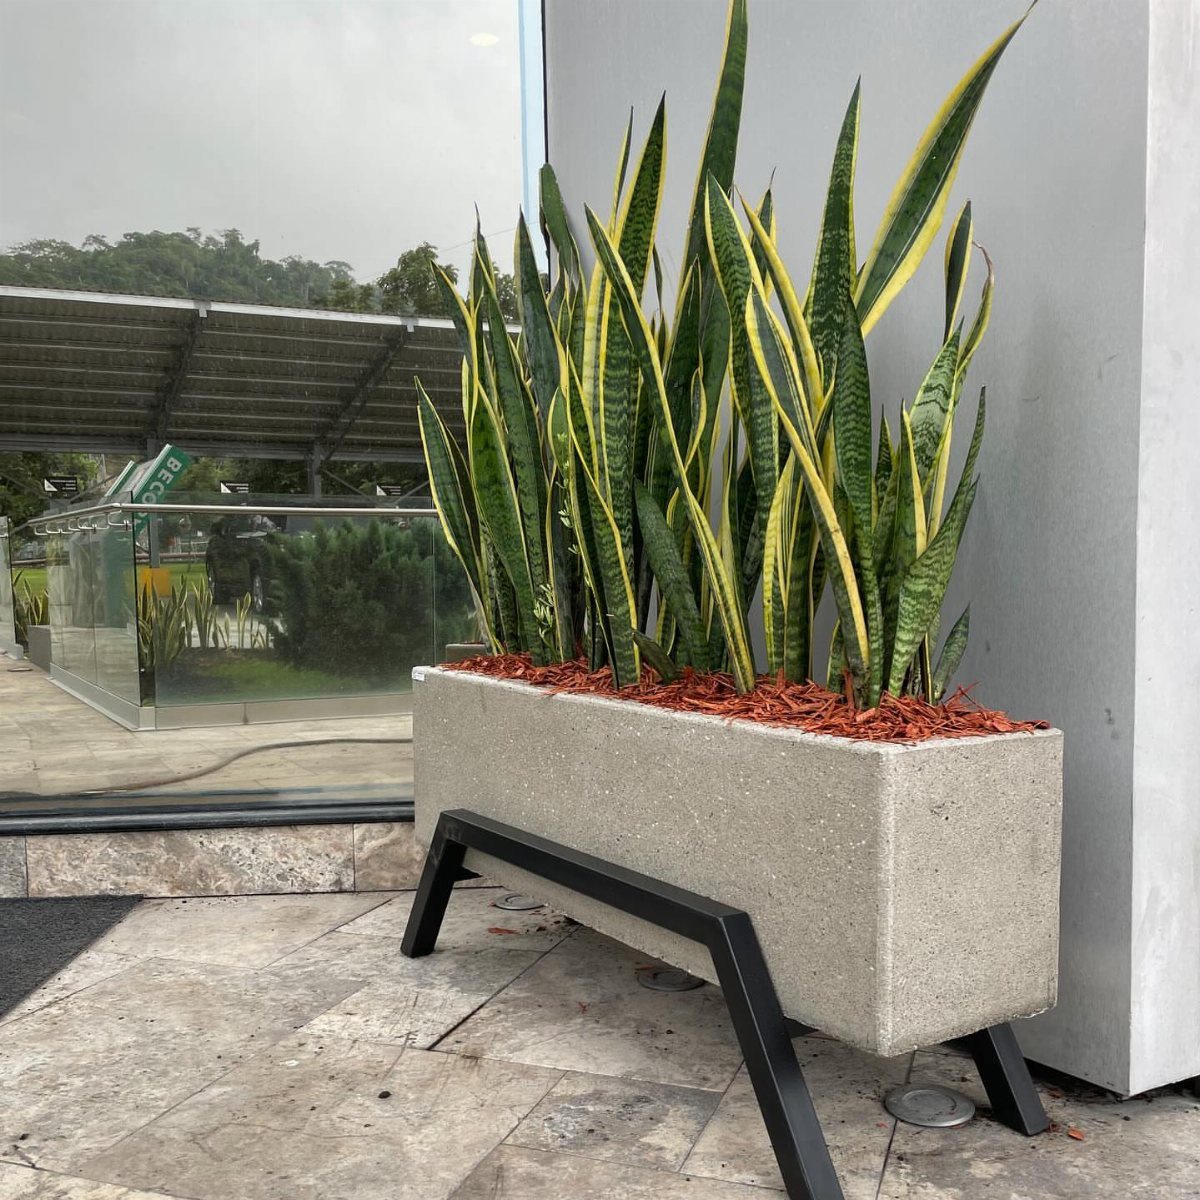
A concrete plant stand reads as architecture rather than furniture. A low, heavy cube sits almost planted itself, which makes it feel right beside a pool or against pale stone where lighter pieces would float away visually.
Weight alone does not make concrete weatherproof. Freeze-thaw cycles crack porous concrete from the inside out, so any mix meant for outdoors needs to be rated for it, and a penetrating masonry sealer matters as much as the pour.
I would use a fiberglass planter nested inside rather than planting directly; drainage stays hidden and the cube itself lasts longer.
This suits someone after a permanent, no-fuss piece who does not plan to rearrange often. Moving it is a job for more than one set of hands.
8. Powder-Coated Iron Arch
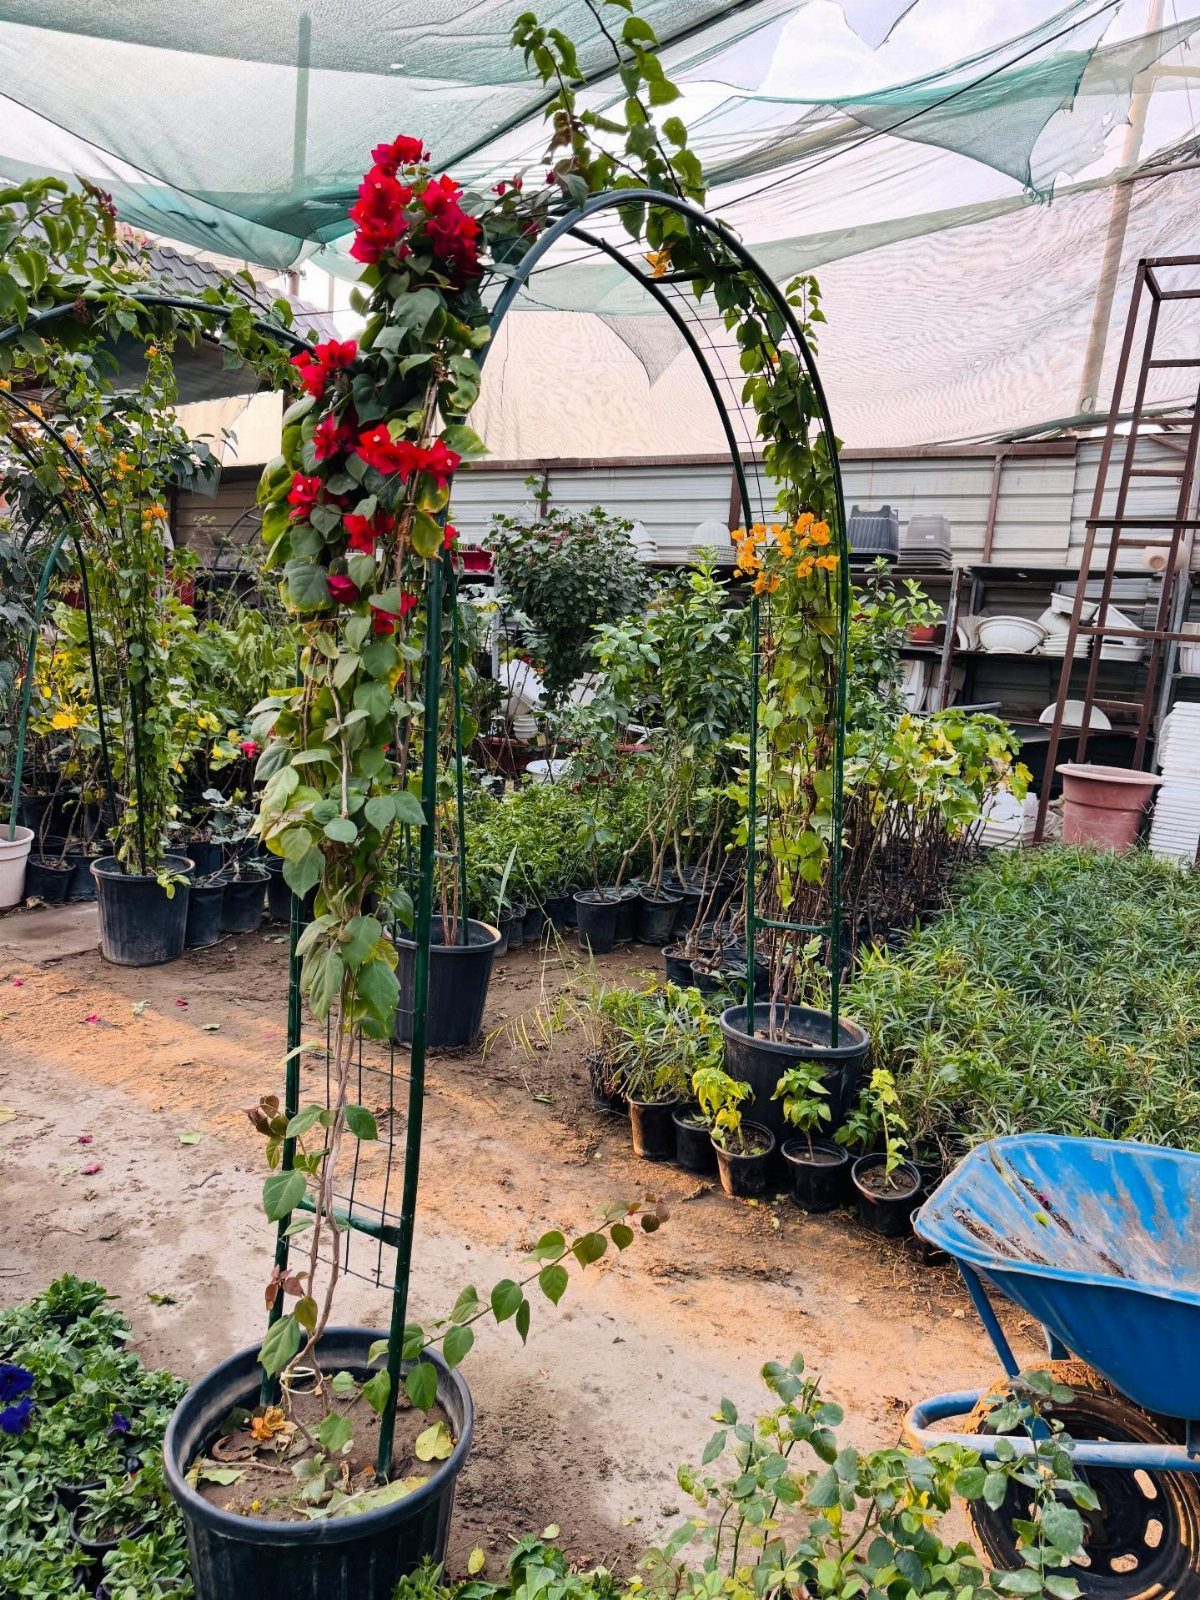
Powder coating is what separates a balcony stand you keep from one you replace. Raw iron rusts at welds and scratches almost predictably; the baked-on polymer skin of a powder-coated frame seals moisture out entirely.
The arch shape buys you height without footprint, which matters on a narrow balcony where floor space is already spoken for. A wall anchor keeps it steady in wind, though check your lease or HOA before drilling.
The hanging bar and two shelves give three zones total: trailers above, mid-size plants on the shelves, and a floor pot tucked underneath if the base is open.
I would pick this for a renter who can anchor safely and wants one stand to carry a whole collection. The matte black finish disappears against most walls and lets the plants read as the feature.
9. Wooden Plant Stand
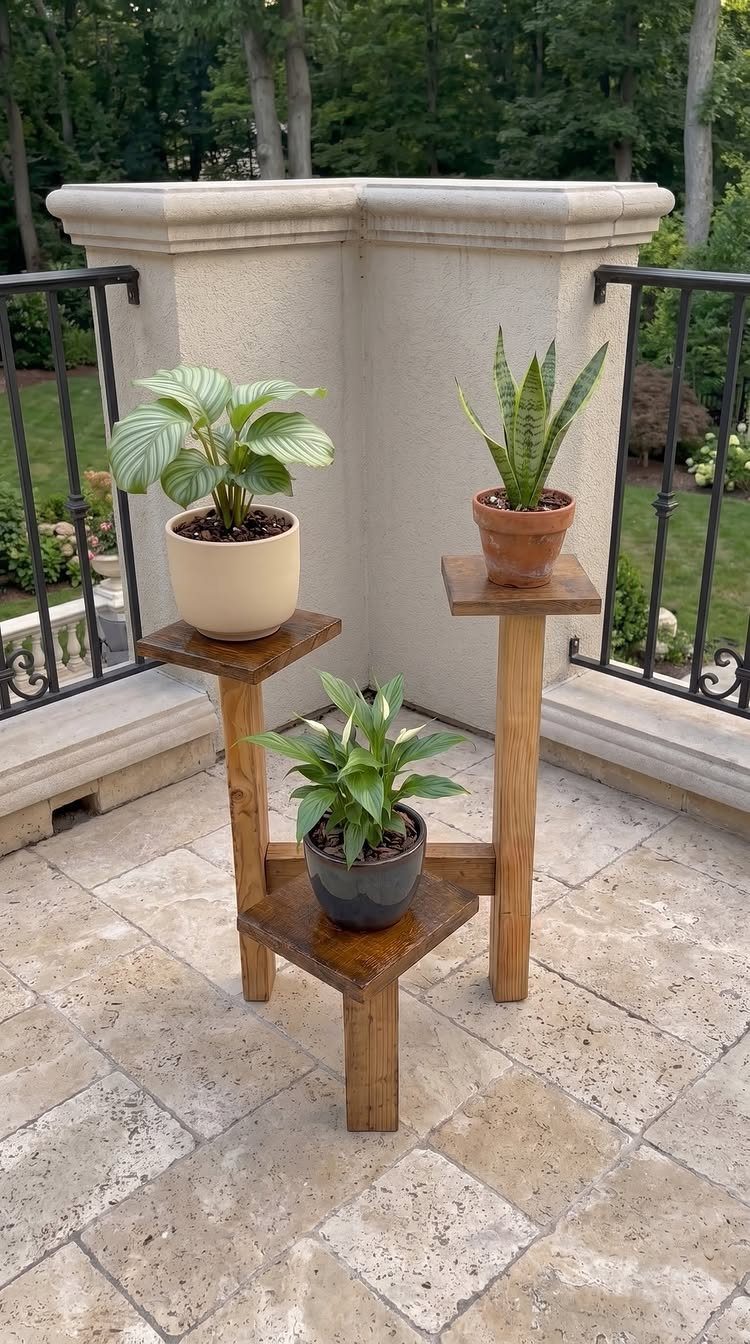
Wood is the material that forgives mistakes. A three-tier stand can be built from a single 1x board with a saw and a drill, or bought flat-packed for not much more than the lumber would cost.
Either way, the staggered levels let each plant catch light without shading its neighbor, which matters more than it sounds once everything fills in.
If you are building, exterior-rated plywood or cedar holds up; construction lumber left raw will gray and check within a season. A penetrating oil finish beats paint for longevity, since it does not trap moisture underneath.
This is the entry point stand: cheap enough to experiment with, easy to modify when your collection changes, and replaceable without mourning.
10. Farmer’s Market Plant Stand
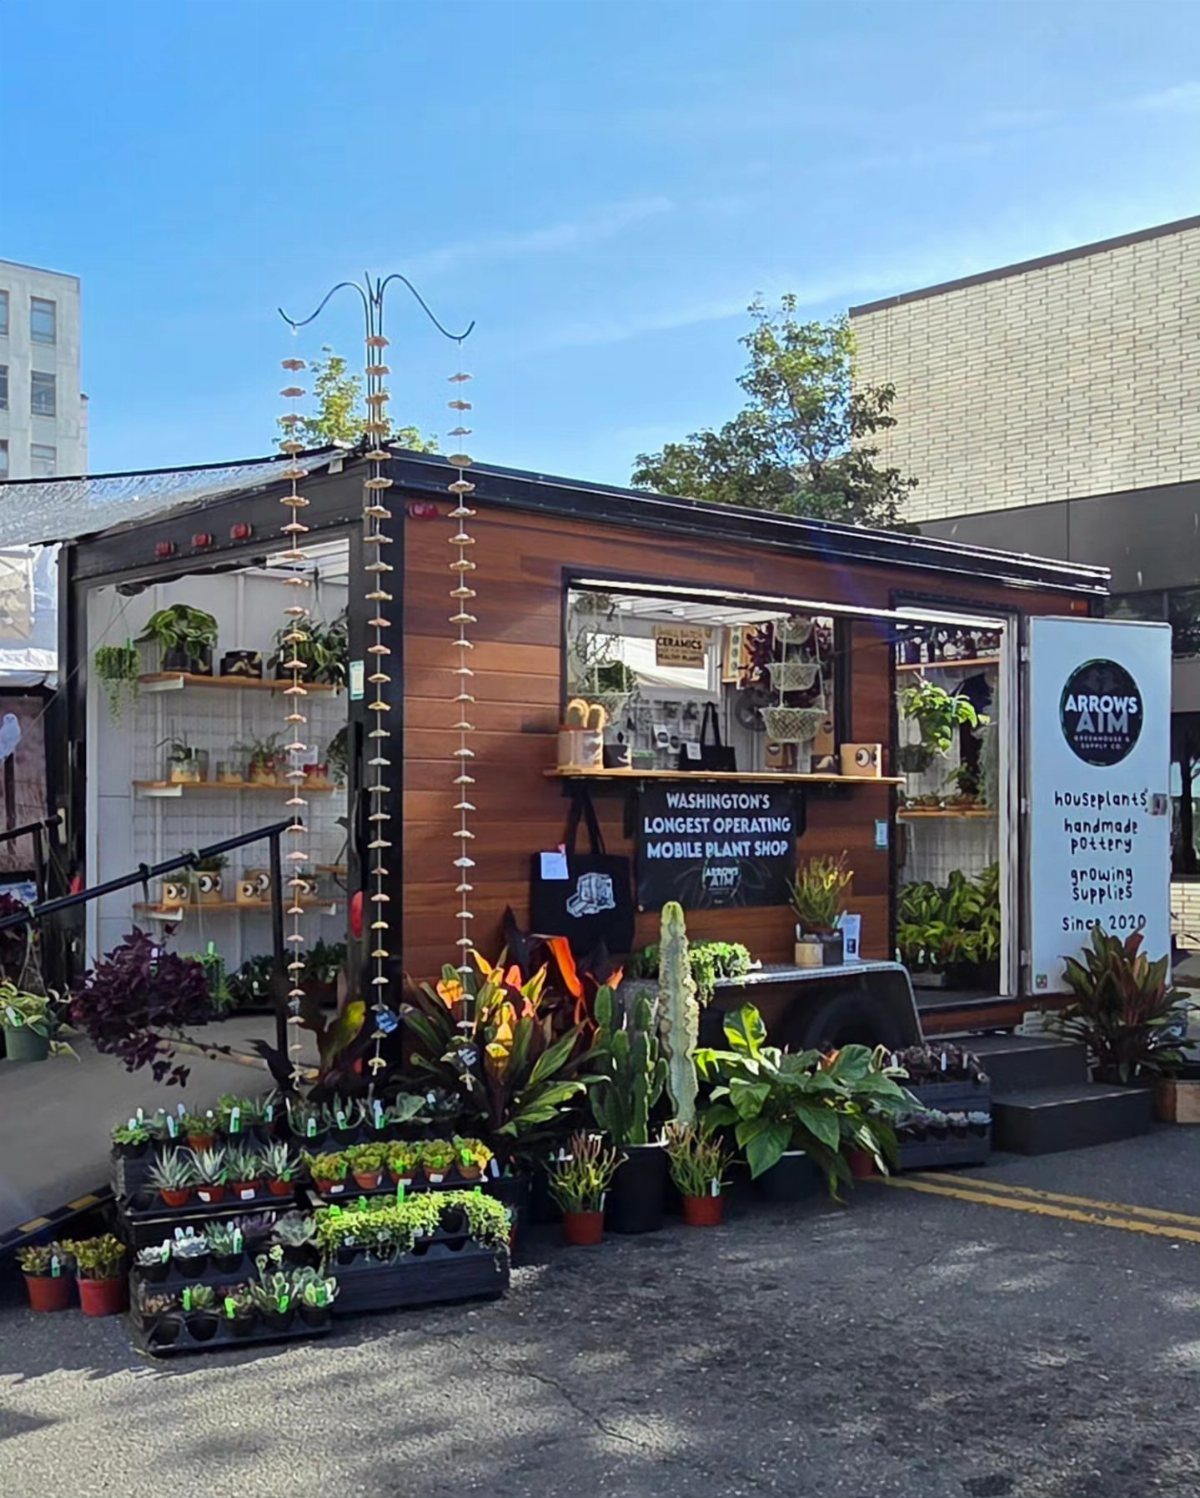
The farmer’s market stand borrows its charm from actual market stalls: lath boards, visible hinges, and a hand-painted sign that announces this is a person who grows things, not a person who bought a look.
The mobile version is a trailer, but the plans build a folding frame that stores flat against a wall or opens to display a dozen pots.
Lath is thin and light, which keeps the frame movable, but it also means this is not a stand for heavy ceramic. Plastic and fiber pots work best; the boards will flex under real weight.
Hinges at the corners let it fold accordion-style, so it fits a closet or a narrow garage gap off-season.
I would build this for a small patio or a landlord who tolerates nothing permanent. The sign is optional, though it is what makes the thing feel like yours rather than a shelf with plants on it.
11. Pedestal Plant Stand
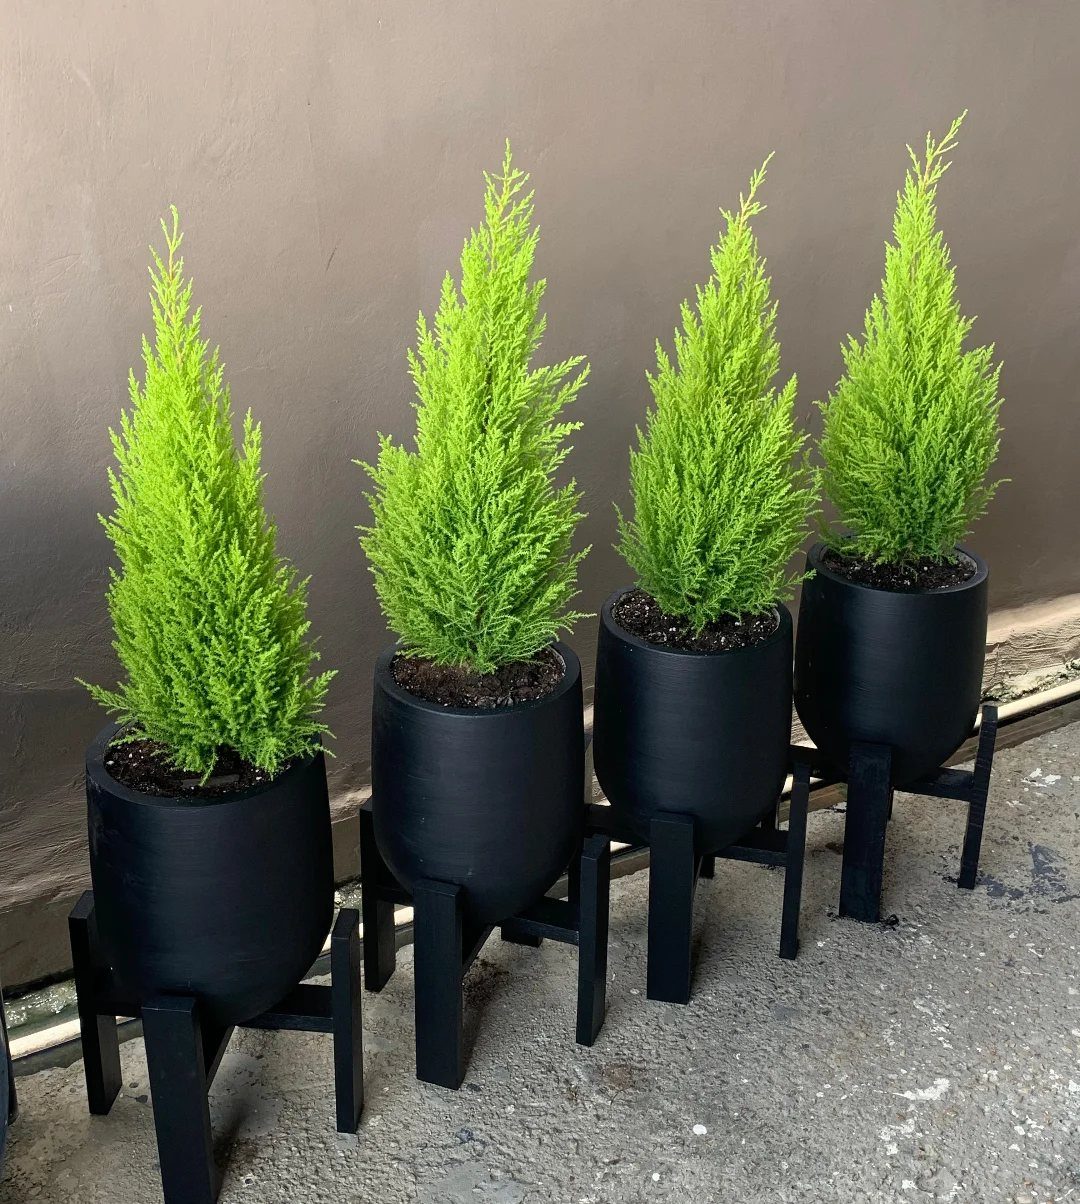
A pedestal does one job: it lifts a single plant to where you actually see it. One pedestal looks like an afterthought; three or more read as intention.
Materials run from powder-coated steel to cast resin to turned wood, and the choice changes the temperature of the room. Metal reads modern, wood reads collected, painted resin reads accessible.
Height varies from barely off the ground to knee-high; the taller ones suit floor plants you want at table level, the short ones work on an actual table or a low wall.
This is for the collector who has one specimen worth isolating. It trades away density: each plant gets its own real estate, so the overall count stays low.
12. Pallet Plant Stand
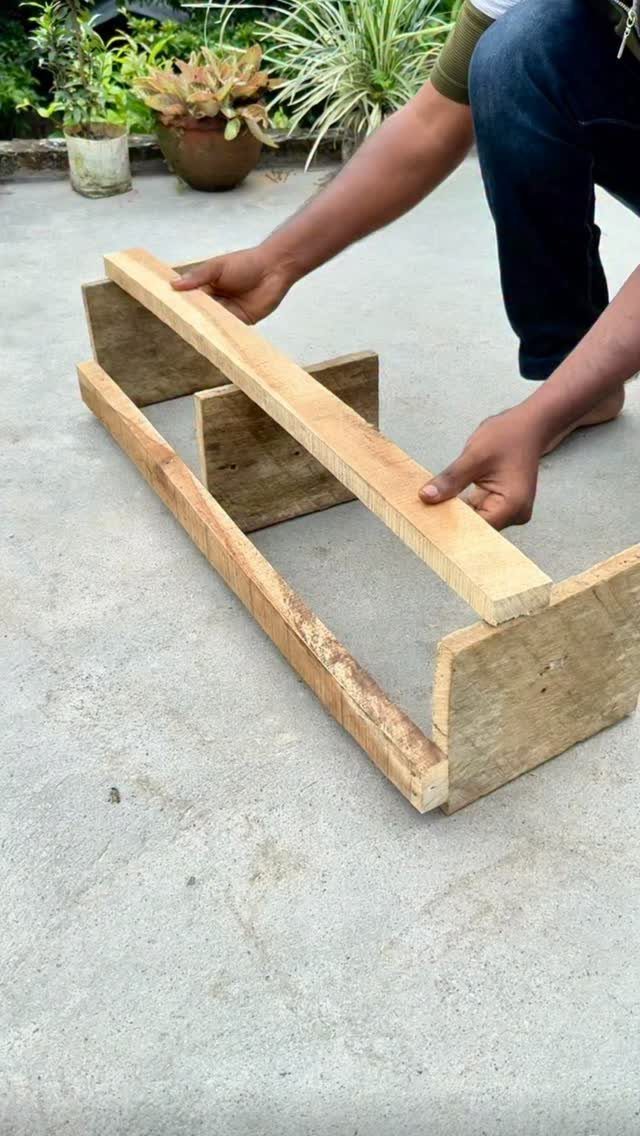
Pallets are free if you ask around loading docks and construction sites, which is their whole appeal. Light-colored pine slats, probably heat-treated rather than chemically fumigated, matter if you are growing anything you might eventually eat.
Check for the HT stamp; MB means methyl bromide, and that pallet belongs in a landfill.
Disassembly is the work. A pry bar and a hammer get the slats off, but expect splits and bent nails.
Some builders leave the pallets whole and just stand them on end for instant shelving; others break them down completely and rebuild. The first way takes an hour, the second takes a weekend and yields cleaner lines.
I would use whole pallets for a temporary season, broken-down lumber for something that stays. Either way, a coat of exterior stain keeps the graying at bay for a year or two.
13. Bug House Plant Stand
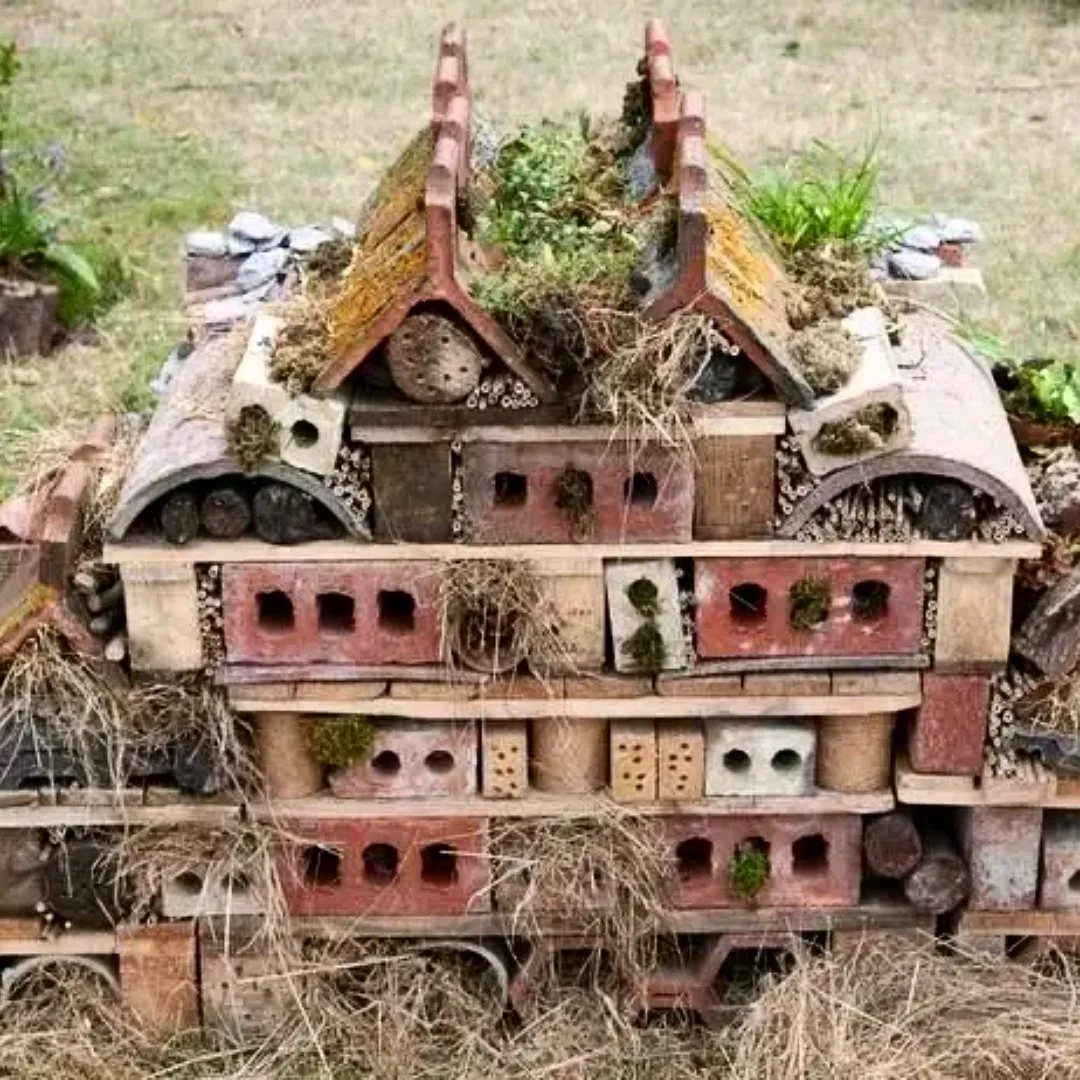
A bug house plant stand keeps your pots on top and gives solitary bees, ladybugs and lacewings somewhere to live underneath.
Solid brick, terracotta or thick timber makes a flat roof that holds the weight; leave gaps between layers of straw, drilled logs and broken tiles below for the insects to crawl into.
I would build the legs from 4x4s and bore half-inch holes deep enough to keep water from pooling, angled slightly downward so rain drains out. The whole thing sits on grass or paving stones without fuss.
It suits gardeners who want one structure doing two jobs, and the pollinator benefit builds over a season or two as word spreads among the neighborhood bugs.
A simple wooden stand with drilled legs works if you do not have room for the full layered build.
14. Old Window Shutter Stand
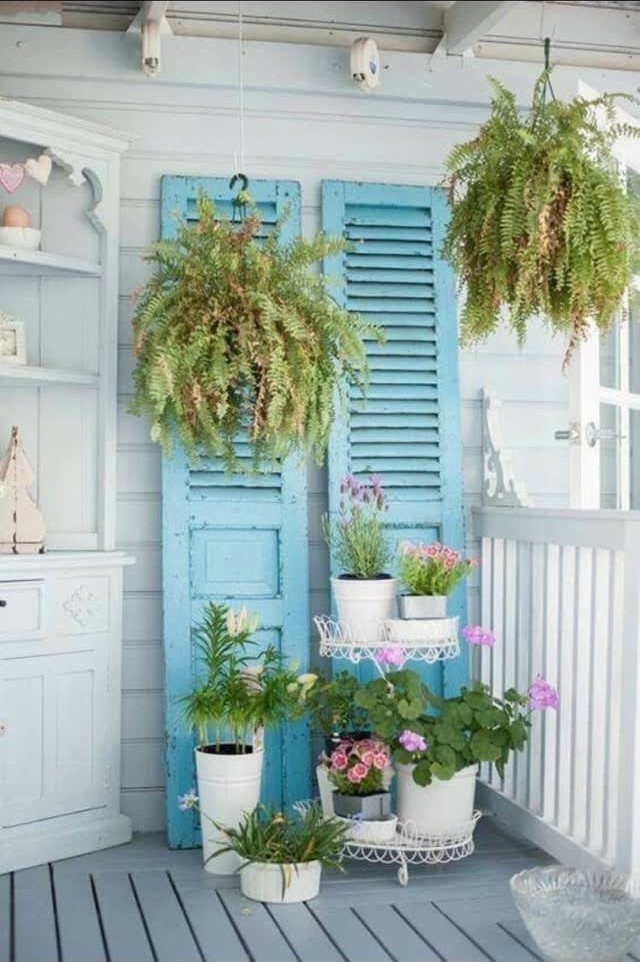
Two weathered shutters leaning against a porch wall already read as architecture, and the slats give you built-in ledges for small pots.
Tie 4-inch terra cotta pots through the louvers with jute or wire, or set larger containers on the ground in front and let the shutters frame them like a backdrop.
Paint them first if the color clashes; a soft blue that has faded to something calmer than hardware-store bright will settle in better against the garden.
This is low-skill recycling: no cuts, no assembly, just hauling and leaning. It trades stability for charm, so keep it out of wind corridors or anchor the bottom to a deck rail.
I would pick shutters with wide slats, since narrow ones wobble under anything heavier than a succulent.
15. Vertical Herb Shelf
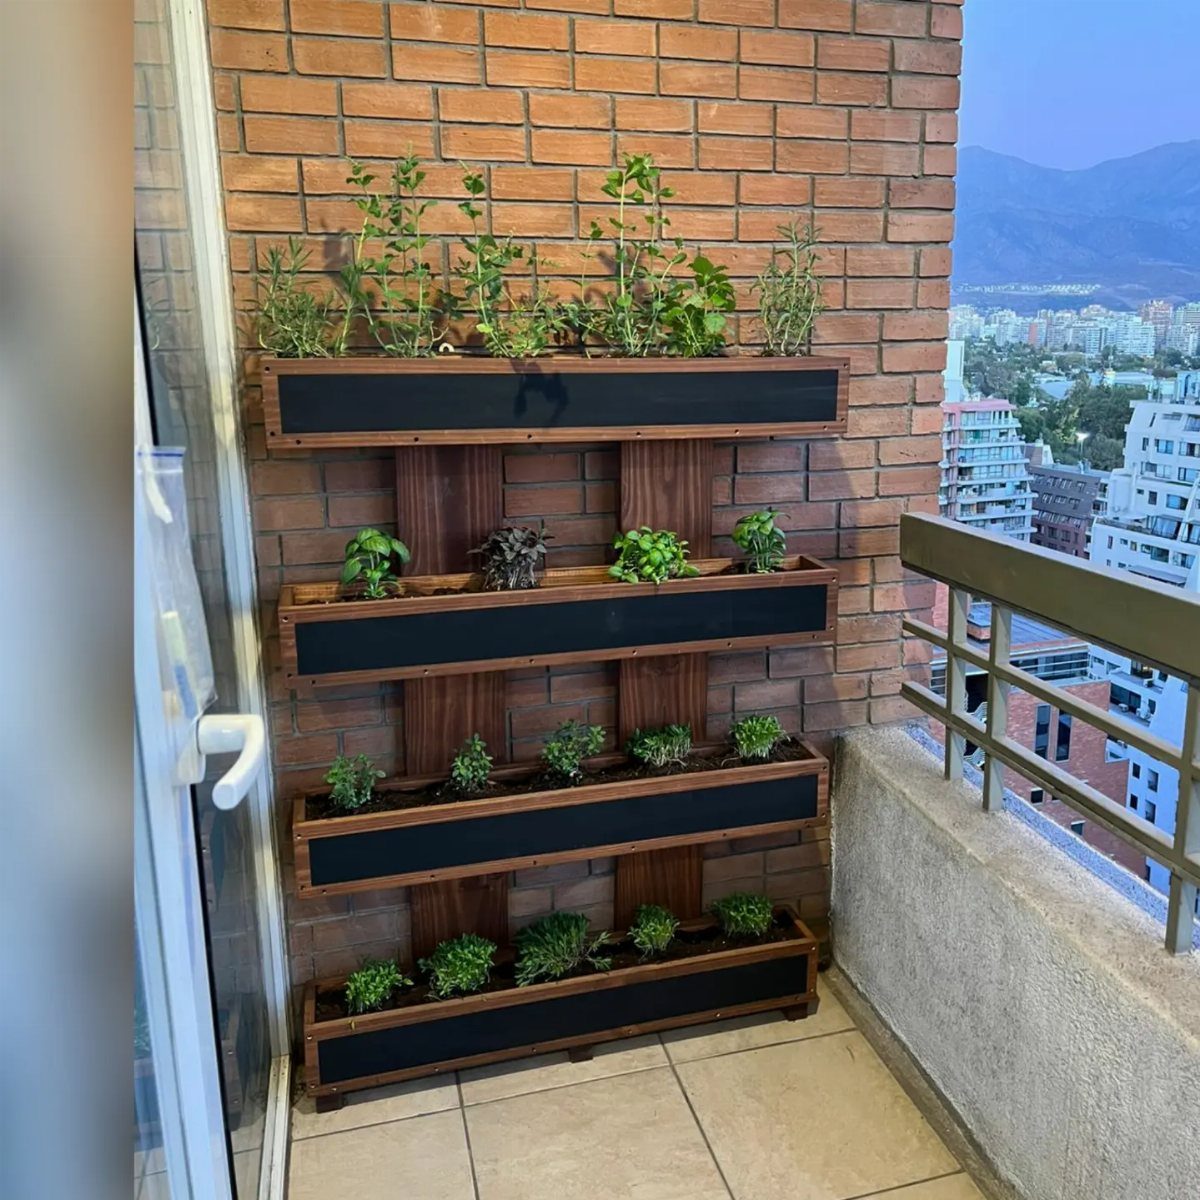
A vertical herb shelf screws to brick or siding and holds four long planters in the footprint of a single pot.
Build from 1x cedar or pine, use a Kreg jig for the box frames, and line the bottoms with landscape fabric over drain holes so soil stays put.
Aluminum flat bar across the front of each tier hides the mechanics and gives a clean edge.
Fresh herbs want plenty of direct sun, so a south-facing balcony wall is ideal.
This setup costs more than ground pots but buys back floor space; I would build it for a cook who steps outside for basil and mint daily, not for someone who waters once a week and forgets.
Stability and Support
Wind catches stands the way it catches umbrellas: suddenly and from the side. A tiered frame or a freestanding ladder has more surface than you’d think, and a gust can send pots and soil across the patio before you react.
Weight the feet with concrete pavers or sandbags, or lean the stand against a wall so the wind pushes it into the surface rather than away from it.
For soft ground, burying the legs deep enough turns the stand into something that resists tipping without looking anchored. On a deck, bolt to the rail or add lateral bracing low on the frame where it does not show.
Check after the first real storm; what held in a breeze may shift when the direction changes.
Material Selection
Terracotta weighs more than plastic, which helps hold a stand steady, but a tall plant in a heavy pot can still tip if the center of gravity sits high.
I would match the pot to the frame: wide, low containers on tall stands, taller pots on squat bases.
Untreated pine, raw metal and porous materials deteriorate fast outside. UV breaks down lignin in wood, wet-dry cycles open cracks, and freeze-thaw stress spalls concrete from within.
A plant stand that lives outside full-time has to hold up like garden infrastructure, not like indoor furniture that happened to wander outdoors. Cedar, teak, powder-coated steel, or concrete rated for exterior use last because they handle those cycles.
Elevation helps too: raising pots improves drainage and airflow beneath them during rain, and puts distance between the root ball and ground pests.
Drainage Considerations
A solid top without holes turns into a birdbath every time it rains, and a pot sitting in that water rots from the bottom.
Drill drainage through the shelf itself if the pot has no feet to lift it, or space the slats wide enough that water falls through rather than pooling.
The stand’s job is partly to keep the pot’s drainage working. Ground-level containers sit in their own runoff; raising them lets gravity do what the pot’s holes intended.
Landscape fabric over the openings keeps soil from washing out without blocking flow.
Upcycling Ideas
Old furniture, pallets, and discarded frames already exist, which matters when the budget is tight and the timeline is this weekend.
A stepladder from a garage sale, shutters pulled from a renovation pile, or a pallet with the HT stamp checked and cleaned up becomes a stand without a trip to the lumberyard.
The outside location forgives a lot.
Paint that would not pass indoors, joints that are slightly off, a surface that weathers rather than staying pristine: all of it reads as character in a garden and saves the cost of buying new.
I would start with what is already in the garage or available for the asking, and spend money only on what keeps it standing upright and draining dry.
Frequently Asked Questions
What can I use as an outdoor plant stand?
Old furniture, pallets, concrete blocks, ladders, shutters, or scrap wood all work. A garage-sale stepladder opens into instant tiers, and two old shutters propped against siding give small pots their own ledges without a single cut.
The farmer’s market style uses lath boards and hinges so it folds flat against a wall when not in use.
How to make an inexpensive plant stand?
One 1x board, a saw, and a drill will get you three shelves, or a flat-pack kit runs barely above lumber price if you would rather skip the cuts.
Pallets cost nothing if you ask around back of stores, though prying them apart eats a weekend and looks far tidier than using them whole.