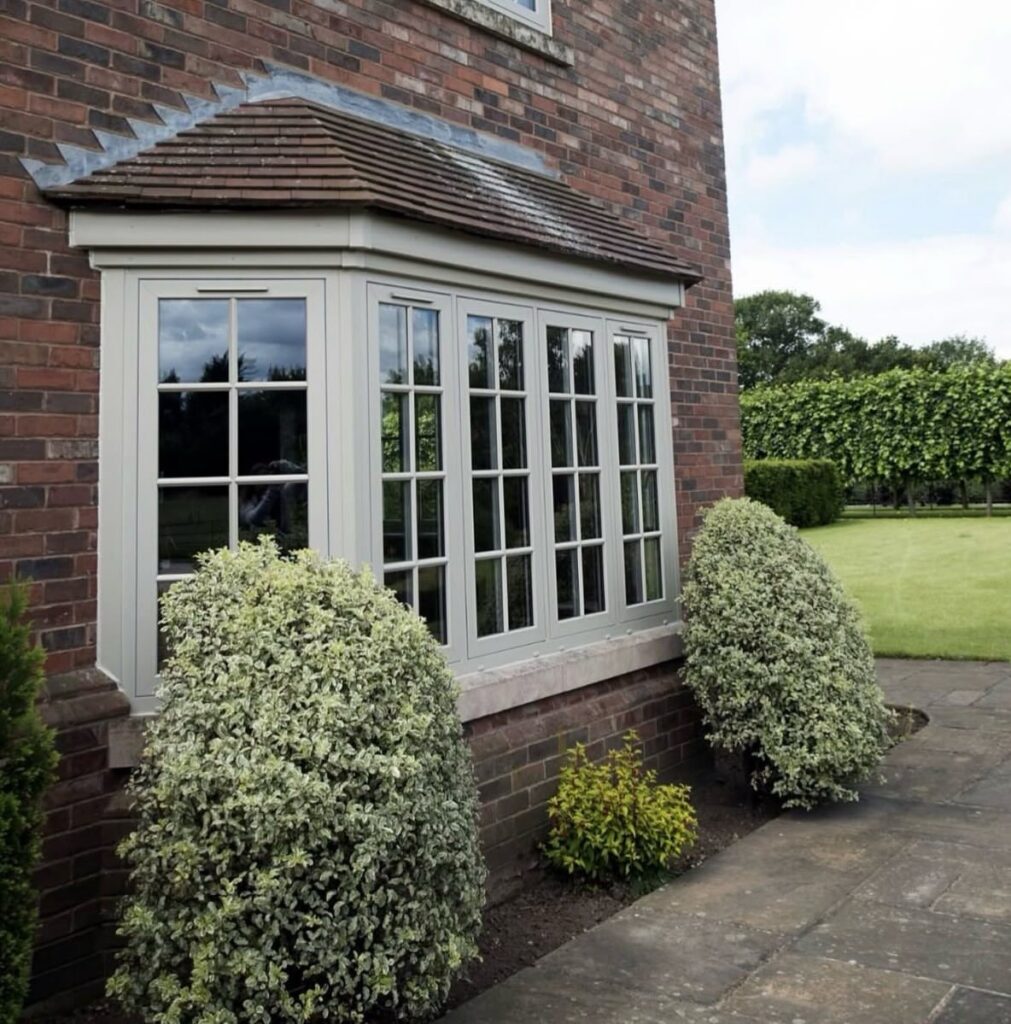
Bay window landscaping can run from a cedar window box you build Saturday morning to brick and stone you’ll still be looking at when the mortgage is paid.
What decides which idea fits is whether you need to take it with you when you leave or whether you are planting something that stays with the house.
The slatted bottom I use for drainage in those cedar boxes is the same reason I skip ready-made ones; most are too shallow for hydrangeas to survive a single summer.
1. Window Box Planter Ideas
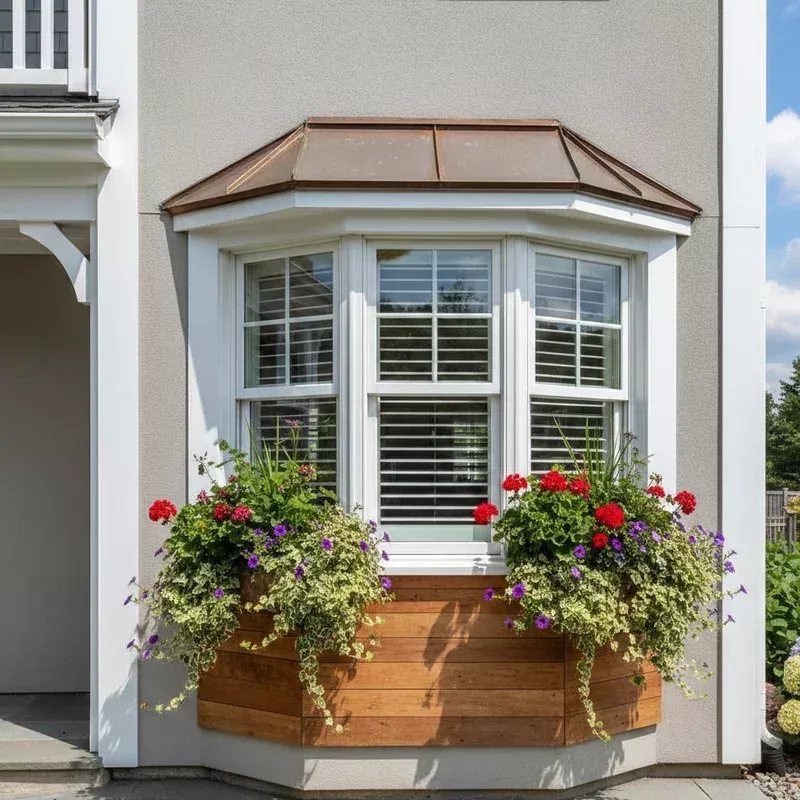
A wrap-around window box turns the bay’s curve into a single planting stage instead of three separate ledges.
Copper roofing overhead gives the flowers a warm glow at sunset, which is half the reason I keep coming back to this look.
Hydrangeas work if the box is deep enough; most ready-made ones are not, so I build from cedar 1x8s with a slatted bottom for drainage.
Trailing greenery such as licorice vine or sweet potato vine forgives missed waterings and softens the box edges.
Keep the soil line well below the rim or the wood rots faster than the plants mature. I’d pick this one for renters who want color without tearing up the yard; take the box with you when you leave.
2. Layered Flower Beds
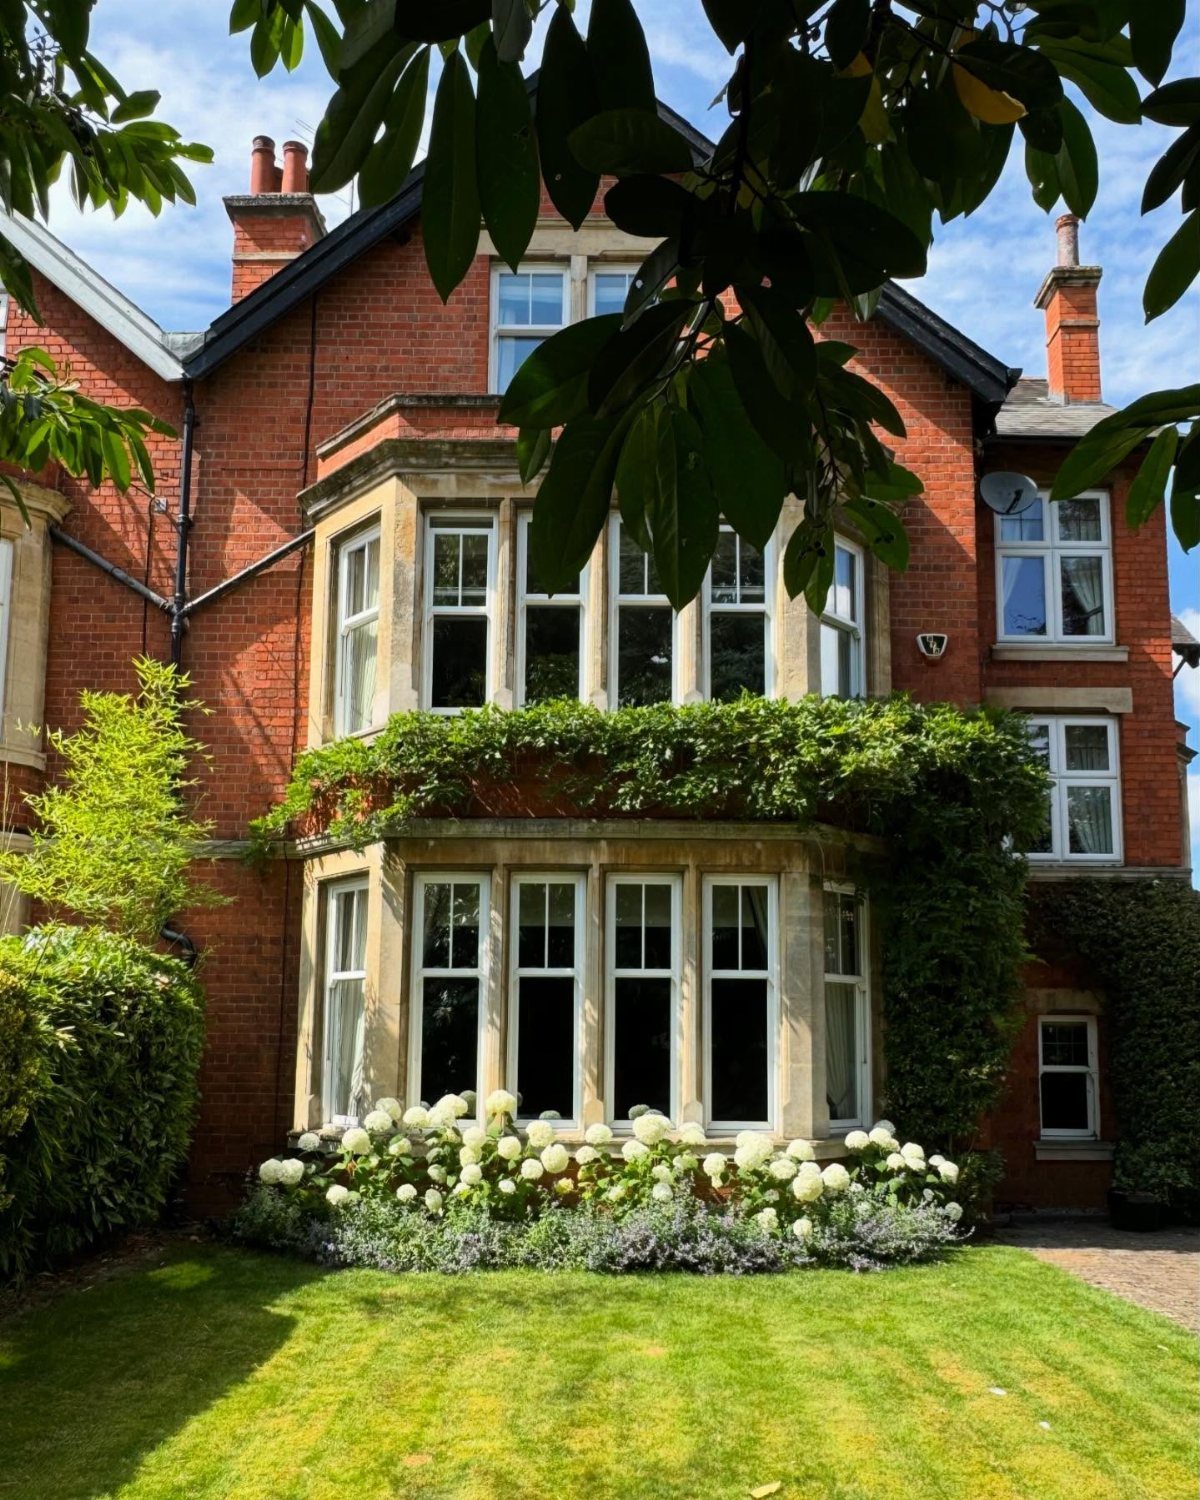
Two tiers of planting let you stack height without blocking the glass, which is the whole problem with beds under windows.
I set the rear shrubs farther from the foundation than feels right at first; they fill out faster than you expect and need air against the siding. Roots find cracks, and siding needs air.
The lower tier sits forward enough to catch rain runoff from the roof; that is free irrigation through the hottest months.
Purple-gray groundcover, maybe creeping thyme or sedum, loosens the look without extra work. This one trades away weekend speed for a bed that looks intentional by year two.
Skip it if you need finished by Sunday night.
3. Cottage-Style Garden
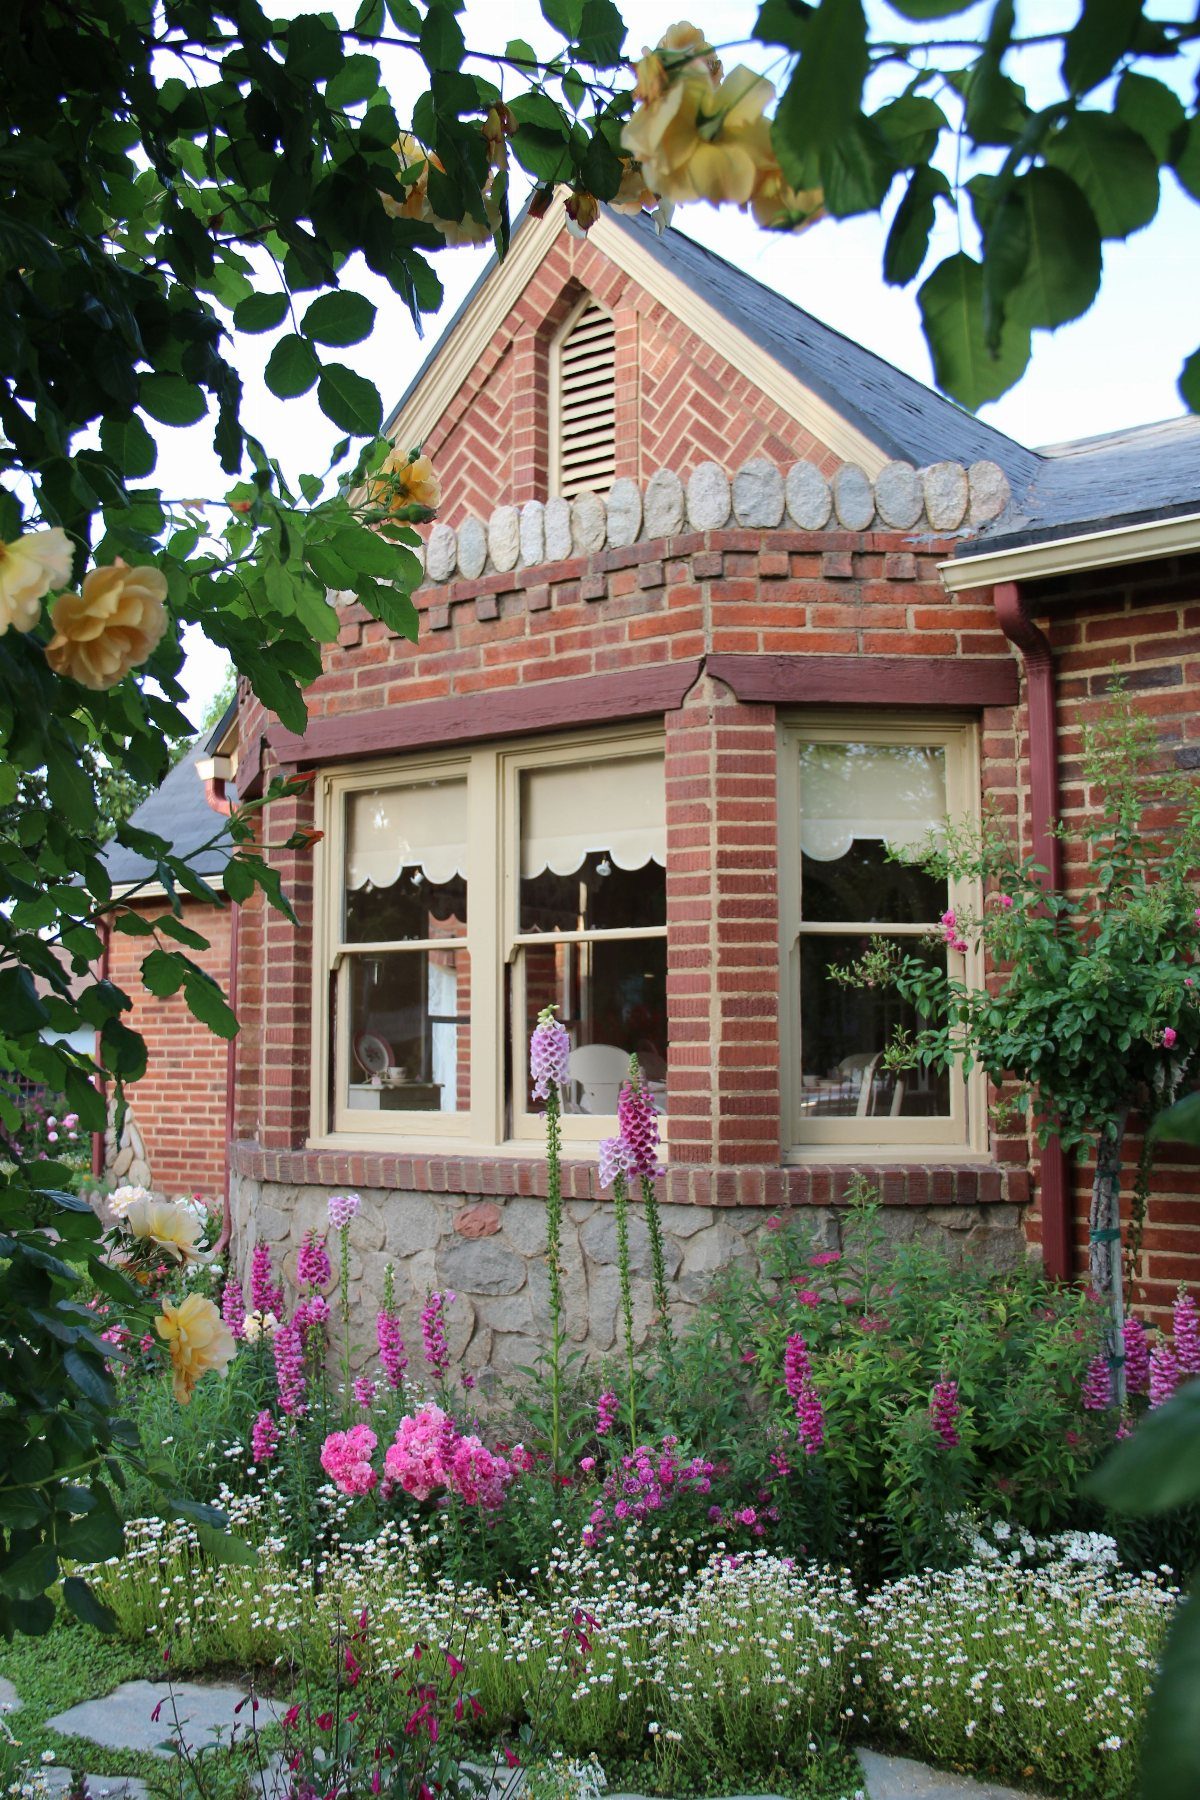
A cottage garden around a bay window works because the window itself is already busy; the planting can relax and match its energy.
Foxgloves give vertical spikes in early summer, roses carry June through September, and daisies fill the gaps with zero attention.
Morning glory or clematis up the brick needs twine or thin wire anchored in mortar joints, not siding. I learned that after pulling loose a vinyl corner piece.
Clematis is slower to establish but perennial in zones 4–9; morning glory reseeds so aggressively I now pull half the seedlings each May.
A stone foundation does real work, lifting the bed clear of splashback rot where siding meets soil. Without stone, raise the soil on a gravel base so water drains off rather than soaking the siding.
This style suits owners who will be in the house long enough to watch self-seeders find their own balance.
4. Brick and Stone Surrounds
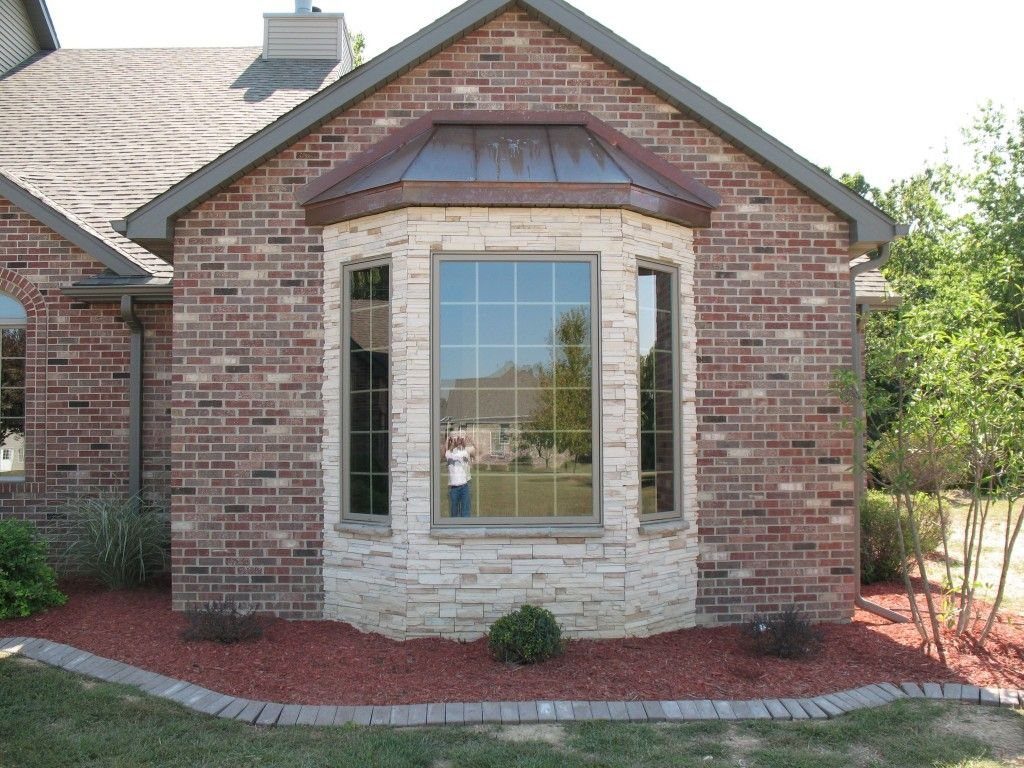
Stone veneer at the bay base gives the window weight it does not have on its own, especially on a brick house where the bay can look pasted on.
A light color reads as trim rather than structure, which keeps the house from going too dark.
Red mulch and brick edging do separate jobs: mulch keeps weeds down, edging keeps lawn grass from marching into the bed. I use steel edging now; brick shifts in freeze-thaw and needs relaying every few years.
This one trades away flexibility for permanence. Stone is not coming off without damage.
I’d only do it on a house I planned to stay in past the mortgage’s first refinance.
5. Exterior Trim Enhancements
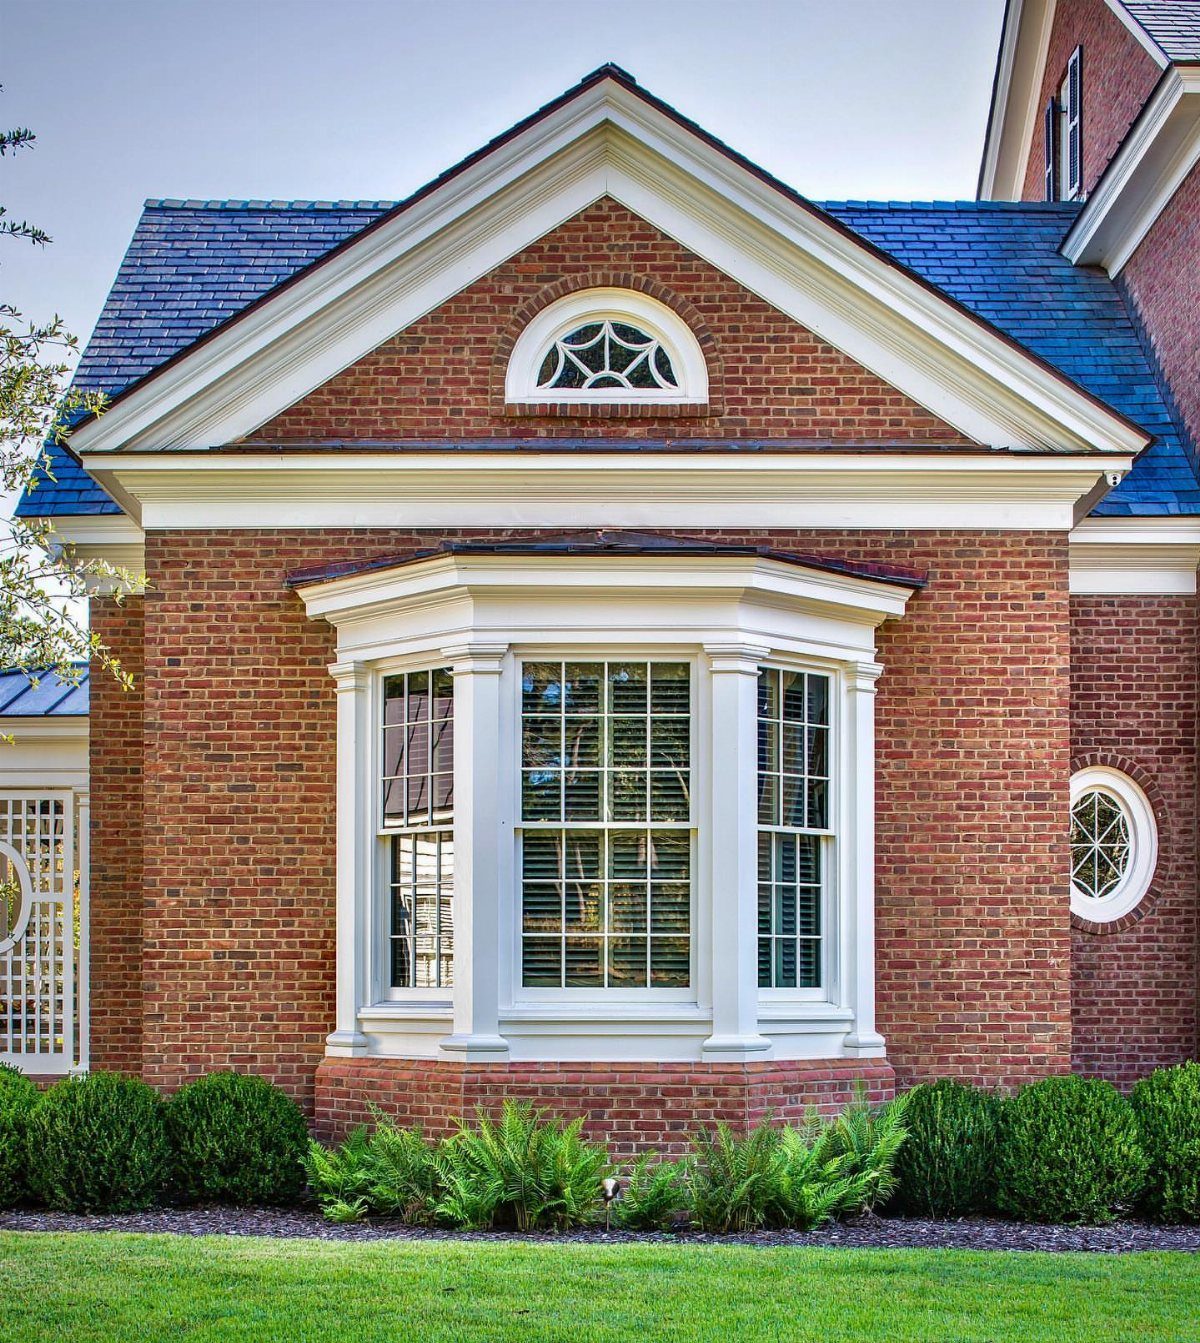
Crown molding and a pediment turn a builder-grade bay into something that reads as original to the house.
White trim against red brick is high contrast by choice; painted brick the same color as the trim would lose the shadow lines that make the detail matter.
PVC trim holds paint longer than wood and costs more; I weigh the difference at every ground-level board. I use PVC on anything close to the soil; rot finds the bottom board first and works upward from there.
The small arched window under the roofline is a nice touch if your bay’s roof pitch allows it; most do not without looking squeezed.
This is the most expensive idea here and the slowest to install. It suits owners who want the house to read as maintained from the curb, not discovered in the garden.
If your budget is tight, do the crown and skip the columns; the horizontal line carries most of the effect.
Choosing the Right Plants
Dwarf hydrangeas, boxwoods, coral bells, Japanese holly, and Carex ornamental grasses stay compact enough to keep the glass clear.
I would not plant standard hydrangeas under a window; even the dwarf varieties need a box or bed deep enough for their root ball.
East-facing bays get soft morning light; south-facing ones cook by mid-July. Match the plant to the side of the house, not just the hardiness zone on the tag.
Seasonal Care Tips
Summer heat means checking boxes and beds twice a week; containers dry faster than ground soil.
I ease off the watering once nights start feeling cold, and I quit fertilizing well before frost so the plants have time to toughen up.
Flowering shrubs need a trim once the blooms are spent; evergreens do better with an early spring shaping before they start pushing new growth.
Slow-release fertilizer every six to eight weeks carries plants through the season without the surge-and-crash of liquid feeds.
Drainage matters more than nutrients. A slatted box bottom or gravel base under stone keeps roots from sitting wet; rot kills more window gardens than drought does.
Sunlight Considerations
Window orientation is the first filter before you pick a plant. East-facing bays get gentle morning sun; west-facing ones take the harsh afternoon blast.
North-facing windows stay in indirect light all day, which suits coral bells and other shade-tolerant plants. South-facing bays receive the most sun and dry out fastest.
I would not put a shade-lover like coral bells on a south-facing bay without some protection, and full-sun plants such as dwarf hydrangeas struggle on the north side.
The compact varieties in the list work across most exposures, but their color and bloom density shift with the hours of light they receive.