These ideas range from a quick wallpaper swap to a full mudroom build with waterproof flooring and a dehumidifier, and the deciding factor is whether you park inside or can sacrifice floor space for function.
A pull-out drying rack built from pine dowels and standard drawer slides suits renters with exactly one cabinet bay to spare, while a fold-down wall station disappears flat when the car needs the space back.
1. Pull-Out Drying Racks
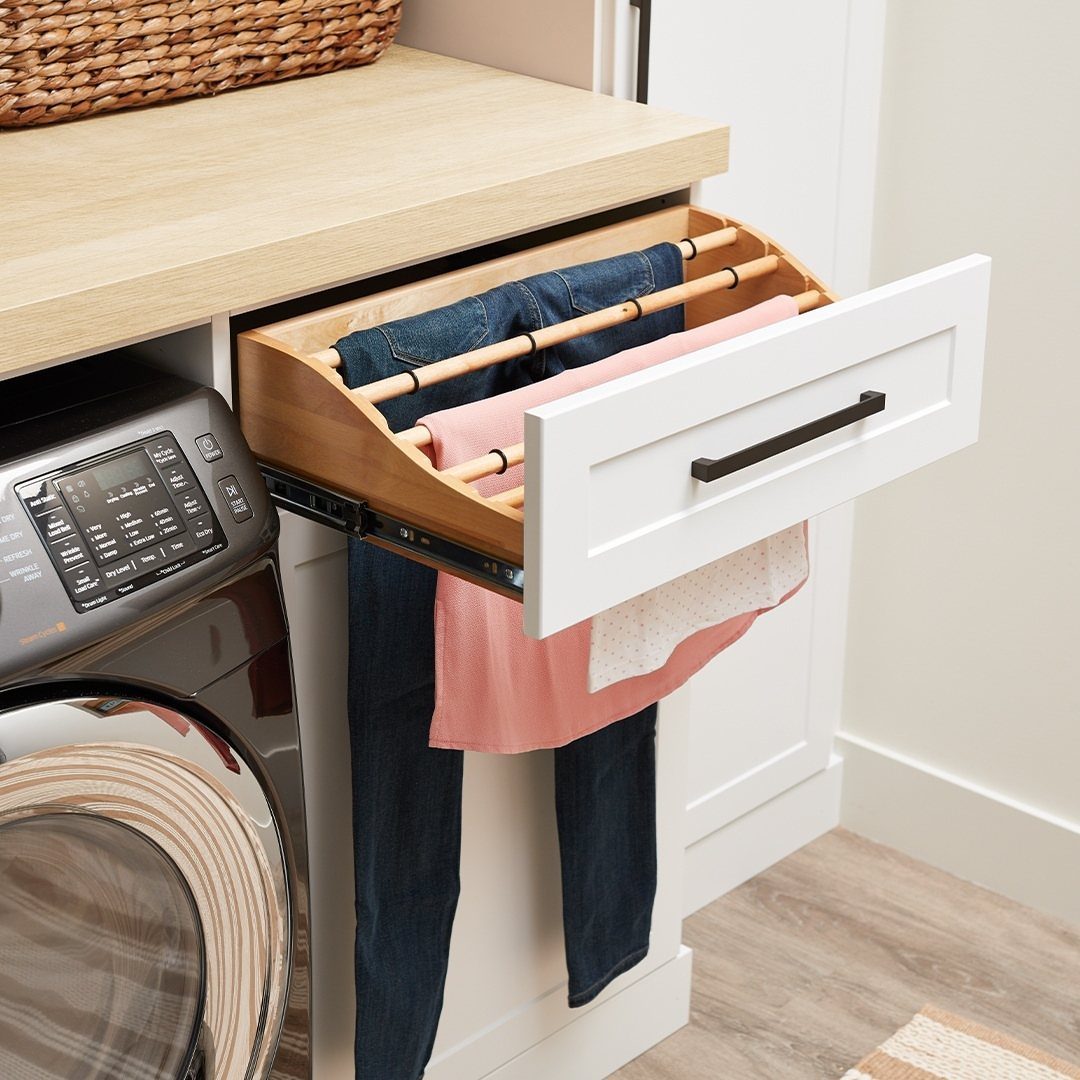
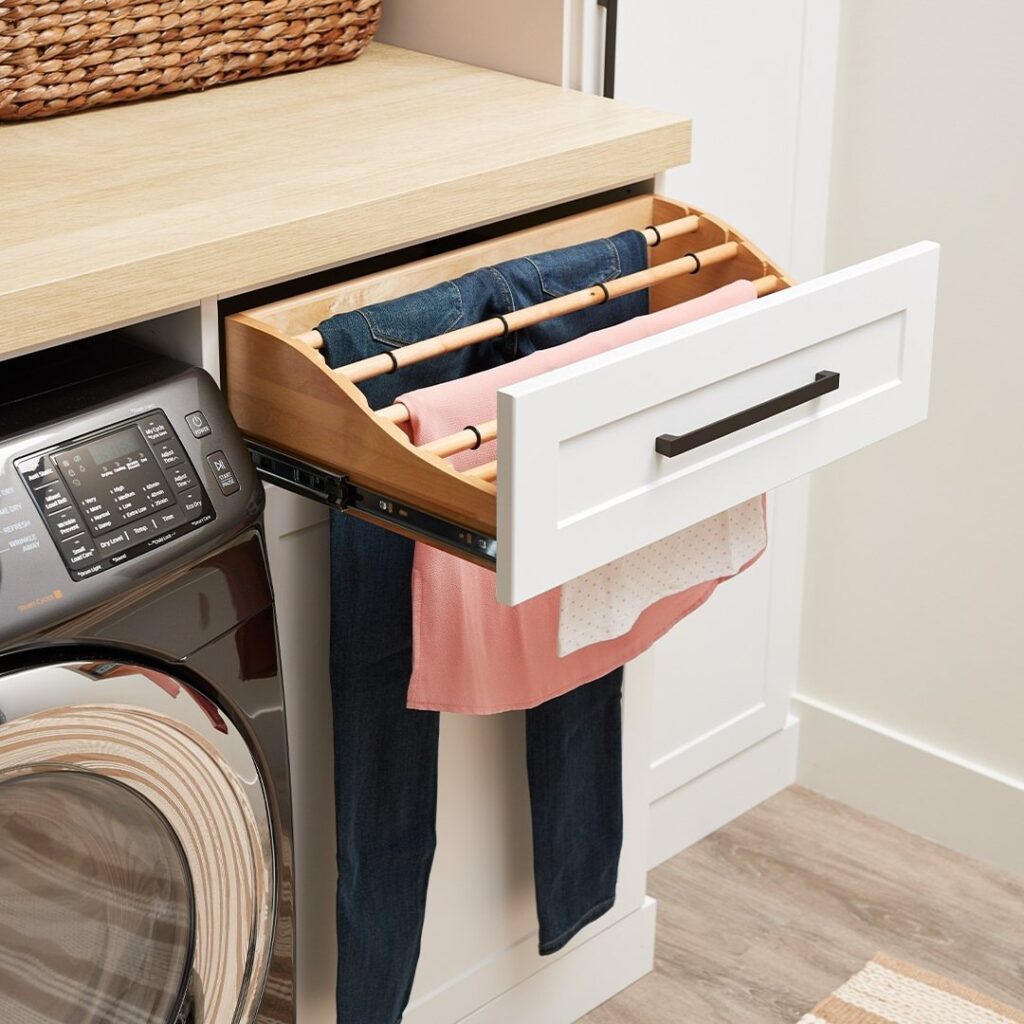
A pull-out drying rack builds almost like a regular drawer, only the bottom becomes dowel rods instead of a solid panel.
Seven to ten pieces of clothing fit across the rods for air-drying delicates or anything that cannot take the dryer.
The version beside a front-load washer sits under a wood countertop, so the whole unit disappears when closed.
Pine dowels run cheap at most hardware stores, and the drawer slides are the same heavy-duty pair you would use for any deep cabinet.
This suits renters or anyone with a single cabinet bay to spare. What it trades away is the drawer storage that would have been there; for me, that swap wins every time.
2. Fold-Down Workstation and Drying Rack
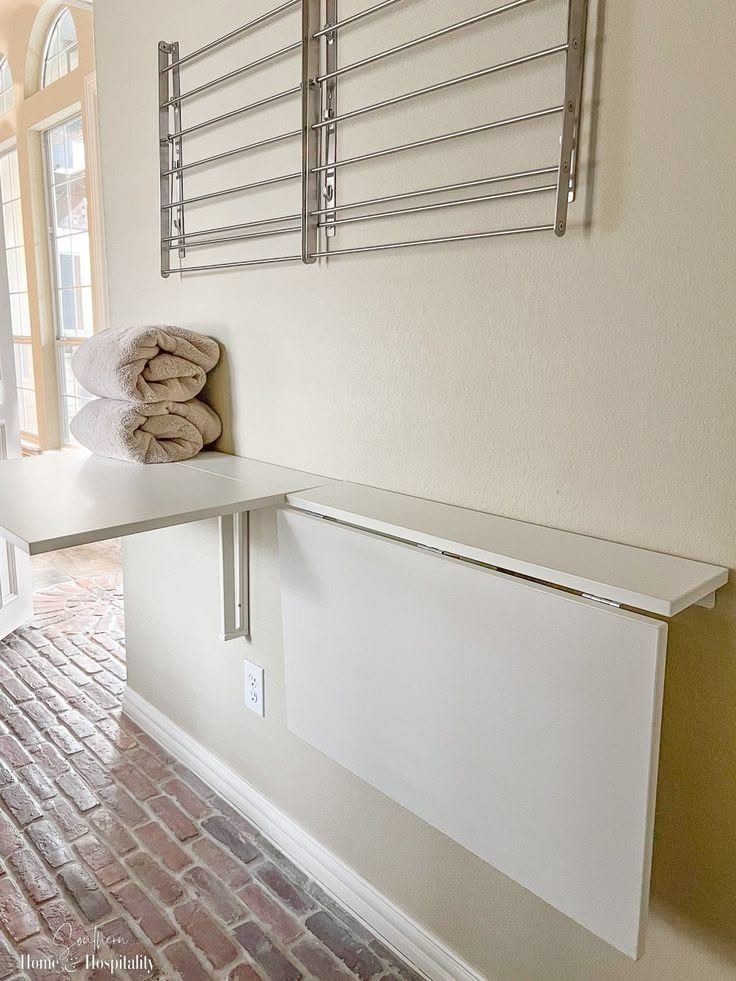
Brick garage floors and beige walls do not have to stay bare. A fold-down table mounted to the wall gives a surface for folding towels or sorting socks, then drops flat when the car needs the space.
The metal drying rack above it folds too, so both pieces disappear against the wall. I would pick a painted hardwood top over plywood for this; garage humidity warps the cheap stuff within a season.
Stainless hardware resists the rust that starts on anything lesser.
This pairing suits anyone who parks inside and cannot sacrifice floor space. You need wall studs or blocking behind the drywall; a hollow-core door screwed to nothing but drywall will not survive the first load of wet jeans.
3. Wallpaper Backsplash
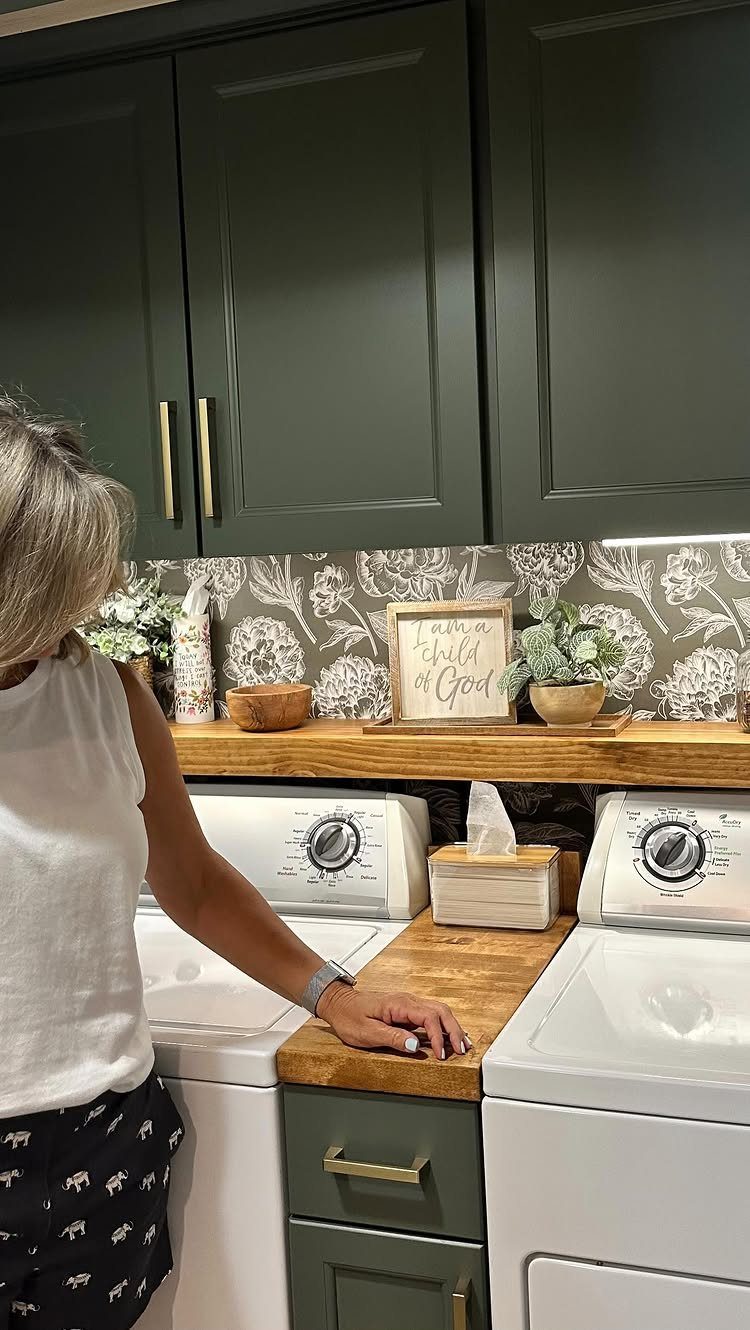
Removable wallpaper backsplashes stick to painted drywall or cabinet sides and peel off when the lease ends or the mood shifts. Pattern against cold appliances and concrete floors adds more warmth than paint alone.
The wall surface underneath decides how well the paper sticks and how long it lasts. Gloss paint needs light sanding so the adhesive grips; flat paint grabs too hard and may tear when removed.
Wash the wall with degreaser first, garage dust included. Most backsplash runs need only two lengths cut from a standard roll.
I would skip the paste-the-wall papers for this application. The peel-and-stick vinyls cost more per foot but forgive a crooked start, which matters when you are working alone on a Saturday.
4. Utility Sink
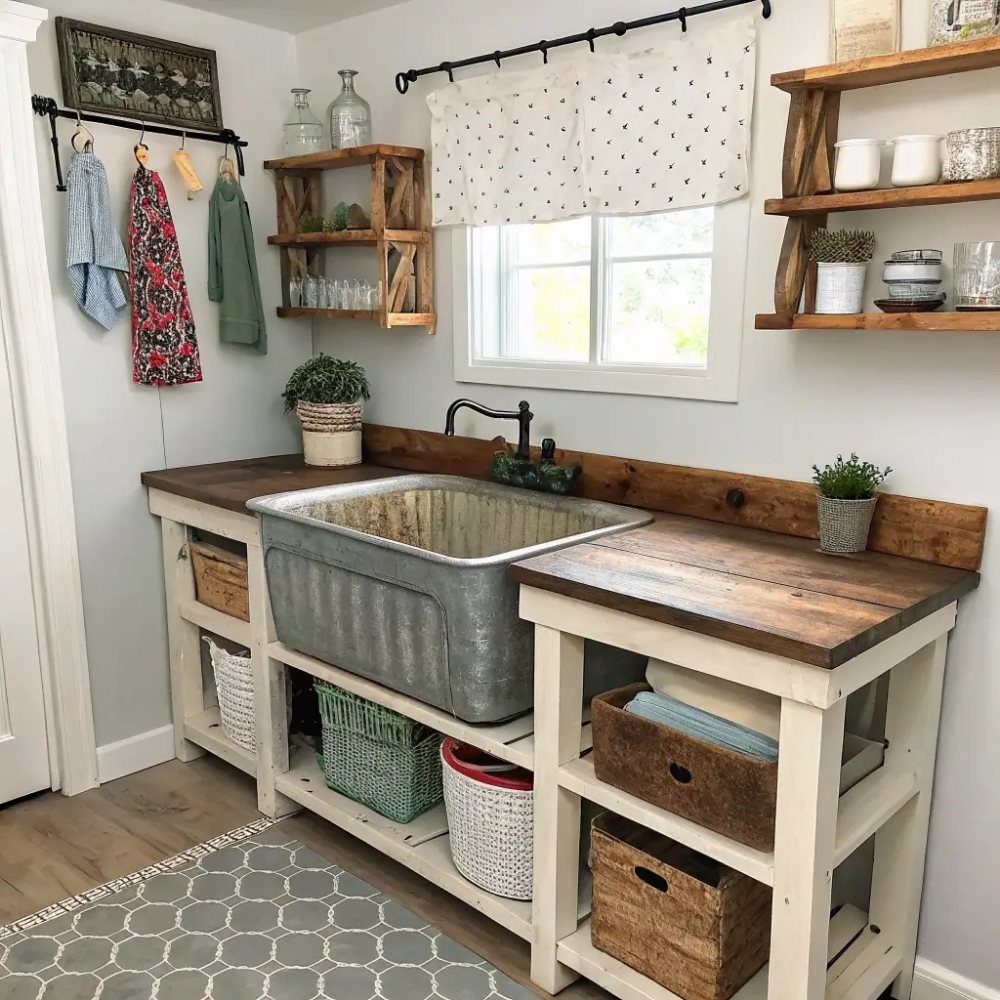
A galvanized utility sink set into a wood counter handles soaking, paintbrush washing, and the muddy boots that never seem to stay outside.
A stock water trough from farm supply runs less than a finished laundry basin and outlasts plastic by decades.
Existing plumbing nearby makes this reasonable; running new supply and drain lines across a garage floor does not. Check whether your washer box has spare ports or if the sink needs its own shutoffs.
A floor-mounted trap costs less than hiding it in the wall, and in a garage nobody minds the exposed plumbing.
Space is the real limit. The builder who skipped this for a full countertop made the right call for her workflow; I would do the same if the choice were counter area versus sink.
But for gardeners or anyone who hand-washes frequently, the sink wins.
5. Lighting Fixtures
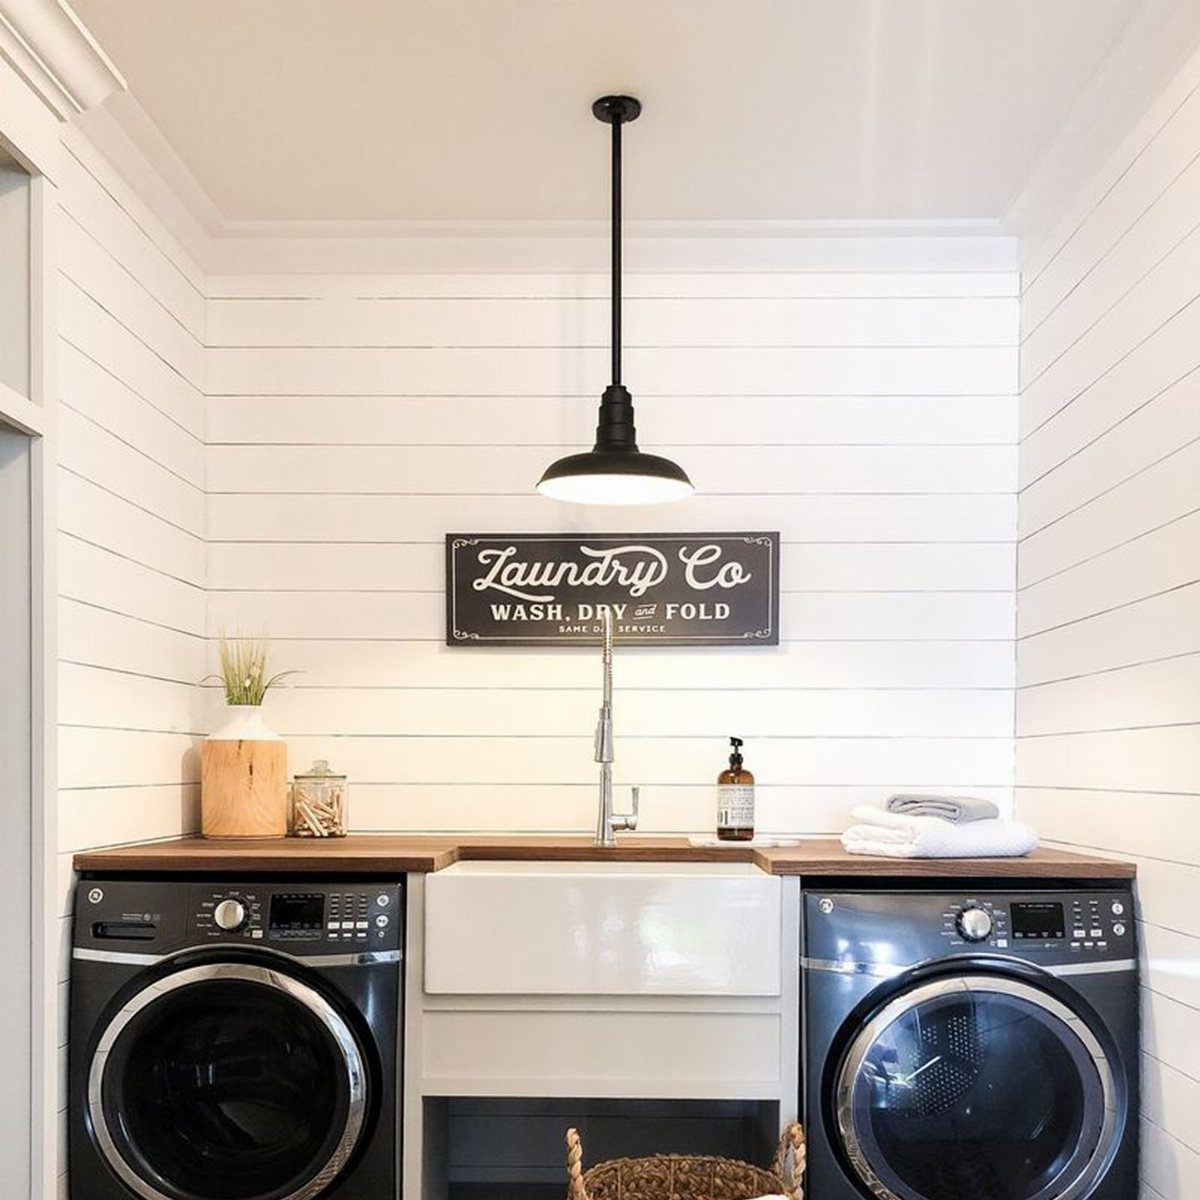
A single black pendant over the sink turns a garage corner into a room that happens to hold appliances. The pagoda-shaped shade in one version throws enough light for evening loads while reading as deliberate design against white shiplap.
What changes the answer is what hangs there now. A bare bulb or shop light means any fixture improves the space; if you already have flush mounts, the upgrade is harder to justify.
Check whether the box is centered over your sink or your folding zone; a pendant even slightly off-center looks like a mistake forever.
I would wire this on its own switch, not the overhead circuit, so the glow functions without flooding the whole garage. For renters, a plug-in swag pendant achieves most of the effect without opening the ceiling.
6. DIY Storage Cabinet
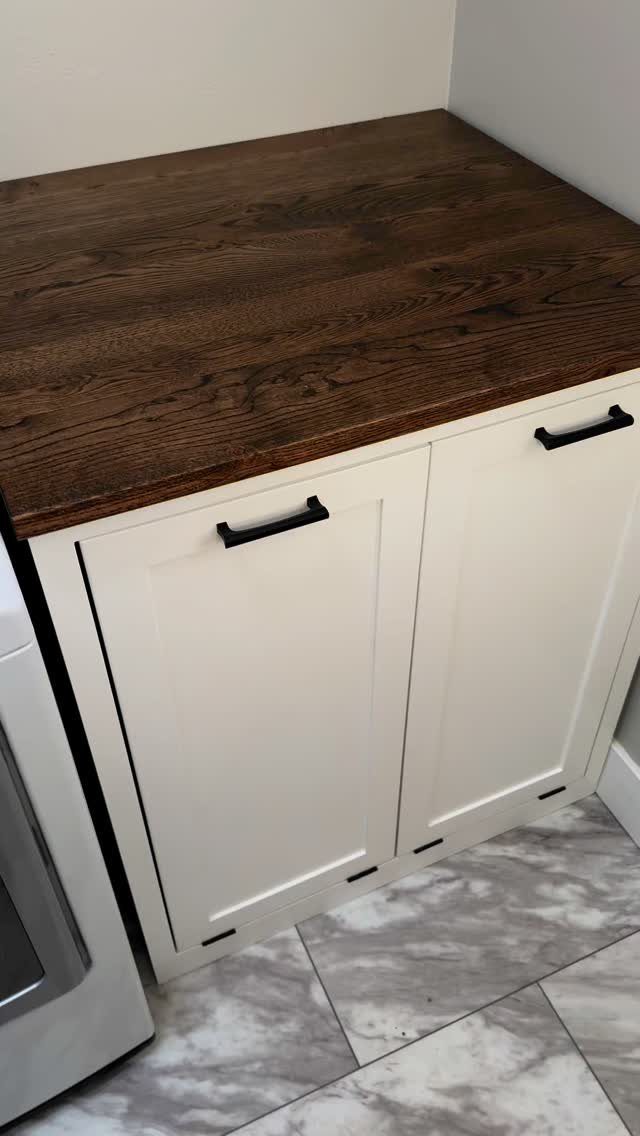
Shaker-style doors on a simple box cabinet hide detergent bottles and stain sticks that never look good no matter how you arrange them.
The white version with dark hardware and a stained wood top sits on marble-patterned tile, but paint grade works fine if you are building to match existing machines.
Construction is straightforward: a plywood carcase, door dividers inside, and face-frame doors hung on concealed hinges.
Build it in place if the washer and dryer are already installed; getting a finished cabinet over a running dryer vent is not worth the puzzle.
The "bottom drawers" in some plans are false fronts over open storage for taller bottles.
This suits anyone tired of open shelving. What it trades away is the instant grab of supplies in view; for me, the calm of closed doors more than pays that back.
7. Countertop Over Appliances
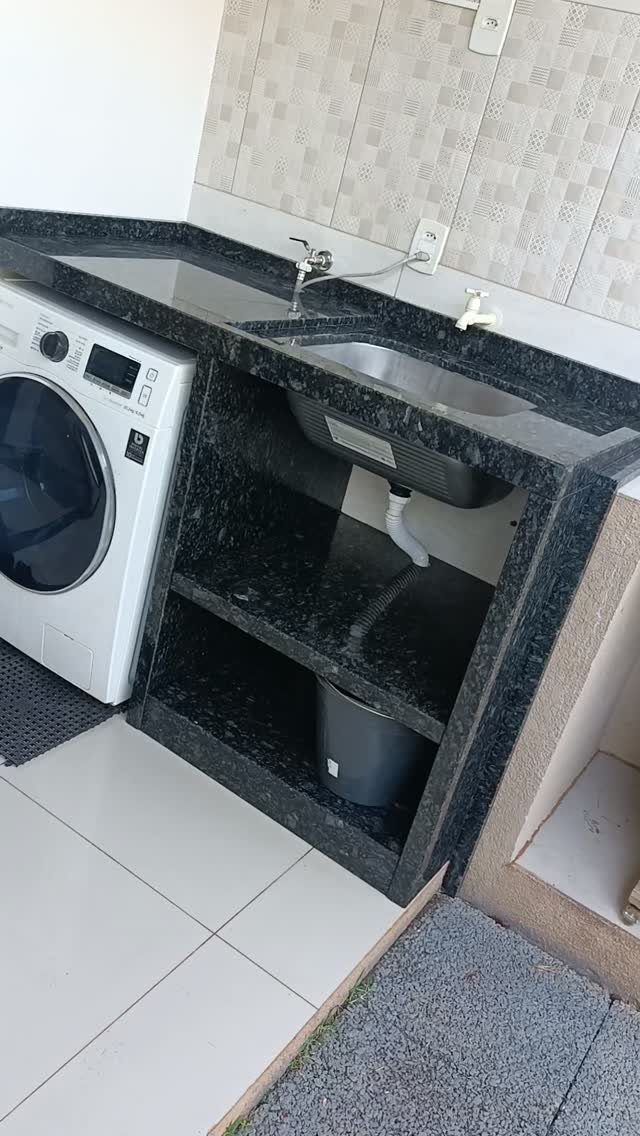
A granite slab stretched across two front-loaders gives you a folding station where there was only vibration before.
Open shelves underneath keep detergent and stain spray within arm’s reach, though I would add a lip or a small rail at the back if the machines sit more than an inch below the counter edge; socks have a way of disappearing behind.
Plywood works fine if stone is outside the budget. Build it in two layers, band the front edge with iron-on veneer, and seal every surface that faces steam.
I built one from birch ply for cheap, and it held up fine before I sold the house.
This one suits renters who can take the counter with them, or anyone whose machines front-load and sit level. Top-loaders need a different plan entirely.
8. Vertical Laundry Towers
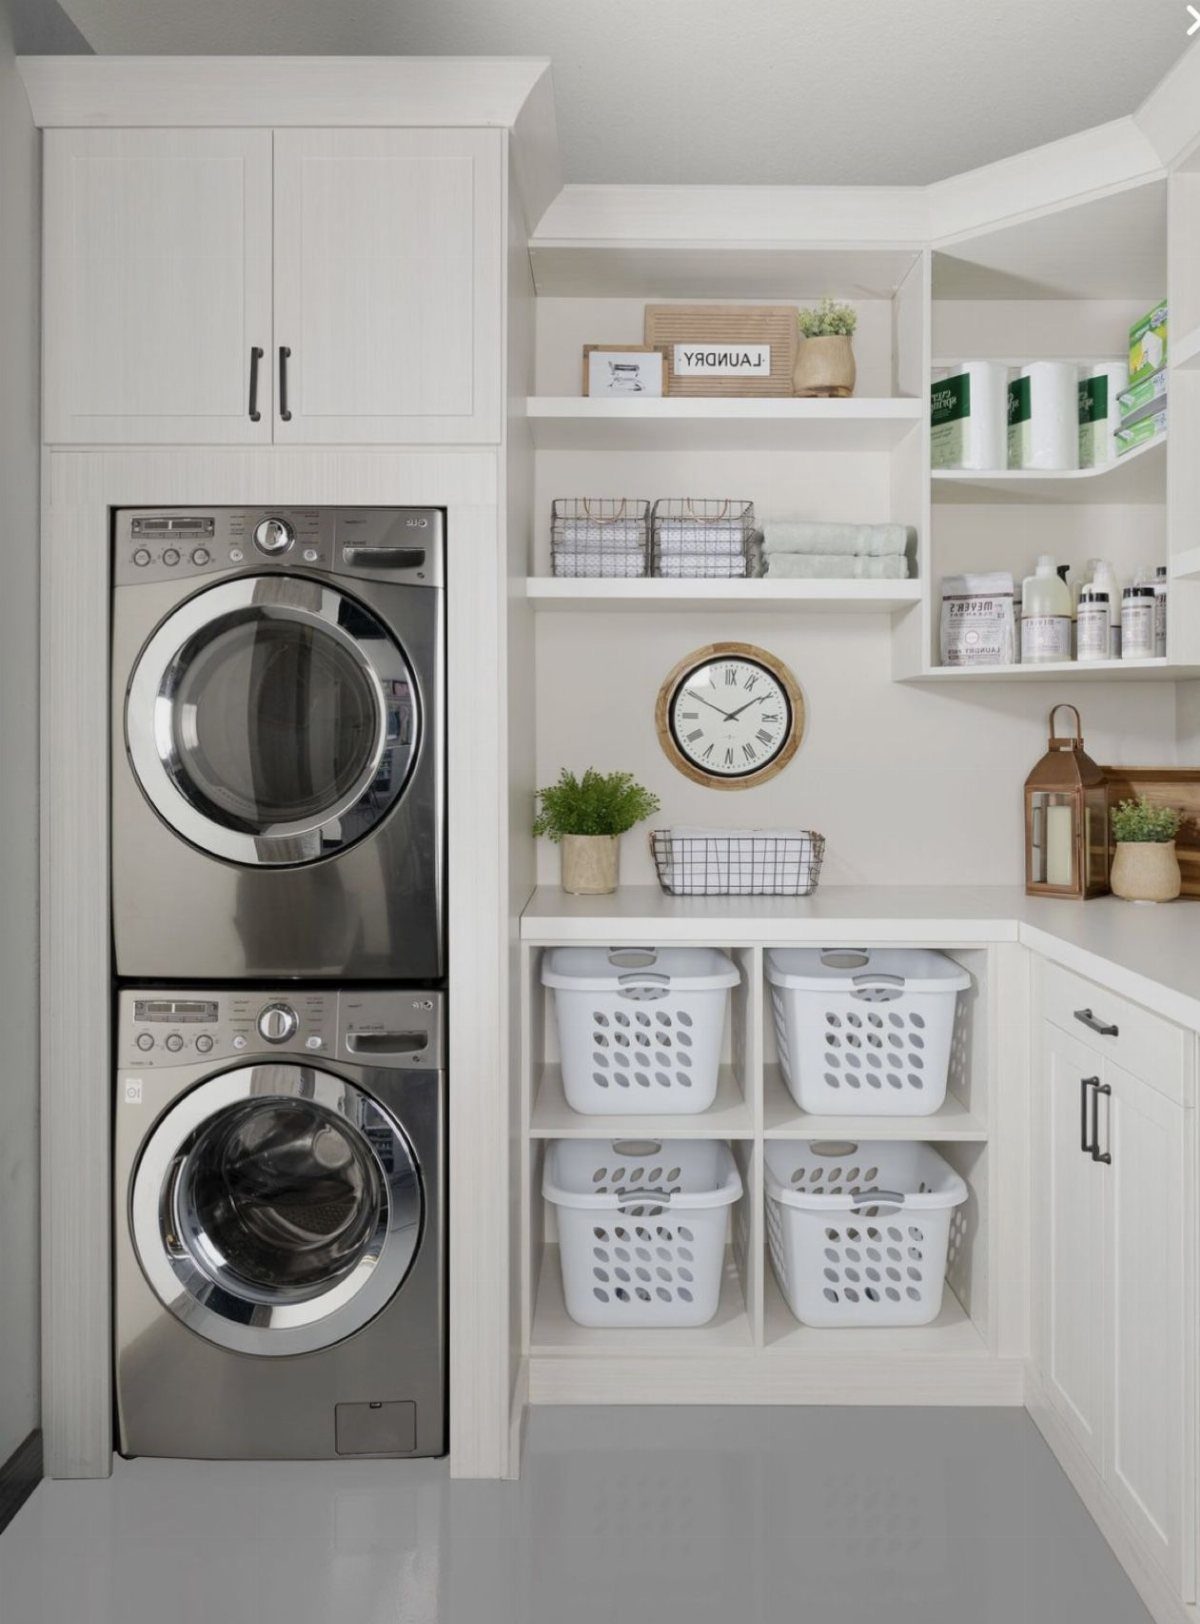
Stacking the washer and dryer buys back usable garage floor, which in my last place meant room for a bike repair stand instead of a second trip to the shop.
A shallow cabinet above the pair stores bottles and boxes that would otherwise colonize every flat surface.
A step stool lives permanently in my setup. The detergent jug gets heavy at shoulder height, and I learned that after one dropped bottle of blue liquid and a stained concrete floor.
Venting stays standard; the stack uses the same duct run as side-by-side units, though you will want to check that the ceiling height clears the full assembly plus a few inches of wiggle room for installation.
Best for single people or couples without heavy daily loads. Families washing bedding every weekend may miss the simultaneous wash-and-dry cycle.
9. Mudroom-Laundry Hybrid
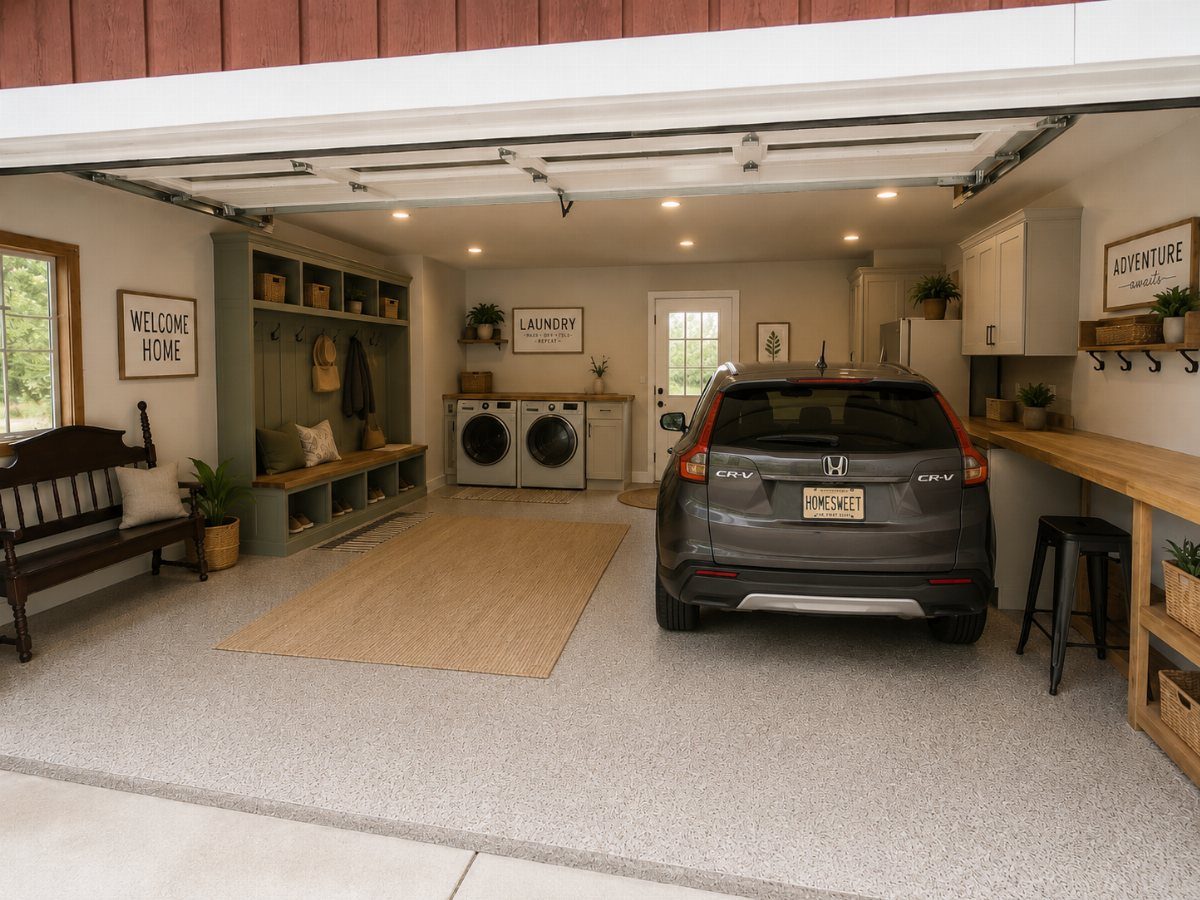
The bench with cubbies in this garage lets someone strip off muddy boots and drop them straight into a bin before walking into the house clean.
I would put the laundry nook on the same wall, not across the space; the fewer wet steps across concrete, the better.
Waterproof flooring matters more here than in a dedicated laundry room. Garage slabs sweat, and mudroom runoff adds to it.
I used vinyl plank with a sealed perimeter in my own hybrid space, and I still ran a small dehumidifier through the humid months.
Drainage toward the overhead door or a floor drain saves you from standing water after a heavy rain.
This layout trades garage parking depth for convenience. Measure your vehicle plus open doors before committing to built-ins on both walls.
10. Define Appliance Zones
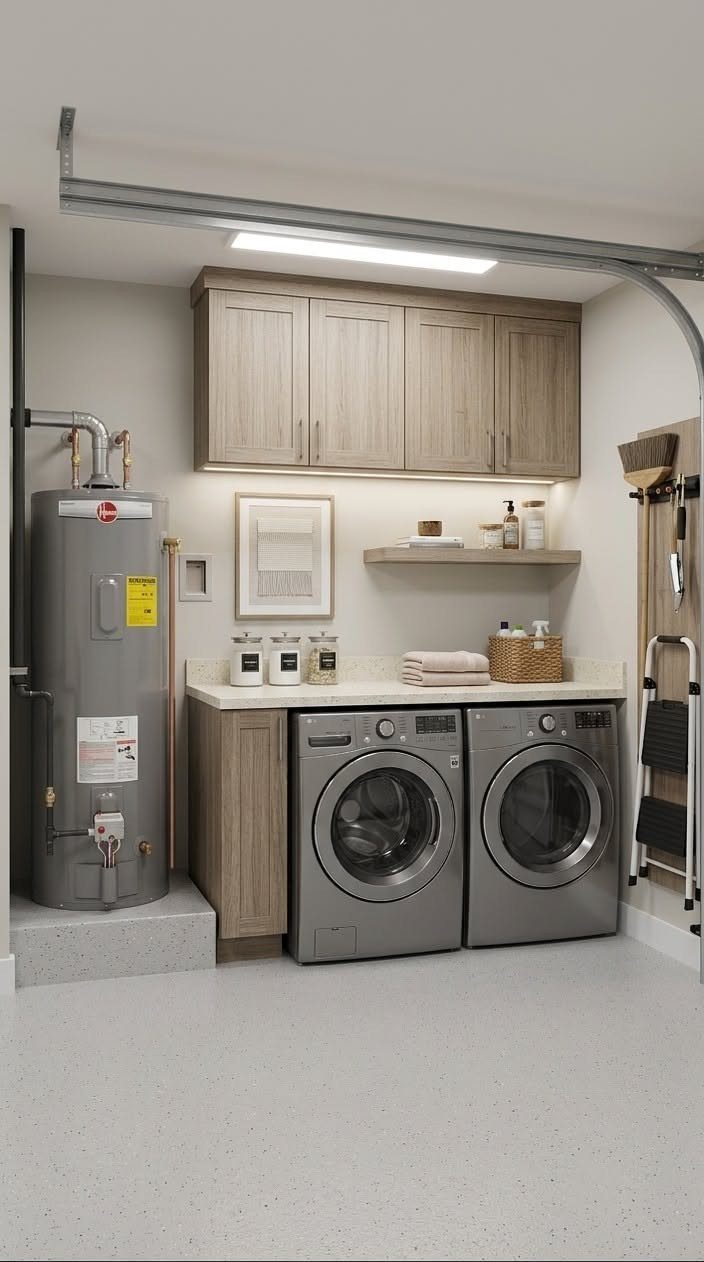
Narrow shelving between the laundry corner and the tool storage does the actual work of keeping the spaces separate; your eye reads two zones instead of one cluttered rectangle.
The work triangle here is tight: washer, dryer, and the folding counter or drying rack within a step or two of each other.
I like slatted panels for this division when the budget allows. They let air move, which matters in a garage where the water heater and appliances both add heat and humidity.
A basic dehumidifier plugged into the same circuit as the laundry pair costs enough to notice in summer but keeps the musty smell out of clean towels.
Skip this if your garage is truly single-purpose. The zone definition only earns its keep when the space does double duty.
11. Ironing Board
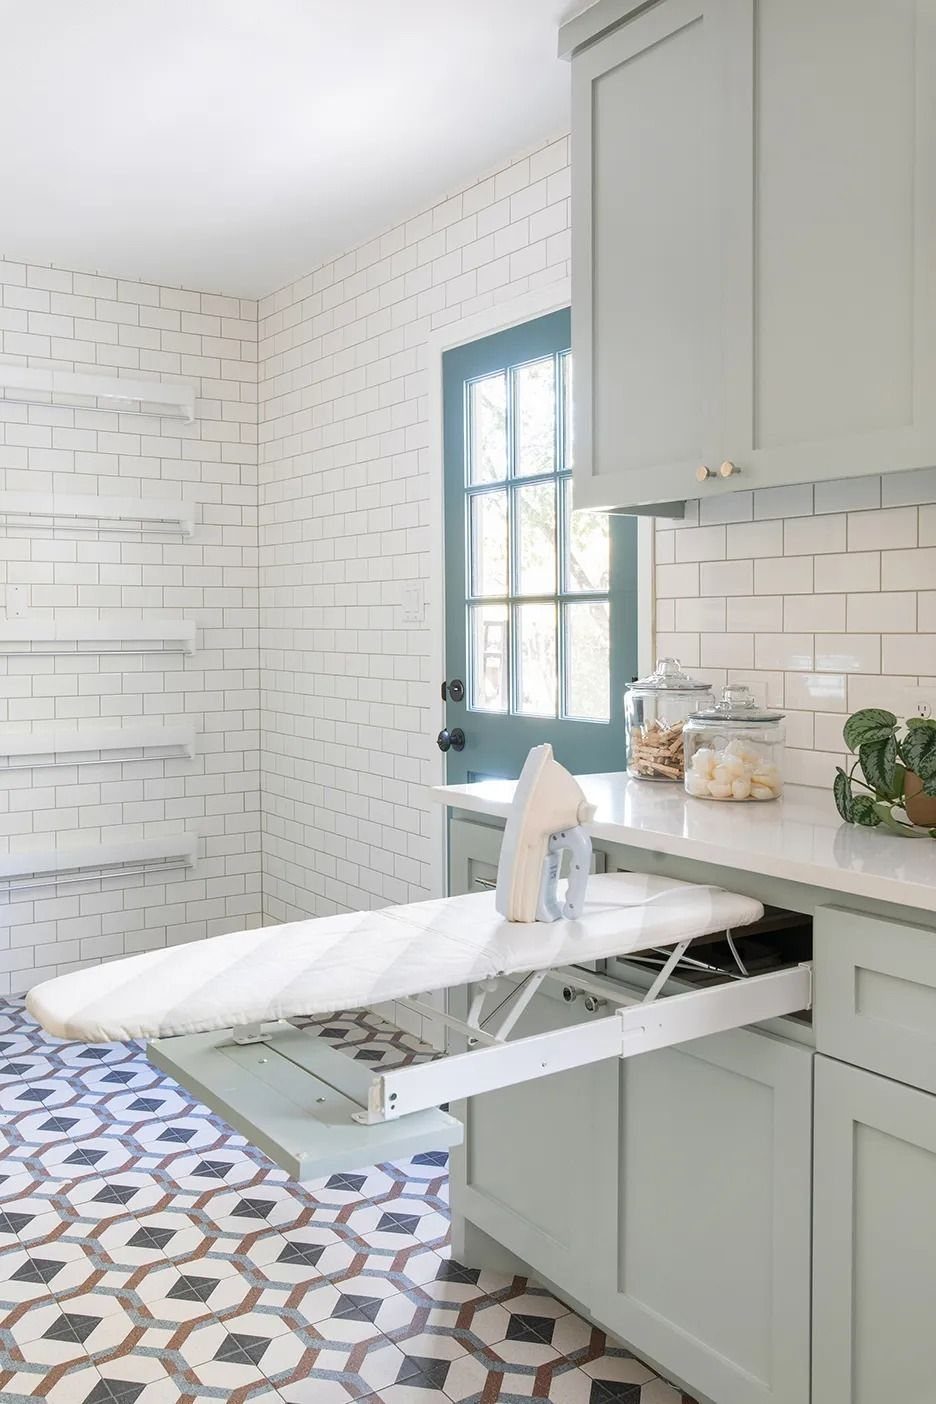
A pull-out board that stores inside a cabinet drawer beats the freestanding kind on every count except one: it needs a cabinet deep enough to hold it.
The drawer front matches the surrounding cabinets, which tells me the board was planned from the start, not wedged in later.
Check your iron’s length against the board’s depth before you buy or build. My first attempt left too much iron handle hanging off the end, which meant scorch risk and unstable balance.
A wall-mounted drop-down board works better if your cabinets are shallow; it folds flat against the wall and pulls no drawer space from storage.
I would skip the pull-out entirely in a garage that freezes in winter. The padding and hinge mechanism do not like temperature swings, and the board sits unused half the year.
Creating a Cohesive Look
Paint the garage laundry area the same color as the walls inside your house and the space stops reading as an afterthought. Carrying the interior white through to the garage does more for cohesion than any single piece of furniture.
Shiplap on one wall, kept to clean lines, adds texture without clutter. The question to ask before bringing anything in: will this be useful?
If the answer is no, it belongs somewhere else. Every item that makes the cut should earn its place through function first.
A mudroom-laundry hybrid needs the same discipline. Match the finishes to the house, but solve the moisture before you worry about how it photographs.
Maximizing Small Spaces
Vertical storage buys back floor space you do not have.
Multi-functional pieces do the same work twice.
Access and calm pull in opposite directions. Open shelving lets you grab a bottle in one motion; closed doors mean everything stays where you left it.
For a garage that also holds bikes or a workbench, I would take the closed storage and spend the saved visual peace on the rest of the project.
DIY Vs. Professional Help
Your skill level and your budget are the two numbers that decide who does the work. A plywood countertop over front-loaders is a Saturday project with a circular saw and iron-on edge banding.
I would build the cabinet carcase in place if the machines are already installed. Wrestling a finished box over a running dryer vent wastes an afternoon for no gain.
The same logic applies to electrical: a plug-in swag pendant avoids ceiling work, and the result is nearly identical.
Professional help makes sense where mistakes cost more than the labor. Plumbing behind walls, any gas line, and load-bearing modifications fall in that category.
Importance of Ventilation
I would run one through the humid months in any garage laundry setup, hybrid or not.
The garage overhead door seals poorly by design; that air exchange is not your friend.
Smart ventilation, paired with the dehumidifier, handles moisture that would otherwise shorten appliance life and invite mildew into fabrics.
Check that your dryer duct run is intact; a leak into the garage dumps lint and warm, wet air exactly where you do not want it.
Frequently Asked Questions
How to make a garage laundry area look nice?
Start with the surface: drywall and paint turn exposed studs into a finished room faster than any single upgrade.
Removable wallpaper on cabinet sides or a small backsplash section adds pattern without commitment, though flat paint underneath can tear on removal.
A pendant light over the folding zone does more for atmosphere than any fixture swap costs, and a wood countertop across the appliances reads as deliberate design rather than leftover space.
Can a laundry room be in the garage?
Yes, and in many houses it already is. The washer and dryer need only water supply, drain access, and a vent run that reaches outside; most garages have at least two of these from an existing utility corner.
What changes is the finish level: bare concrete and open studs work fine mechanically but feel temporary, while a counter, cabinet, and proper light make the same machines feel like a room.