
How thick you roll the clay or how high you stack the cone depends mostly on how many people in the house want to shape it.
1. DIY Clay Ornaments
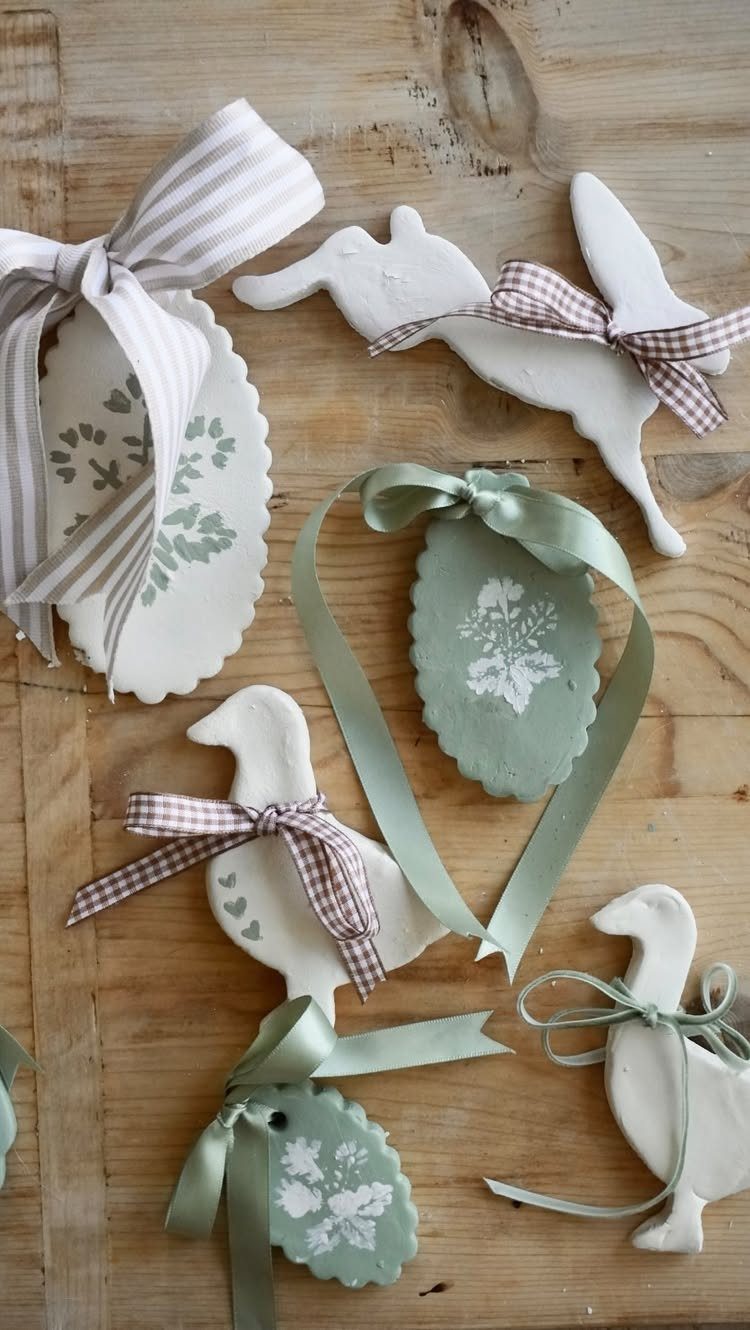
Air-dry clay, a set of cookie cutters, and an afternoon is all it takes to build ornaments no one else owns.
I roll the clay to about a quarter inch, press in the cutter, then stamp a leaf or a small flower into the surface before the clay sets.
Twenty-four to forty-eight hours of drying on a wire rack keeps them flat; ribbons in sage green or a brown check run through the hole and tie off the look.
This suits anyone who wants the tree to feel collected rather than bought, and a batch of shapes costs less than a couple of coffee shop drinks.
Create an Air Dry Clay DIY Ornament with the imprint from a winter hat. Hang on your holiday tree, use as a homemade holiday decoration, or give as a gift!
— Crayola
2. DIY Rainbow Clay Christmas Tree Decorations
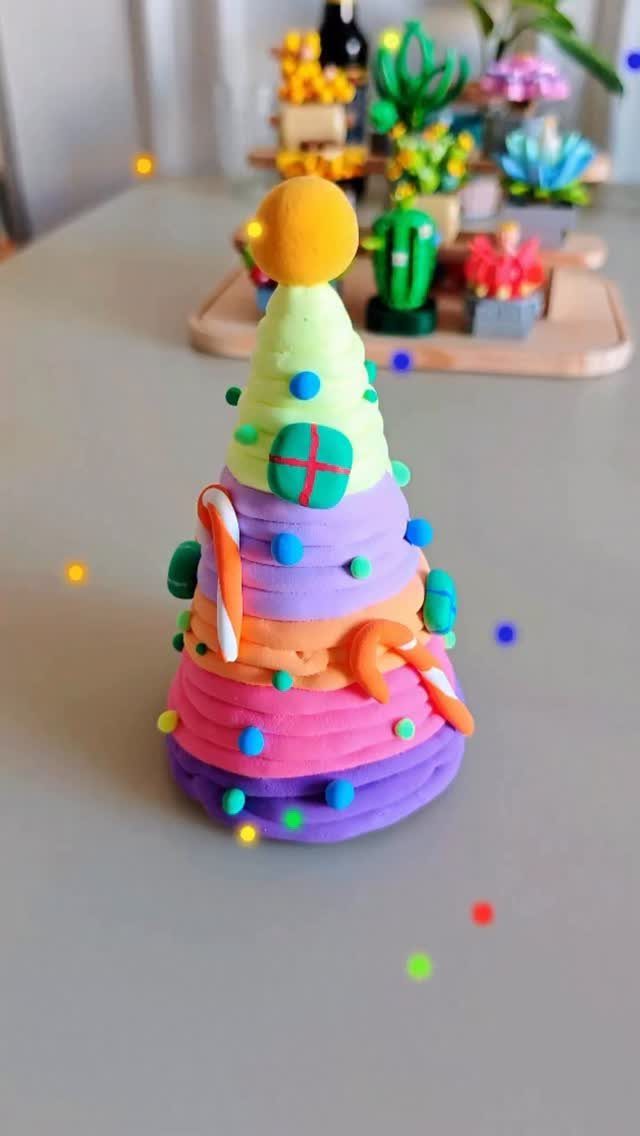
Stacked rainbow layers turn a simple cone into something a kid would fight to hang.
I pinch off discs of clay in purple through lime, press them together from wide base to narrow top, then add tiny balls and a miniature gift while the clay is still workable.
The drying time matches any flat ornament, but the shape needs a day or two on its side, turned once, so the bottom does not sag.
These read as playful rather than precious, which makes them a good fit for a household with small children who want their own mark on the tree.
3. Fingerprint Christmas Tree Ornament
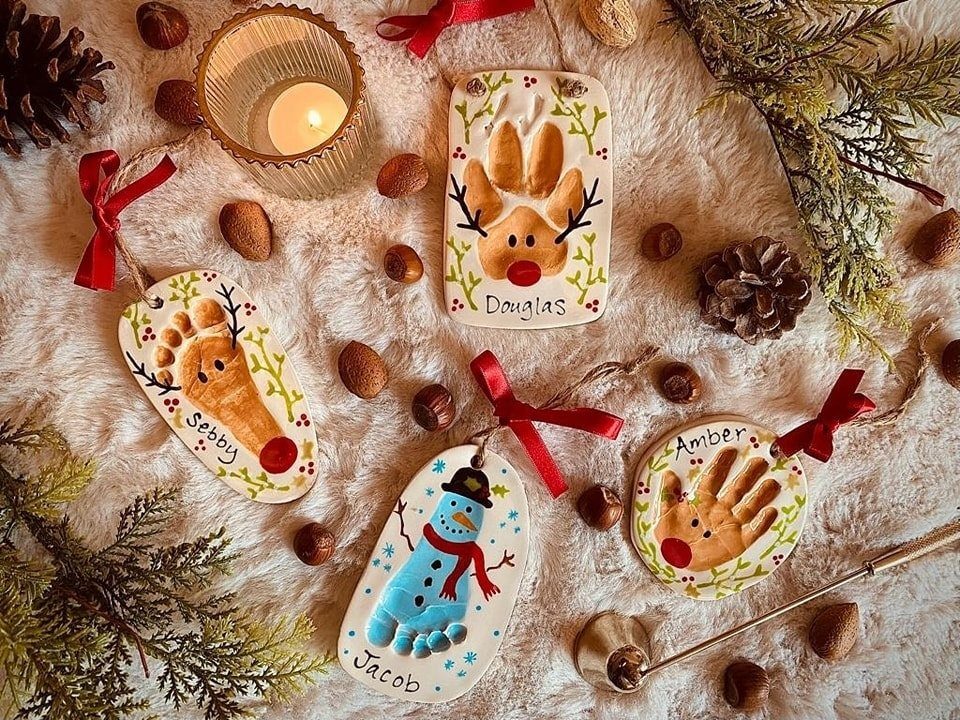
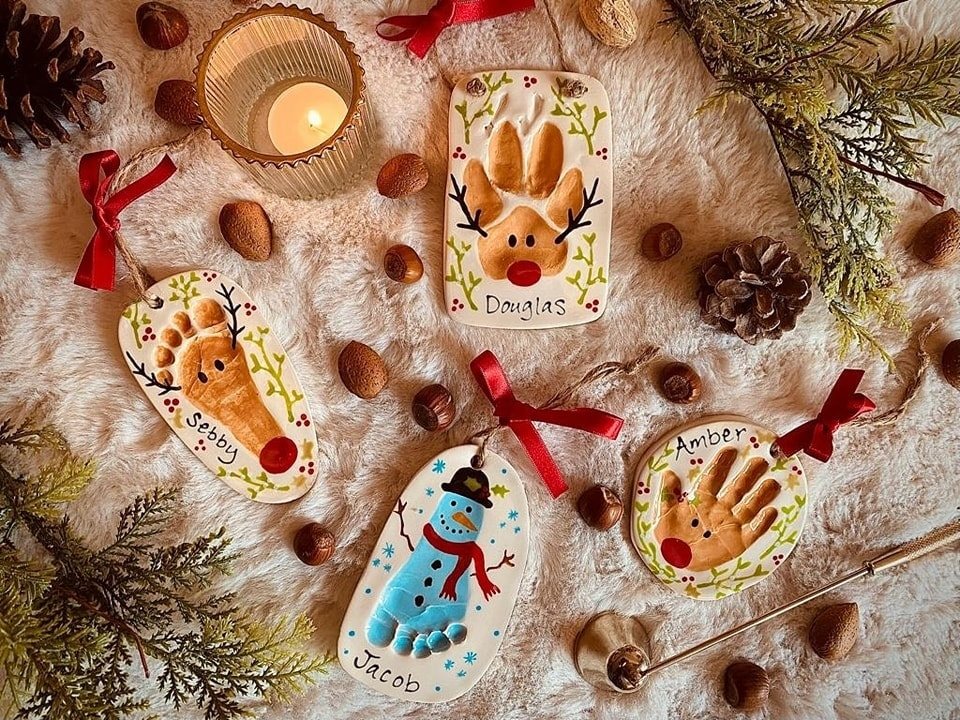
Fingerprints pressed into wet clay freeze a year in a way no store ornament can.
I flatten a palm-sized piece of air-dry clay, cut a simple tree or circle, then press a thumb or fingertip into the surface to build a reindeer body or a snowman stack.
Names and dates scratch in with a toothpick before the clay dries. Paint adds color if you want it, but the raw print alone carries the memory.
This is the project I would hand to grandparents or to anyone who says they have no skill; the imperfection is the whole point.
4. Christmas Wreath
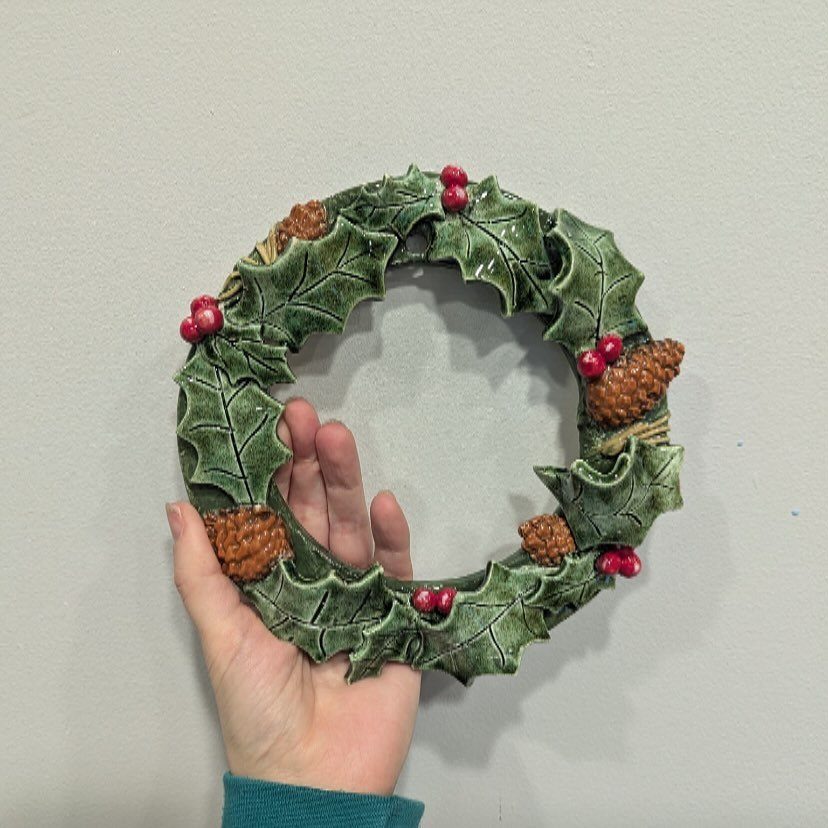
A wreath built from clay hangs light and survives years of storage without shedding needles. I roll red clay into a thick rope, join the ends into a ring, then flatten it slightly so the face holds its shape.
Holly leaves in green, berries in white, and small yellow flowers press onto the surface while the clay is still soft; the pieces bond as they dry without glue.
Once the wreath firms up on a flat board, it is ready for a ribbon loop.
This works for a front door that needs color but not weight, or for a wall where a live wreath would dry out by New Year’s.
5. Christmas Cookie Plate

Tiny plates shaped like gingerbread men and trees turn a simple circle of clay into a cookie plate that never crumbs.
I form the base, then build small figures in white, red, and green clay with simple faces pressed in by a pencil tip or a straw end. A drop of craft glue sets any piece that threatens to shift.
The whole arrangement dries in a day and sits flat on a shelf or hangs from a ribbon through a hidden hole.
This is the project for someone who wants the look of a full cookie swap without the oven time, and the scale keeps it friendly for small hands.
6. Simply Clay House Decoration
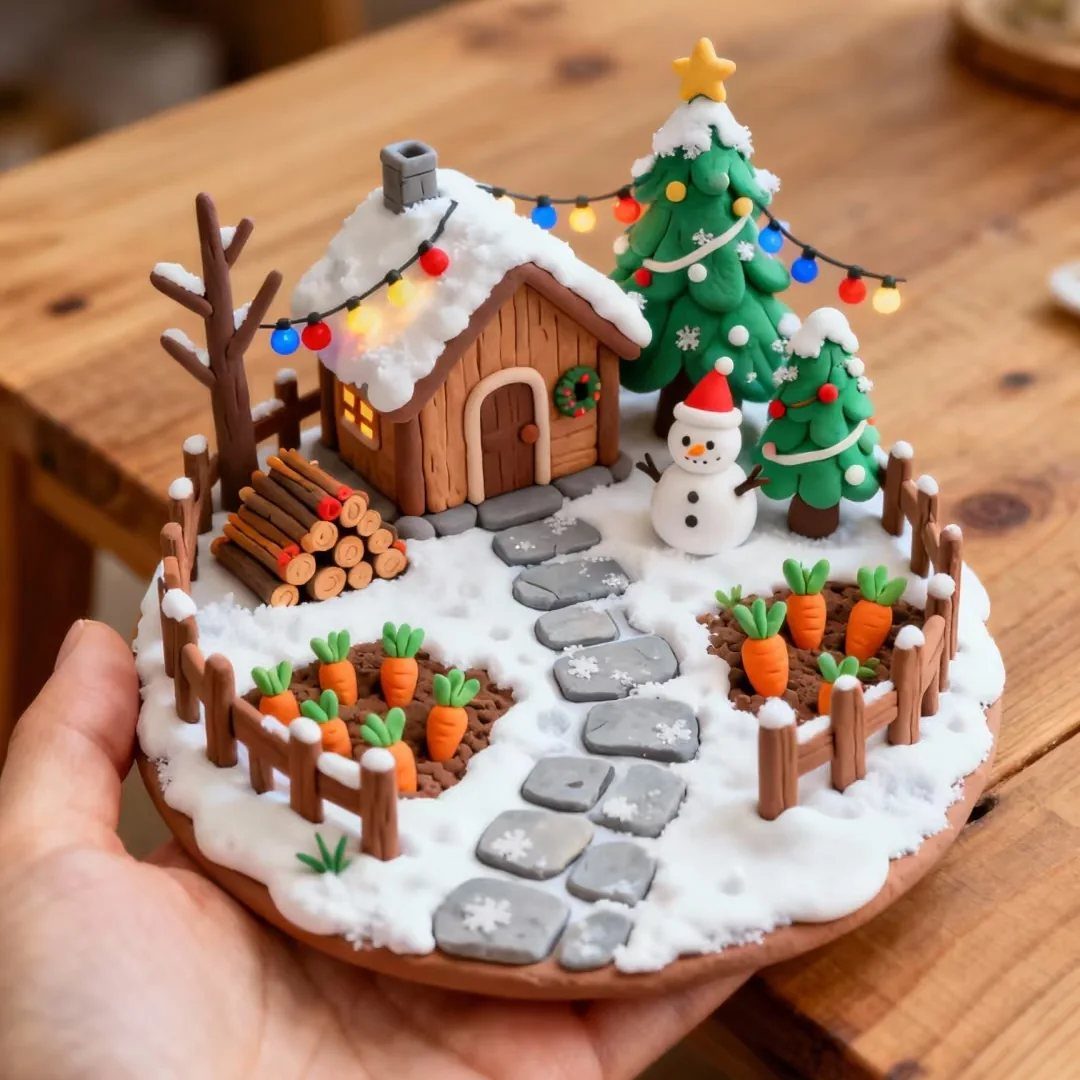
A clay house held in one palm carries more detail than its size suggests.
I start with a simple rectangle for walls and a triangle for roof, both from air-dry clay, then add a snowman, two small trees, and a path of pressed stones while the clay is still workable.
A dusting of white clay shavings or paint gives the snow. The piece dries hard enough to handle; a loop of twine through the chimney turns it into an ornament.
This one rewards patience over speed, and I would save it for an evening without interruptions, or for a teenager who has outgrown simpler shapes.
7. Clay Nature Print Decorations
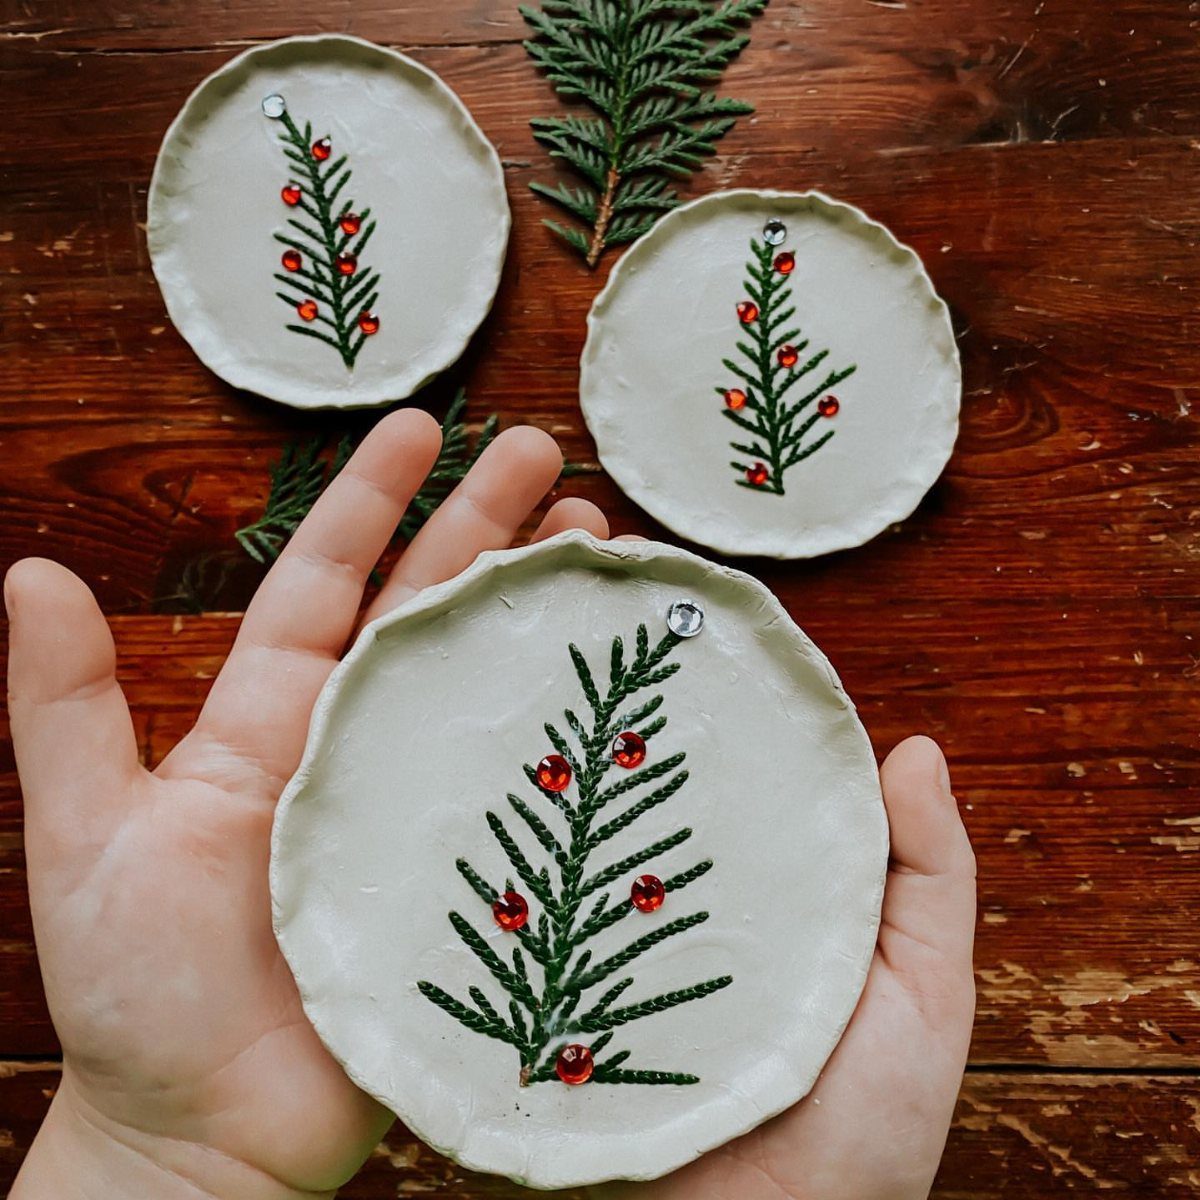
Pine needles pressed into soft clay leave a crisp, woody imprint that paint alone cannot fake.
I roll the clay to about a quarter inch, lay a sprig face down, and press gently with a rolling pin so the needles sink in without tearing through.
A biscuit cutter shapes the ornament; a straw hole at the top saves trouble later.
Air-dry clay needs a full day, sometimes two in humid weather, before I paint the print with green acrylic and dot on red beads while the paint is still tacky.
This suits parents who want a nature walk and a craft in one afternoon. Tree ornaments have to stay light, so the clay stays thin, and thin clay breaks if a kid treats it like a playground toy.
Salt dough is cheaper and harder but takes longer to dry and gives a rougher print. For a cleaner impression, I pick needles that are still flexible, not the dry ones that crumble.
8. Gingerbread House
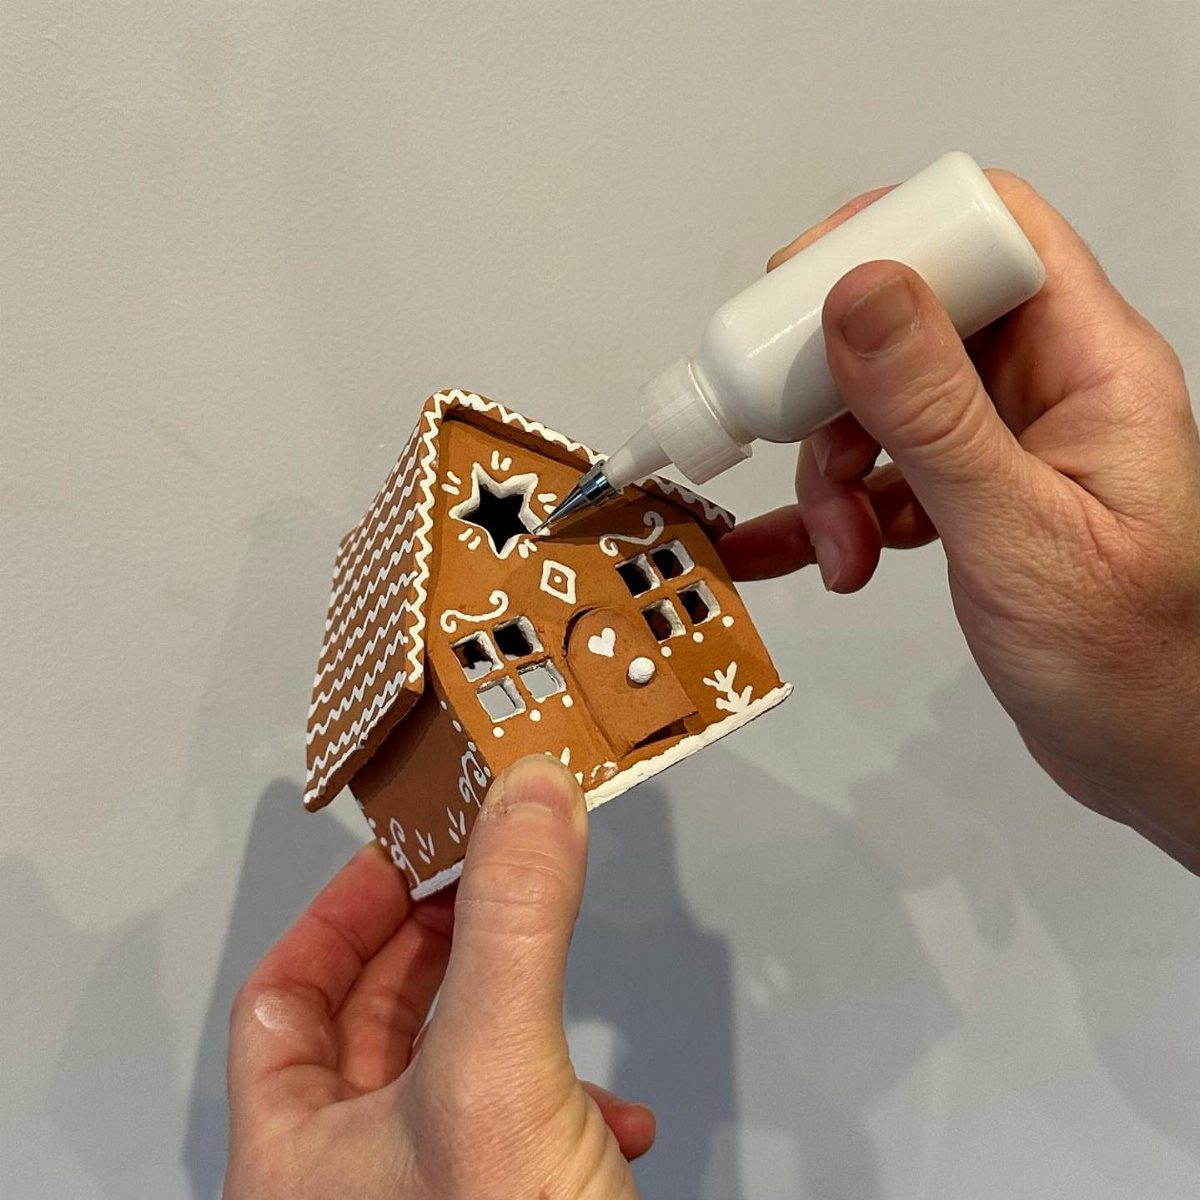
A clay gingerbread house sits on a shelf for years without drawing ants, which is more than I can say for the edible kind.
I build walls from slabs scored and slipped together, then let them firm up before adding a roof; rushing this is how the corners sag.
White acrylic in a squeeze bottle gives the icing look without the sugar, and the tip controls whether I get fine lines or fat dots.
Brown clay is the obvious base, but terracotta works if I want a warmer, brick-like tone.
This project eats an afternoon and some patience. Small windows and doors are easier cut from thin slabs than carved from thick walls.
For a house that actually opens, I leave the back wall off and hinge it later with wire; most people just want the front to face the room.
Kids under ten can manage the decorating if an adult handles the slab construction and the drying time.
9. Clay Leaf Print Ornaments
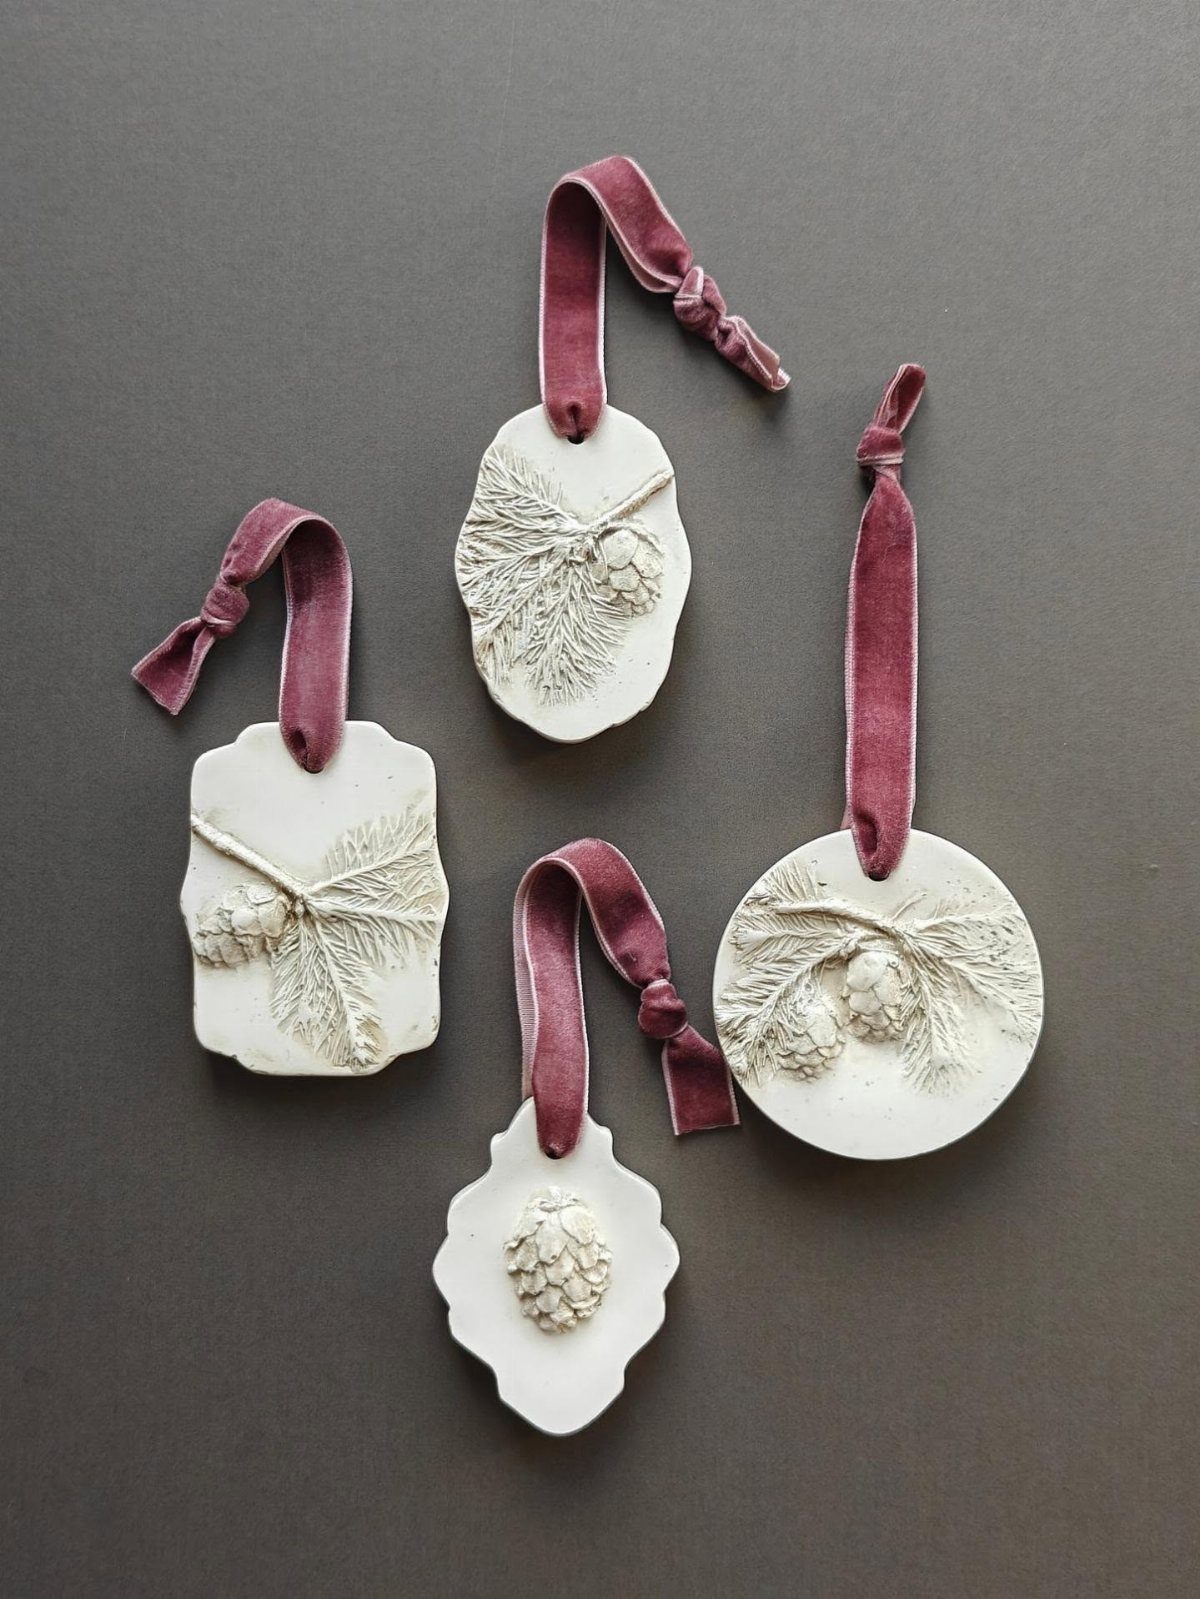
Leaf print ornaments work best with leaves that have strong veins on the back side; smooth-top leaves like holly give a faint imprint that disappoints.
I press the clay onto the leaf rather than the other way around, which keeps the leaf from shifting.
A burgundy velvet ribbon, narrow enough to thread through a small hole, dresses up the white clay without competing with the print.
Pine needles and small cones give the clearest patterns in my experience; ferns look elegant but tear easily if the clay is too wet.
These dry lighter than they look wet, so I underpaint the print slightly darker than I want. A coat of matte varnish keeps the surface from dusting chalk onto fingers year after year.
For a family with kids at different ages, this is the rare project where a toddler’s sloppy pressing and a preteen’s careful arrangement both look intentional.
Materials Needed
Cookie cutters in basic shapes, a small rolling pin, and a straw for holes handle the forming. For impressions, leaves with strong back-side veins, pine needles, or small flowers from the yard work better than anything from a craft aisle.
A wire cooling rack lets pieces dry flat without the underside softening against a table. Acrylic paint in basic colors, matte varnish, and narrow ribbon or twine finish the job.
A toothpick or pencil tip scores lines or writes names; diagonal pliers pull out mistakes if a piece warps.
Tips for Working with Clay
A sheet of wax paper on the table beats any "non-stick" promise; clay lifts clean and the paper rolls up for trash.
I seal leftover clay in its original bag with the air pressed out, then into a container with a lid. Dry clay is dead clay.
Stretching the clay before rolling removes air bubbles that crack later. A quarter inch is the thickness I aim for; thinner breaks, thicker warps while drying.
If the clay feels sticky, a short rest on wax paper usually firms it enough. Too dry, and a few drops of water kneaded in saves the batch.
Drying time is not negotiable. Twenty-four hours is the minimum for thin ornaments in dry winter air; humid days or thick shapes need forty-eight.
Turning a piece once during drying keeps the bottom from flattening. Rushing this with a hair dryer or oven causes cracks that show up after painting.
Finishing Touches
Raw clay has its own look, but paint adds the holiday colors most people expect. Acrylic in squeeze bottles gives control for fine lines; a brush works for washes.
I underpaint impressions slightly darker than the final color, since clay dries lighter than it looks wet.
One coat is enough; two starts to look plastic.
Glitter catches light on raised details, but a little goes a long way. I dust it onto tacky paint rather than mixing it in, so the sparkle sits on top.
Dark wax, thinned with mineral spirits, settles into leaf prints and letter grooves to make them readable from across a room. Wipe the surface clean before the wax sets, or the whole piece goes muddy.
Involving Kids
Fingerprint ornaments and simple shapes are where kids start. A toddler’s pressing is sloppy by adult standards, but the print itself carries the year; that imperfection is what grandparents want on their trees.
For children under ten, I handle the slab construction and drying schedule. They manage decorating, pressing leaves, or adding tiny balls to a rainbow stack.
The clay rewards a light touch, which is a hard sell to small hands; I keep a backup piece ready.
A walk outside before crafting supplies the needles, leaves, or small cones for impressions. A flexible needle prints clean; dry ones crumble under pressure and frustrate everyone.
Baking soda clay is another route, harder than air-dry when fired but giving a rougher texture. It takes longer to dry and needs oven time, so I skip it for weekend projects.
Air-dry keeps the timeline honest and the complaints short.
Frequently Asked Questions
What are some unique Christmas clay ideas?
Store shelves never carry ornaments pressed with real leaves or flowers, fingerprint reindeer, or pine needle prints, all of which air-dry clay handles without a kiln.
Pressing natural textures into soft clay captures detail that paint alone cannot fake, and names scratched in with a toothpick date the piece for years.
What are some easy clay ideas for beginners?
A set of cookie cutters and something to press into the surface, even a house key or a fork, is enough to start.
A fingerprint pressed into soft clay and baked or dried makes an ornament that looks best when it is slightly crooked; the wobble proves a human made it.
What are some easy Christmas crafts I can make?
Rainbow clay Christmas trees, clay wreath ornaments, and tiny cookie plate scenes all fit an afternoon and a small budget.
How long do air-dry clay ornaments take to dry?
Flat pieces stay true on a wire rack for a full day, sometimes two if the air is humid. Humid weather can push the time toward the longer end.
Can I use regular acrylic paint on air-dry clay Christmas crafts?
Yes. Paint goes on after the clay has dried all the way through; a thin coat of white primer underneath keeps the color from soaking in unevenly.
Multiple thin layers give even coverage, and a clear varnish over the top protects the color and adds shine if you want it.